Dashed Lines - Freeform Style - PS
I keep seeing questions about dashed lines (and dotted ones) and usually this tutorial or others like it using the pen tool are referenced. This is a great way to do precise dashes but there's another way if you like to freestyle it or are in a hurry. This was done using PS CS2 but it works for other versions of PS. I don't use PSP so I don't know if it can translate.
Step 1: Select the Hard Square 5 pixels. You can use various sizes, I just chose 5 pixels to make it big enough to see clearly. [You can also use the round hard brush, but it makes the dashes a bit more fuzzy. See Step 2 for more specifics on using the round brush.]
Step 1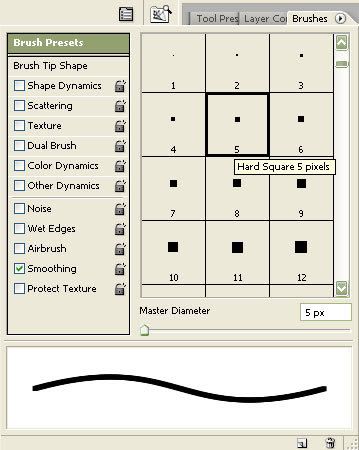
Step 2: Click on "Brush Tip Shape" and make the following changes: Change the "Roundness" to 20% (or other percentages depending on the look you want as shown below) and change the "Spacing" to 200% (or higher depending on the spacing you like between your dashes). [If you use the round brush instead of square, you should set the "Roundness" between 0% and 5%. But using the round brush limits you on the variety of looks you can achieve.]
Step 2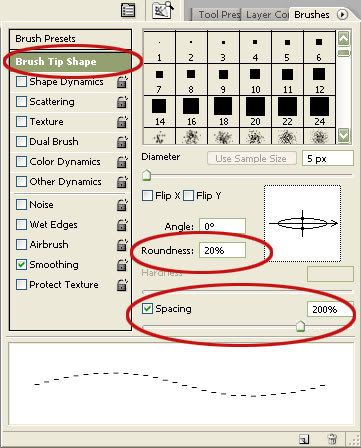
Step 3: Click on "Shape Dynamics" and change the "Angle Jitter" Control setting to Direction.
Step 3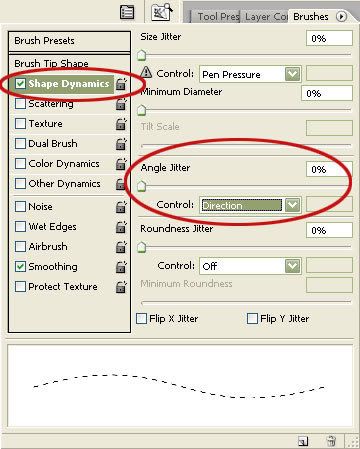
------------------------------------
That's it! Now you can just draw dashed lines to your heart's content. Below I show you that by changing the "Roundness" setting (Step 2), you can get various thicknesses from faint to bold.
For dotted lines, use a round brush and do not adjust the "Roundness" setting unless you want an oval shape instead of round.
------------------------------------
Roundness at 20%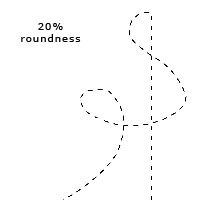
Roundness at 30%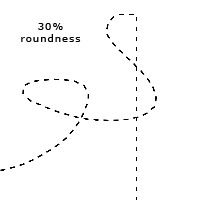
Roundness at 35%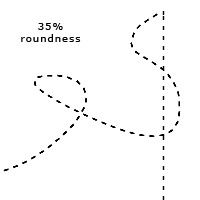
Roundness at 40%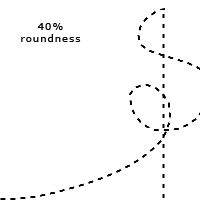
Step 1: Select the Hard Square 5 pixels. You can use various sizes, I just chose 5 pixels to make it big enough to see clearly. [You can also use the round hard brush, but it makes the dashes a bit more fuzzy. See Step 2 for more specifics on using the round brush.]
Step 1

Step 2: Click on "Brush Tip Shape" and make the following changes: Change the "Roundness" to 20% (or other percentages depending on the look you want as shown below) and change the "Spacing" to 200% (or higher depending on the spacing you like between your dashes). [If you use the round brush instead of square, you should set the "Roundness" between 0% and 5%. But using the round brush limits you on the variety of looks you can achieve.]
Step 2

Step 3: Click on "Shape Dynamics" and change the "Angle Jitter" Control setting to Direction.
Step 3

------------------------------------
That's it! Now you can just draw dashed lines to your heart's content. Below I show you that by changing the "Roundness" setting (Step 2), you can get various thicknesses from faint to bold.
For dotted lines, use a round brush and do not adjust the "Roundness" setting unless you want an oval shape instead of round.
------------------------------------
Roundness at 20%

Roundness at 30%

Roundness at 35%

Roundness at 40%
