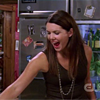
PS7 Tutorial: Lorelai goes HA!
Going from 
to
These are some simple steps, very simple and only involves just a hue/sat layer. :D
Step 1: Build your base
Take the cap of your choice, any will due, just make sure that it's not too bright already. DO NOT CROP.
Step 2: Screen it
Duplicate your base and Screen it twice. Depending on your base though, you may want to screen it again or just one time.

Step 3: Add the Saturation Layer in.
Go to LAYER - NEW ADJUSTMENT LAYER - HUE/SATURATION
Up your Saturation to 30

Step 4: Add some color!
I'm going to combine all the colors into one step so it's easier to navigate.
COLOR BURN - #6FEAF9

SOFT LIGHT - #A7EEF7 @ 50%

COLOR BURN - #F4A4A4 @ 70%

SOFT LIGHT - #F8E7BD

That ends our color layers.
Step Five: Add in a brush, if wanted.
I choose an old ragged texture for mine actually, and erased where I wanted and sharpened the edges. This is the result I got:

Step Six: Add text, if wanted.
I wanted the text to match her expression, so in Action Jackson, I wrote HA! and made it disappear into the brush.

And viola - Lorelai goes HA!
Other icons with the same process:


Any questions, please ask. Enjoy!

to

These are some simple steps, very simple and only involves just a hue/sat layer. :D
Step 1: Build your base
Take the cap of your choice, any will due, just make sure that it's not too bright already. DO NOT CROP.
Step 2: Screen it
Duplicate your base and Screen it twice. Depending on your base though, you may want to screen it again or just one time.

Step 3: Add the Saturation Layer in.
Go to LAYER - NEW ADJUSTMENT LAYER - HUE/SATURATION
Up your Saturation to 30

Step 4: Add some color!
I'm going to combine all the colors into one step so it's easier to navigate.
COLOR BURN - #6FEAF9

SOFT LIGHT - #A7EEF7 @ 50%

COLOR BURN - #F4A4A4 @ 70%

SOFT LIGHT - #F8E7BD

That ends our color layers.
Step Five: Add in a brush, if wanted.
I choose an old ragged texture for mine actually, and erased where I wanted and sharpened the edges. This is the result I got:

Step Six: Add text, if wanted.
I wanted the text to match her expression, so in Action Jackson, I wrote HA! and made it disappear into the brush.

And viola - Lorelai goes HA!
Other icons with the same process:
Any questions, please ask. Enjoy!