Dolling Tutorial
We are making this doll.
PSP7 // maybe translatable

Don't follow tutorial exactly, use different colors, patterns, clothing types, bases, etc.
This is just a guide.
To find other bases Here are links to base sites.
http://ppkh.davidsonlinegallery.com/
http://www.shouri.com.ar/
http://ilck.neonsparkle.net/
http://www.yumestudio.it/angychan/dolls/
http://wayuki.nl
http://libby.buggative.net/
http://www.pinkland.net
http://www.melissadollies.com/
1. I will be using a Base from AngyChan.

2. Now you need to delete Angy-Chan's tag off of it.
Increase you color dept to 16 million colors.
Then Increase your canvas to the size 200x200
4. Prepping your base.
This is where you change the skin color, eye color, make up, and etc to your liking.
If the base is already there then you don't need to change it.
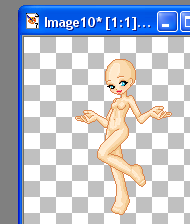
5. Add a new raster layer.
Using the paintbrush tool, on the round shape. Size 1, Hardness 100, Opacity 100, Step 25, and Density 100.
Pick a dark navy color, I used #0B204F.
Now outline where you what the pants to be.
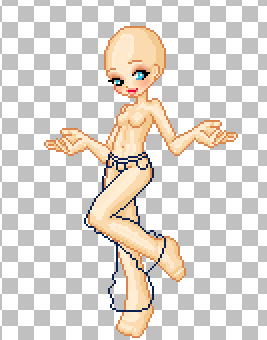
6. Pick a dullish, light aqua blue color and fill in the pants with it.
I used this color #91ACB7.
7. Now I use Eye Candy - HSB Noise.
At the settings Hue Variations- 37, Saturation Variation- 26, Brightness Variation- 15, Opacity Variation - 0, Lump Width (pixel)- 1, Lump height (pixel)- 1, Random Seed - 100.
If you don't have Eye Candy then you will have to use regular noise.
Open up Noise and use these settings.
Nosie- 15, and put it on Uniform.
8. Use your retouch tool > darken rgb with these settings.
Size- 2, Hardness- 0, Opacity- 10, Step- 25, Density- 100.
Then go in and build ceases at area's you think that it;s needed.
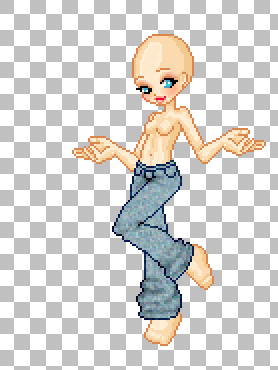
9. The go in and shade the pockets , fly, and waistband.
10. Then increase the size of the brush to 6 and the opacity to 25, and then go around the edges, crease, etc and shade all that.
11. Then switch to lighten rgb and lighten the inside of the jeans, then switch to size 2, and go around the creases and light that.
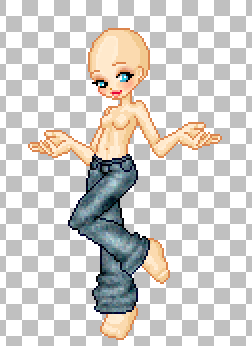
12. Now we are going to go back to using the paintbrush tool to make the belt.
I'm using the color white, go in and draw a line along the inside of the waistband then use a different color to make the buckle. I used the color #CEAF5C, the waist can be in shape, and it can be colored in if you like.

13. Add a new raster we will be making the shirt now.
I'm using the color #396D2D, and now outline the shirt.
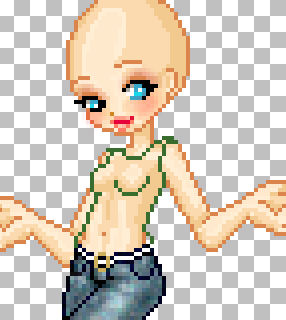
14. Now fill in the shirt with a lighter color, I'm using this color #8BCF79.
15. Using the retouch tool > Darken RGB on these settings
Size- 1, Hardness- 0, Opacity- 10, Step- 25, Density- 100.
Now put creases in the shirt.

16. Increase the brush size to 4, and the opacity to 20.
Now add the shading around the shirt and creases.
17. Now switch to lighten rgb and lighten the inside of the shirt.
18. Now decrease the brush size to 1 and lighten the inside of the creases.
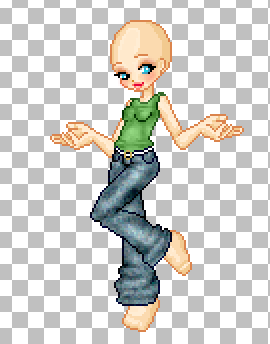
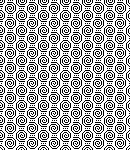
19. Now paste the this pattern (or your own) as a new raster layer over the shirt. Then erase all the extra.
Place it on burn at 30%.
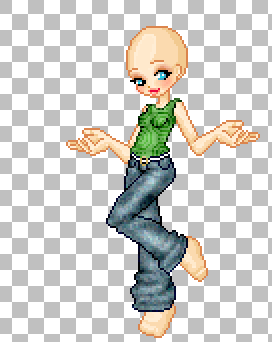
20. Add a new raster layer.
Draw on sleeves using a color on the shirt. I use this color #2C6020
Then fill in with a lighter color I used this color #91C583
21. Use the Retouch Tool > Darken RGB with Size 3, Opacity 20, then shade the sleeve abit. Then lower the opacity of the layer to 50.
22. Add anew raster layer
Draw out the shoe, I used black. Then fill it in with a lighter color I used dark gray.
Because I made the shoes smaller than the feet, I had to go erase the parts of the feet that were still showing.
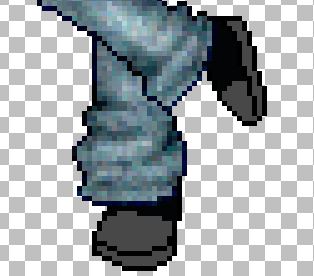
23. Using the retouch tool > Darken RGB on size 4 and opacity on 20, and shaded around the edges of the shoes.
Then I switched to lighten RGB and lighten the inside of the shoes.

24. Then I used a light gray for the laces.
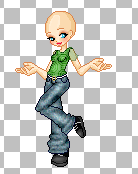
25.Add a new raster layer.
Choose a color I choose this color #956601 (This is the darkest color)
Draw out the hair how you want.
26.Add the next lightest color, then when shading go down the strands, do this with the next 4 colors. Each lighter than other.
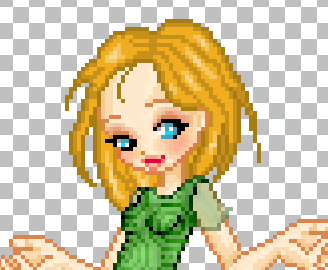
27. Duplicate the hair. Select (marching ants) the hair and glassian blur it at depending on the hair .05-1.00 no more or less.
I did mine at 1.00.
28. Use the retouch tool > Darken RGB at size- 6 and the opacity- 20 and darken the strand and edge of the hair.
29. Increase the brush size to 12, and stoke across the hair. Do the same thing at a different place with the dodge tool but
with the opacity at 3.
30. Copy doll and place it on a white canvas as a new selection.
Selection > Modify > Expand, number of pixels- 1
31. Save as a tranparent Gif (or a png)
Don't save as a jpeg that eats the doll.

Then there you go! If you need help ask. Post your results. :)
PSP7 // maybe translatable

Don't follow tutorial exactly, use different colors, patterns, clothing types, bases, etc.
This is just a guide.
To find other bases Here are links to base sites.
http://ppkh.davidsonlinegallery.com/
http://www.shouri.com.ar/
http://ilck.neonsparkle.net/
http://www.yumestudio.it/angychan/dolls/
http://wayuki.nl
http://libby.buggative.net/
http://www.pinkland.net
http://www.melissadollies.com/
1. I will be using a Base from AngyChan.

2. Now you need to delete Angy-Chan's tag off of it.
Increase you color dept to 16 million colors.
Then Increase your canvas to the size 200x200
4. Prepping your base.
This is where you change the skin color, eye color, make up, and etc to your liking.
If the base is already there then you don't need to change it.

5. Add a new raster layer.
Using the paintbrush tool, on the round shape. Size 1, Hardness 100, Opacity 100, Step 25, and Density 100.
Pick a dark navy color, I used #0B204F.
Now outline where you what the pants to be.

6. Pick a dullish, light aqua blue color and fill in the pants with it.
I used this color #91ACB7.
7. Now I use Eye Candy - HSB Noise.
At the settings Hue Variations- 37, Saturation Variation- 26, Brightness Variation- 15, Opacity Variation - 0, Lump Width (pixel)- 1, Lump height (pixel)- 1, Random Seed - 100.
If you don't have Eye Candy then you will have to use regular noise.
Open up Noise and use these settings.
Nosie- 15, and put it on Uniform.
8. Use your retouch tool > darken rgb with these settings.
Size- 2, Hardness- 0, Opacity- 10, Step- 25, Density- 100.
Then go in and build ceases at area's you think that it;s needed.

9. The go in and shade the pockets , fly, and waistband.
10. Then increase the size of the brush to 6 and the opacity to 25, and then go around the edges, crease, etc and shade all that.
11. Then switch to lighten rgb and lighten the inside of the jeans, then switch to size 2, and go around the creases and light that.

12. Now we are going to go back to using the paintbrush tool to make the belt.
I'm using the color white, go in and draw a line along the inside of the waistband then use a different color to make the buckle. I used the color #CEAF5C, the waist can be in shape, and it can be colored in if you like.

13. Add a new raster we will be making the shirt now.
I'm using the color #396D2D, and now outline the shirt.

14. Now fill in the shirt with a lighter color, I'm using this color #8BCF79.
15. Using the retouch tool > Darken RGB on these settings
Size- 1, Hardness- 0, Opacity- 10, Step- 25, Density- 100.
Now put creases in the shirt.

16. Increase the brush size to 4, and the opacity to 20.
Now add the shading around the shirt and creases.
17. Now switch to lighten rgb and lighten the inside of the shirt.
18. Now decrease the brush size to 1 and lighten the inside of the creases.

19. Now paste the this pattern (or your own) as a new raster layer over the shirt. Then erase all the extra.
Place it on burn at 30%.


20. Add a new raster layer.
Draw on sleeves using a color on the shirt. I use this color #2C6020
Then fill in with a lighter color I used this color #91C583
21. Use the Retouch Tool > Darken RGB with Size 3, Opacity 20, then shade the sleeve abit. Then lower the opacity of the layer to 50.
22. Add anew raster layer
Draw out the shoe, I used black. Then fill it in with a lighter color I used dark gray.
Because I made the shoes smaller than the feet, I had to go erase the parts of the feet that were still showing.

23. Using the retouch tool > Darken RGB on size 4 and opacity on 20, and shaded around the edges of the shoes.
Then I switched to lighten RGB and lighten the inside of the shoes.

24. Then I used a light gray for the laces.

25.Add a new raster layer.
Choose a color I choose this color #956601 (This is the darkest color)
Draw out the hair how you want.
26.Add the next lightest color, then when shading go down the strands, do this with the next 4 colors. Each lighter than other.

27. Duplicate the hair. Select (marching ants) the hair and glassian blur it at depending on the hair .05-1.00 no more or less.
I did mine at 1.00.
28. Use the retouch tool > Darken RGB at size- 6 and the opacity- 20 and darken the strand and edge of the hair.
29. Increase the brush size to 12, and stoke across the hair. Do the same thing at a different place with the dodge tool but
with the opacity at 3.
30. Copy doll and place it on a white canvas as a new selection.
Selection > Modify > Expand, number of pixels- 1
31. Save as a tranparent Gif (or a png)
Don't save as a jpeg that eats the doll.

Then there you go! If you need help ask. Post your results. :)