Icon-Tutorial #2 feat. Jared Leto
I have to divert my mind... so here my second tutorial. Hope you like it!
We go from:
to:
Using Photoshop 7 and I guess it's translatable.
1. Prepair your base. (Sharpen, blur, whatever you like... ^^) I choose a picture of Jared Leto this time.
2. Use the "Marquee Tool" (M) to mark the part of the picture you like the most and make a new layer via copy. Put the new layer to the left side and set it to overlay (or change the opacity or don't do anything with it *lol*. The overlay doesn't fit with every picture).
3. Duplicate the new layer, desaturate it and set it to Soft Light@100%.
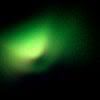
4. Then use this texture:

(I don't know where I've found this. If anyone knows, let me know, please!)
5. Set it to Screen@100% and change the Color Balance until the texture fits with your picture.
6. Then duplicate the base layer and put it on the top at Screen@100%.
7. Add a new layer and fill it with #003562. This one is set to Soft Light@100%.
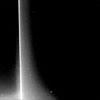
8. I thought it looked weird so I've used this texture:

(And again I don't know where I've found it. Sry! Help would be nice!)
9. Set it to Screen@100% and watch out that it fits with the cut-layer. Use the eraser if you need.
10. Add some text if you like and set the opacity to 70%.
11. And that's it! ^^
I hope it can be helpful for some reason.
I'd love to see your results! ^^
We go from:

to:

Using Photoshop 7 and I guess it's translatable.
1. Prepair your base. (Sharpen, blur, whatever you like... ^^) I choose a picture of Jared Leto this time.
2. Use the "Marquee Tool" (M) to mark the part of the picture you like the most and make a new layer via copy. Put the new layer to the left side and set it to overlay (or change the opacity or don't do anything with it *lol*. The overlay doesn't fit with every picture).
3. Duplicate the new layer, desaturate it and set it to Soft Light@100%.
4. Then use this texture:

(I don't know where I've found this. If anyone knows, let me know, please!)
5. Set it to Screen@100% and change the Color Balance until the texture fits with your picture.
6. Then duplicate the base layer and put it on the top at Screen@100%.
7. Add a new layer and fill it with #003562. This one is set to Soft Light@100%.
8. I thought it looked weird so I've used this texture:

(And again I don't know where I've found it. Sry! Help would be nice!)
9. Set it to Screen@100% and watch out that it fits with the cut-layer. Use the eraser if you need.
10. Add some text if you like and set the opacity to 70%.
11. And that's it! ^^
I hope it can be helpful for some reason.
I'd love to see your results! ^^