TUTORIAL 2, PSPX.
My second tutorial, under the cut. Made with Paint Shop Pro X. Easily translatable, I'm hoping.
Going from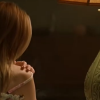
to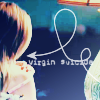
.
All right, this is my SECOND tutorial, and I'm still learning the basics of making these.
If there are any errors, or something that doesn't work out correctly, please comment me and I'll try my hardest to fix it.
Or, if you need any help finding something. ALSO, I WOULD LOVE TO SEE WHAT YOU MADE!! : D!
Okay.
So, I'm starting with a cap I took myself from the movie. Which is amazing by the way, go see it if you haven't.
And this is my crop.
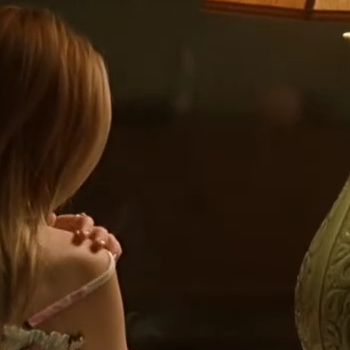
Large, D:, I know.
So, prepare this for the actual editing. Any blurring you might want to do, anything, do it now. I didn't, I left it just as it is.
STEP ONE// Resizing your base is your own preference, however large you want your image to be, is up to you. For the sake of space, I'll resize mine.
Now, the first thing I did was Adjust>Color>Fade Correction settings at 45% and Adjust>Smart Photo Fix. The settings for this is entirely based upon the image you use.
The image now looks like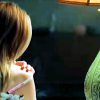
.
STEP TWO// Duplicate this base into three new layers. Set the first to Screen at 100% opacity, and the second to Soft Light at 100% opacity.
The image now looks like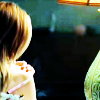
.
STEP THREE// Add this layer
and set it to multiply.
Add this layer
and set it to Burn at 60%.
Add this layer
and set it to Overlay at 60%.
Add this layer
and set it to Color (L) at 25%.
And now the image looks like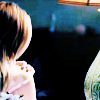
.
STEP FOUR// Add a new Hue/Saturation/Lightness adjustment layer. The only setting I changed was Saturation, which I raised to 23. This will vary depending on your image, along with almost all the other steps. Now the image looks like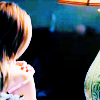
.
STEP FIVE// Add this layer
and set it to darken at 25% opacity.
Add this layer
and set it to Exclusion at 70% opacity.
Now the image looks like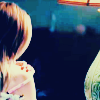
.
STEP SIX// Add this gradient
and set it to soft light, I also duplicated this layer twice to make more of a difference in the image.
[NOTE: This image probably will NOT WORK if you use it. It is a PSP PRESET. You can also MAKE it by opening a new TRANSPARENT 100x100 image, painting a line of white at the bottom and hitting gausian blur. D:, sorry for the inconvienience.]
My image now looks like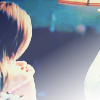
.
FINAL STEP// I used the line tool with these presets

, and drew a swirly line.
Then, I used the text tool with Cholo Sperry Rand R20 at 14 pixels to write Virgin Suicides.
This finishes my super easy tutorial, giving you this image.
.
Hope this was nice and helpful. [=
Going from

to

.
All right, this is my SECOND tutorial, and I'm still learning the basics of making these.
If there are any errors, or something that doesn't work out correctly, please comment me and I'll try my hardest to fix it.
Or, if you need any help finding something. ALSO, I WOULD LOVE TO SEE WHAT YOU MADE!! : D!
Okay.
So, I'm starting with a cap I took myself from the movie. Which is amazing by the way, go see it if you haven't.
And this is my crop.

Large, D:, I know.
So, prepare this for the actual editing. Any blurring you might want to do, anything, do it now. I didn't, I left it just as it is.
STEP ONE// Resizing your base is your own preference, however large you want your image to be, is up to you. For the sake of space, I'll resize mine.
Now, the first thing I did was Adjust>Color>Fade Correction settings at 45% and Adjust>Smart Photo Fix. The settings for this is entirely based upon the image you use.
The image now looks like

.
STEP TWO// Duplicate this base into three new layers. Set the first to Screen at 100% opacity, and the second to Soft Light at 100% opacity.
The image now looks like

.
STEP THREE// Add this layer

and set it to multiply.
Add this layer

and set it to Burn at 60%.
Add this layer

and set it to Overlay at 60%.
Add this layer

and set it to Color (L) at 25%.
And now the image looks like

.
STEP FOUR// Add a new Hue/Saturation/Lightness adjustment layer. The only setting I changed was Saturation, which I raised to 23. This will vary depending on your image, along with almost all the other steps. Now the image looks like

.
STEP FIVE// Add this layer

and set it to darken at 25% opacity.
Add this layer

and set it to Exclusion at 70% opacity.
Now the image looks like

.
STEP SIX// Add this gradient

and set it to soft light, I also duplicated this layer twice to make more of a difference in the image.
[NOTE: This image probably will NOT WORK if you use it. It is a PSP PRESET. You can also MAKE it by opening a new TRANSPARENT 100x100 image, painting a line of white at the bottom and hitting gausian blur. D:, sorry for the inconvienience.]
My image now looks like

.
FINAL STEP// I used the line tool with these presets

, and drew a swirly line.
Then, I used the text tool with Cholo Sperry Rand R20 at 14 pixels to write Virgin Suicides.
This finishes my super easy tutorial, giving you this image.

.
Hope this was nice and helpful. [=