Bright Green Coloring tutorial - Selective Coloring
From 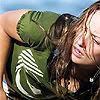
to
in PS7
Today will be a picture of this girl from the movie 'Turistas'. I have no clue what her name is. But she's hot. So I'm using her. xD
Crop, sharpen, etc. to get your base.
Next, duplicate your base and set to screen. The opacity depends on your base. I used 75%
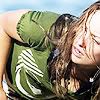
Next, an exclusion layer. Use a very dark blue/almost black color. I used #000032 and set it to around 60-70%. Whichever you feel. I went with 65%

Now for a hue/Saturation layer:
Master: 0, 30, 0
Red: 0, 10, 0
Yellows: 0, 10, 0
Cyans: 0, 20, 0
Blues: 0, 25, 0
Magentas: 0, 45, 0
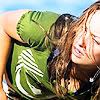
And now where the green comes in.
Open a new Selective Coloring layer:
Greens
C: 25
Y: 20
Neutrals
C: 25
Y: 19

And you're done! ^__^ Show me what ya'll got.
to
in PS7
Today will be a picture of this girl from the movie 'Turistas'. I have no clue what her name is. But she's hot. So I'm using her. xD
Crop, sharpen, etc. to get your base.
Next, duplicate your base and set to screen. The opacity depends on your base. I used 75%
Next, an exclusion layer. Use a very dark blue/almost black color. I used #000032 and set it to around 60-70%. Whichever you feel. I went with 65%
Now for a hue/Saturation layer:
Master: 0, 30, 0
Red: 0, 10, 0
Yellows: 0, 10, 0
Cyans: 0, 20, 0
Blues: 0, 25, 0
Magentas: 0, 45, 0
And now where the green comes in.
Open a new Selective Coloring layer:
Greens
C: 25
Y: 20
Neutrals
C: 25
Y: 19
And you're done! ^__^ Show me what ya'll got.