Tutorial 2: Blue Exclusion Coloring (Minus Exclusion)
I did not mean to post a tutorial today, but when I was making an icon for my website, I inadvertently found a very interesting way to get a coloring effect similar to that of a dark blue exclusion layer, but without the exclusion. So I decided to post it, as it could be very handy. I guess you could say this is a follow-up tutorial I posted a while back to get exclusion coloring, only that used the exclusioning.
Very simple. Done in PS7, but if it's not translatable, I'll smack myself in the head.

1.) Open your base. Prep it however you want. I sharpened mine, but you don't have to.

2.)Duplicate your base layer (Layer>Duplicate Layer). Drag it to the top. Set it to Soft Light, 100% Opacity and Desaturate it. (Image>Adjustments>Desaturate)

3.) Create a new layer. Fill this with #131313, and set it to Color Burn, 20% Opacity.

4.) Duplicate your base layer again (Layer>Duplicate Layer) and drag it to the top. Desaturate it (Image>Adjustments>Desaturate) and set it to Screen, 50%.

And you're done.
Compare to this, which uses a dark blue exclusion layer:
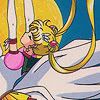
Which I got on a seperate image of the same base. The only thing I did was fill a new layer with #0A1B29 and set that layer to Exclusion, 100%.
The effect is pretty close (I think the coloring I got not using exclusion is even better), and you don't get an ugly yellow in some spots.
Tell me what you think!
Credits
Image: Serapii-Kisu.
Imageshack needs to die. It went BOOM halfway through me typing up my tutorial and uploading images, so I had to go to Photobucket. >.<
Very simple. Done in PS7, but if it's not translatable, I'll smack myself in the head.

1.) Open your base. Prep it however you want. I sharpened mine, but you don't have to.

2.)Duplicate your base layer (Layer>Duplicate Layer). Drag it to the top. Set it to Soft Light, 100% Opacity and Desaturate it. (Image>Adjustments>Desaturate)

3.) Create a new layer. Fill this with #131313, and set it to Color Burn, 20% Opacity.

4.) Duplicate your base layer again (Layer>Duplicate Layer) and drag it to the top. Desaturate it (Image>Adjustments>Desaturate) and set it to Screen, 50%.

And you're done.
Compare to this, which uses a dark blue exclusion layer:

Which I got on a seperate image of the same base. The only thing I did was fill a new layer with #0A1B29 and set that layer to Exclusion, 100%.
The effect is pretty close (I think the coloring I got not using exclusion is even better), and you don't get an ugly yellow in some spots.
Tell me what you think!
Credits
Image: Serapii-Kisu.
Imageshack needs to die. It went BOOM halfway through me typing up my tutorial and uploading images, so I had to go to Photobucket. >.<