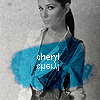
my first tutorial. =]
get this: 
to this:
okay, well its basically more or less another tut that i used, which i don't remember who by.. if you know or its you, then please tell me so i can credit. Untill the greyscale, its my own.
001. open a blank 100x100 canvas and colour it with #B3C1D0.
002. paste your image with the setting on multiply.
003. new hue/saturation layer and put these settings in: H: 0 S: 47 L: 0 and set it on screen.
004. new fill layer with #FBF803 and set it on soft light.
005. new selective colour layer, and put these settings in: REDS, C: -100 M: 0 Y: 100 B:100 YELLOWS, C: -24 M: 0 Y: -21 B: 0 MAGENTAS, C: -100 M: -100 Y: -100 B: 0 NEUTRALS, C:68 M:-19 Y:-80 B:0
006. new selective colour layer, and put these settings in: WHITES, C: -22 M: 48 Y: -12 B: 71
007. another new selective colour layer, and with these settings: REDS, C: -75 M: 21 Y: 44 B: 33 YELLOWS, C: -18 M: 55 Y: 32 B: 31 CYANS, B: 49 BLUES, B: 29 MAGENTAS, C: 71 M: -37 Y: 0 B: 100 NEUTRALS, C: 21 M: -11 Y: -12 B: 0
008. yet again, another selective colour layer: CYANS, C: 45 M: 0 Y: 0 B: 100 NEUTRALS, B: 15 BLACKS, B: 40
009. new brightness/contrast layer: B: -4 C: 9
010. new colour balance layer: MIDTONES, C-R: 22 M-G: -13 Y-B: -15 SHADOWS, C-R: 27 M-G: -9 Y-B: -8
011. merge layers and desturate image.
012. add a texture on, i added one by
peoplemachines
013. add colours set to multiply, and add text.
and your done =]
note: step 001-010 is by someone else, the other three i made up. please change settings so it will match your image.
i would like to see what you came out with.
xx
tutorial posted at:
barbies_bitch
icon_tutorial

to this:

okay, well its basically more or less another tut that i used, which i don't remember who by.. if you know or its you, then please tell me so i can credit. Untill the greyscale, its my own.
001. open a blank 100x100 canvas and colour it with #B3C1D0.
002. paste your image with the setting on multiply.
003. new hue/saturation layer and put these settings in: H: 0 S: 47 L: 0 and set it on screen.
004. new fill layer with #FBF803 and set it on soft light.
005. new selective colour layer, and put these settings in: REDS, C: -100 M: 0 Y: 100 B:100 YELLOWS, C: -24 M: 0 Y: -21 B: 0 MAGENTAS, C: -100 M: -100 Y: -100 B: 0 NEUTRALS, C:68 M:-19 Y:-80 B:0
006. new selective colour layer, and put these settings in: WHITES, C: -22 M: 48 Y: -12 B: 71
007. another new selective colour layer, and with these settings: REDS, C: -75 M: 21 Y: 44 B: 33 YELLOWS, C: -18 M: 55 Y: 32 B: 31 CYANS, B: 49 BLUES, B: 29 MAGENTAS, C: 71 M: -37 Y: 0 B: 100 NEUTRALS, C: 21 M: -11 Y: -12 B: 0
008. yet again, another selective colour layer: CYANS, C: 45 M: 0 Y: 0 B: 100 NEUTRALS, B: 15 BLACKS, B: 40
009. new brightness/contrast layer: B: -4 C: 9
010. new colour balance layer: MIDTONES, C-R: 22 M-G: -13 Y-B: -15 SHADOWS, C-R: 27 M-G: -9 Y-B: -8
011. merge layers and desturate image.
012. add a texture on, i added one by
peoplemachines
013. add colours set to multiply, and add text.
and your done =]
note: step 001-010 is by someone else, the other three i made up. please change settings so it will match your image.
i would like to see what you came out with.
xx
tutorial posted at:
barbies_bitch
icon_tutorial