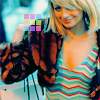
Tutorial 007: Nicole Richie
go from 
to
made on PS CS with selective colouring, saturations, and colour layers and is not translatable.
1] Crop, sharpen, and do whatever steps you usually take to prep your base icon.
2] Create a new layer and flood fill with #ACD6F3. Set to soft light at 100%.
3] Create a selective colouring layer and set to the following:
RED
c: -48
m: 17
y: 52
b: 7
YELLOW
c: -14
m: -34
y: 2
b: 29
CYAN
c: -48
m: 17
y: 34
b: 27
WHITE
c: 19
m: 14
y: 35
b: 21
NEUTRALS
c: 43
m: -7
y: -22
b: -3
BLACK
c: 0
m: 0
y: 0
b: 18
4] Create a Hue/ Saturation layer and set to the following:
MASTER
hue: 0
saturation: 23
lightness: 0
YELLOW
hue: -6
saturation: 3
lightness: 7
GREEN
hue: 0
saturation: -15
lightness: 17
CYAN
hue: 0
saturation: 26
lightness: 13
5] Create a new layer and flood fill with #F7B9D6. Set to soft light at 71%.
6] Create a new layer and flood fill with #C2DAEB. Set to colour burn at 100%.
7] Create a selective colouring layer and set to the following:
RED
c: -32
m: -14
y: 4
b: 13
YELLOW
c: 35
m: -13
y: 7
b: -18
CYAN
c: 19
m: 30
y: 60
b: 12
MAGENTA
c: -37
m: -38
y: 25
b: 59
NEUTRALS
c: 9
m: 6
y: -15
b: -1
BLACK
c: 17
m: 15
y: -5
b: 10
8] Create a Hue/ Saturation layer and set to the following:
MASTER
hue: 0
saturation: 20
lightness: 0
9] Create a new layer and flood fill with #030D14. Set to exclusion at 100%.
10] Create a selective colouring layer and set to the following:
RED
c: -35
m: 16
y: 18
b: 15
YELLOW
c: 0
m: 39
y: 0
b: 0
CYAN
c: -29
m: -28
y: 20
b: 19
NEUTRALS
c: 19
m: 0
y: 24
b: -10
BLACK
c: 0
m: 0
y: 0
b: 14
11] Add your brushes, text, etc. I used both white and black background box shapes by sheld0n.
Merge all your layers and you're done. :]

to

made on PS CS with selective colouring, saturations, and colour layers and is not translatable.
1] Crop, sharpen, and do whatever steps you usually take to prep your base icon.
2] Create a new layer and flood fill with #ACD6F3. Set to soft light at 100%.
3] Create a selective colouring layer and set to the following:
RED
c: -48
m: 17
y: 52
b: 7
YELLOW
c: -14
m: -34
y: 2
b: 29
CYAN
c: -48
m: 17
y: 34
b: 27
WHITE
c: 19
m: 14
y: 35
b: 21
NEUTRALS
c: 43
m: -7
y: -22
b: -3
BLACK
c: 0
m: 0
y: 0
b: 18
4] Create a Hue/ Saturation layer and set to the following:
MASTER
hue: 0
saturation: 23
lightness: 0
YELLOW
hue: -6
saturation: 3
lightness: 7
GREEN
hue: 0
saturation: -15
lightness: 17
CYAN
hue: 0
saturation: 26
lightness: 13
5] Create a new layer and flood fill with #F7B9D6. Set to soft light at 71%.
6] Create a new layer and flood fill with #C2DAEB. Set to colour burn at 100%.
7] Create a selective colouring layer and set to the following:
RED
c: -32
m: -14
y: 4
b: 13
YELLOW
c: 35
m: -13
y: 7
b: -18
CYAN
c: 19
m: 30
y: 60
b: 12
MAGENTA
c: -37
m: -38
y: 25
b: 59
NEUTRALS
c: 9
m: 6
y: -15
b: -1
BLACK
c: 17
m: 15
y: -5
b: 10
8] Create a Hue/ Saturation layer and set to the following:
MASTER
hue: 0
saturation: 20
lightness: 0
9] Create a new layer and flood fill with #030D14. Set to exclusion at 100%.
10] Create a selective colouring layer and set to the following:
RED
c: -35
m: 16
y: 18
b: 15
YELLOW
c: 0
m: 39
y: 0
b: 0
CYAN
c: -29
m: -28
y: 20
b: 19
NEUTRALS
c: 19
m: 0
y: 24
b: -10
BLACK
c: 0
m: 0
y: 0
b: 14
11] Add your brushes, text, etc. I used both white and black background box shapes by sheld0n.
Merge all your layers and you're done. :]