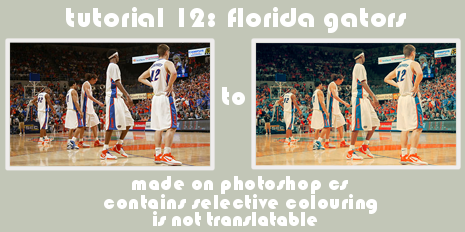
(no subject)

1] Prep your base however you usually would. Since the base I used was of pretty decent quality all I did was use the sharpen tool in a few spots.
2] Create a new layer and flood fill with #030216. Set to Exclusion at 100%.
3] Create a new layer and flood fill with #D3D881. Set to Soft Light at 100%.
4] Create a Selective Colouring layer and set to the following:
REDS
c: -100
m: 0
y: 0
b: 0
YELLOWS
c: -100
m: 16
y: 12
b: 26
CYANS
c: 0
m: 22
y: 20
b: 26
BLUES
c: 0
m: 0
y: 0
b: 44
WHITES
c: 0
m: 19
y: -26
b: 32
NEUTRALS
c: 22
m: 3
y: -13
b: -14
BLACKS
c: 0
m: 0
y: 0
b: 18
5] Create a Colour Balance layer and set to the following:
SHADOWS: -9, -7, 11
MIDTONES: -40, 2, -20
HIGHLIGHTS: -11, 8, -6
note: make sure that the preserve luminosity box is not checked.
6] Create a Selective Colouring layer and set to the following:
REDS
c: -21
m: 10
y: 16
b: 0
NEUTRALS
c: 0
m: -5
y: -8
b: 15
7] Create a Colour Balance layer and set to the following:
SHADOWS: -8, 6, 3
MIDTONES: -6, 13, 27
HIGHLIGHTS: 19, -11, 21
note: again, make sure that the preserve luminosity box is not checked.
8] Create a new layer and flood fill with #F6BD4F. Set to Multiply at 21%.
9] Add your text, brushes, ect and flatten.
edit :: Since someone asked for it, here is the psd in icon size for anyone who just wants that.
The final results:


