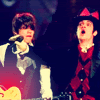
quick tutorial.
i was messing around in photoshop and i made an icon that looked pretty decent, so i decided to share the effect for your reference and mine. xD
go from
to
using photoshop elements 4.0 - definitely translatable for any program.
1. first, get your picture, obvs. i used this craig and ellie picture from degrassi.tv. I cropped mine and set it to screen at 100%. then, i merged the layers. x
2. open hue/saturation/lightness and set saturation to +50. x
3. make a new layer and fill it with #000546. set the layer to exclusion, opacity 100%. x
4. make another new layer and fill it with #c1ecf0. set it to color burn, 70% opacity. x
5. make a gradient layer thing. set the mode to 'radial' and set the color to red, or #F90000. Make sure it goes from red to transparent, not red to white. your opions should look like this. anyway, press okay, and simplify the layer and set it to screen, 100%. move it accordingly; i kept mine where it is, but usually i'm super picky on where i want my gradient to go. xD x
6. add text, brushes, etc. and you're all done! x
feel free to show me your results! :] i want to know how this tutorial went for people.
other icons done with this tutorial {all by me}:

go from

to

using photoshop elements 4.0 - definitely translatable for any program.
1. first, get your picture, obvs. i used this craig and ellie picture from degrassi.tv. I cropped mine and set it to screen at 100%. then, i merged the layers. x
2. open hue/saturation/lightness and set saturation to +50. x
3. make a new layer and fill it with #000546. set the layer to exclusion, opacity 100%. x
4. make another new layer and fill it with #c1ecf0. set it to color burn, 70% opacity. x
5. make a gradient layer thing. set the mode to 'radial' and set the color to red, or #F90000. Make sure it goes from red to transparent, not red to white. your opions should look like this. anyway, press okay, and simplify the layer and set it to screen, 100%. move it accordingly; i kept mine where it is, but usually i'm super picky on where i want my gradient to go. xD x
6. add text, brushes, etc. and you're all done! x
feel free to show me your results! :] i want to know how this tutorial went for people.
other icons done with this tutorial {all by me}:

