Gray and Grainy
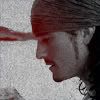
How to go from this:
To this:

or this:

Uses Photoshop CS2, might be translatable.
This is a very popular coloring technique lately, and is actually very easy to do.
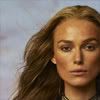
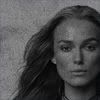
First, open your base. For this tutorial I'll be using a picture of Keira Knightley as Elizabeth Swann:
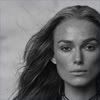
Go to Image > Adjustments > Desaturate:
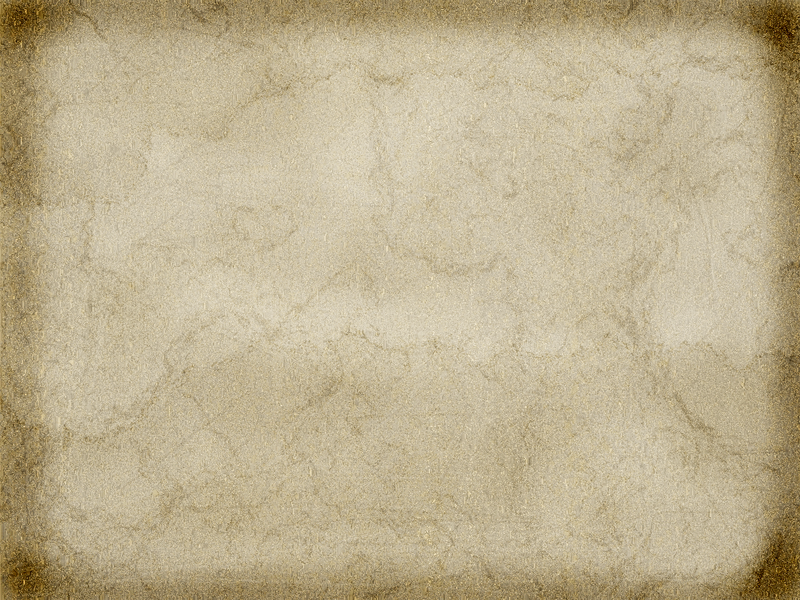
Open this texture, or one similar. I think this particular one was made by lilkittykat27. Desaturate the texture. This is important.
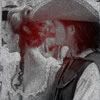
Past the entire texture onto your base. That way, you can move it around to your liking. Set the blending mode to Multiply:
It's still a little too dark to me, so I usually mess with the curves and levels. It's also a good idea to up the contrast with Images > Brightness/Contrast. It all really depends on your image. I messed with the curves and contrast and got this:
You can stop here, or keep going. I decided to add a little more color.
Select Gradients from the tools palette, and set the tool bar at the top to look something like this:

I set the foreground color to #750000, selected the foreground-to-transparent gradient, and selected Radial Gradient from the style options, as you can see above.
Make a new layer for the gradient, and click and hold down your cursor at any area of the image you wish. I put it at about the edge of her hair. Drag your cursor about as far as you want the gradient to go, then release it. Set the layer blending mode to Lighten.
And there you have it! I hope this tutorial was easy to follow.
Other icons I've made using this technique: