Pink-toned screencap tutorial
From 
to
. This was done in PSP X, but I'm sure it's usable in other graphics programs.
I started with a fairly reddish screencap, so you'll have to fiddle with some of these steps if your picture has a different tint.
To start with, select your picture and crop it as you wish.

Duplicate the base and sharpen it. I usually use the unsharp mask, fiddling with the settings for each picture. It seems to work better. Change the layer to soft light at 100%.

Create a new exclusion layer and fill it with #092b0a at 100%.

Make a new saturation layer and fill it with #fd4d2b at 100%.

Now make a new screen layer and fill it with #0a1134 at 100%.

Duplicate the screen layer you just made.

Copy the duplicated background layer you made in the second step (the one you sharpened) and drag it to the top, setting it to screen at 100%.

Duplicate the dark blue screen layer again and drag it to the top, setting it to saturation (legacy) at 100%.

Make a new lighten layer set at 51% and fill it with #c70203.

Duplicate the sharpened copy of the background again and desaturate it. Drag it to the top and set it to soft light at 100%.

Paste in this texture
by so_out_of_ideas, from the "pinkglow" texture set, and set it to soft light at 100%.

Take this mask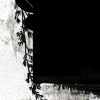
by absolutetrouble, from the "frou frou" set, mirror it, and paste it in. Set it to screen at 100%.

Take this texture
, also from so_out_of_ideas "pinkglow" set. Rotate it 180 degrees, and then paste it in at 100% soft light. This gives a hint of pink to the whiteness of the mask you just pasted in; if you want it just stark white, drag the mask to the top, above this layer.

Adding text is optional, but here's what I did for mine.
Create a new layer at 100% normal. Take this brush
by paranoid_writer's "pos_txt" set and stamp it in #b62f46. (I chose this colour by picking one of the darker pinks in the background using the dropper tool.) I then selected the brush and added a drop shadow using one of the paler pinks from the picture, also using the dropper tool to choose it.

And you're done!

Here's another icon I made with this technique, also from a reddish picture, but without the mask or text brush.
x-posted to theglassaslyum.

to

. This was done in PSP X, but I'm sure it's usable in other graphics programs.
I started with a fairly reddish screencap, so you'll have to fiddle with some of these steps if your picture has a different tint.
To start with, select your picture and crop it as you wish.

Duplicate the base and sharpen it. I usually use the unsharp mask, fiddling with the settings for each picture. It seems to work better. Change the layer to soft light at 100%.

Create a new exclusion layer and fill it with #092b0a at 100%.

Make a new saturation layer and fill it with #fd4d2b at 100%.

Now make a new screen layer and fill it with #0a1134 at 100%.

Duplicate the screen layer you just made.

Copy the duplicated background layer you made in the second step (the one you sharpened) and drag it to the top, setting it to screen at 100%.

Duplicate the dark blue screen layer again and drag it to the top, setting it to saturation (legacy) at 100%.

Make a new lighten layer set at 51% and fill it with #c70203.

Duplicate the sharpened copy of the background again and desaturate it. Drag it to the top and set it to soft light at 100%.

Paste in this texture
by so_out_of_ideas, from the "pinkglow" texture set, and set it to soft light at 100%.

Take this mask

by absolutetrouble, from the "frou frou" set, mirror it, and paste it in. Set it to screen at 100%.

Take this texture
, also from so_out_of_ideas "pinkglow" set. Rotate it 180 degrees, and then paste it in at 100% soft light. This gives a hint of pink to the whiteness of the mask you just pasted in; if you want it just stark white, drag the mask to the top, above this layer.

Adding text is optional, but here's what I did for mine.
Create a new layer at 100% normal. Take this brush

by paranoid_writer's "pos_txt" set and stamp it in #b62f46. (I chose this colour by picking one of the darker pinks in the background using the dropper tool.) I then selected the brush and added a drop shadow using one of the paler pinks from the picture, also using the dropper tool to choose it.

And you're done!

Here's another icon I made with this technique, also from a reddish picture, but without the mask or text brush.
x-posted to theglassaslyum.