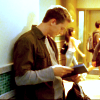
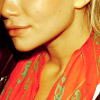
Tutorial

>

In PSP7
requested by xshoot2thrill
Yay, another tutorial! :)
So this time, we're going from

>

in 4 steps :)
STEPONE: Get a base. I got mine from a ryan hanson website! Awh.
So coz this image was sorta dark, duplicate the background and set it to Screen 37%.

>

You can sharpen or whatever. I tend not to, coz then it looks too plastic.
STEPTWO: Make a new Channel Mixer layer (OH THE LOVE)
For PSP: Layers > New Adjustment Layer > Channel Mixer
And set it to these settings:
Output RED: 119, -17, 0
Output Green: 0, 100, 0
Output Blue: -51, 51, 100

>

STEPTHREE: Make a new colour balance layer (OH MORE LOVE)
And set it to these settings:
Midtones: 45, 0, -39
Highlights: -36, 0, -18
Shadows: 30, 4, -17
With Preserve Luminosity checked (default)

>

Yeah, yeah. GREEN, I know.
STEPFOUR: It's a bit well, green, so make a new channel mixer layer and set it to these settings
Output RED: keep things the same
Output GREEN: Keep things the same
Output BLUE: 19, 0, 100

>

AND THASSIT!
Similar icons:


other tutorials @ famous_iicons