First ever tutorial! =o
My first tutorial ^_^ … Made with Photoshop 7
Going from this: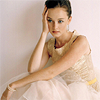
to this: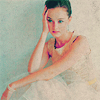
Duplicate layer. Screen 65%
New selective color.
REDS
C: -100
M: 0
Y: 92
B: 33
YELLOWS
C: -100
M: 0
Y: 19
B: 0
WHITES
C: 56
New Layer: F2DEAE on Multiply 60%
New layer: 1B1D25 on Exclusion 100% (or you can change the opacity to whatever suits your picture)
New layer: FFE5F9 Soft Light 20%
New selective color layer:
REDS
C: -100
M: 25
Y: -77
B: 30
YELLOWS
C: -100
M: 0
Y: 45
B: -24
NEUTRALS
C: 48
Y: -3
New curves layer
RBG:
1st point- I: 208 O: 213
2nd point- I: 159 O:161
3rd point- I: 100 O:97
4th point: I: 43 O: 38
RED
1st point- I: 214 O: 213
2nd point- I: 165 O: 108
3rd point- I: 77 O: 46
BLUE
1st point- I: 206 O: 203
2nd point- I: 149 O:150
3rd point- I: 91 O: 68
4th point: I: 35 O: 39
Add a grungy texture like this one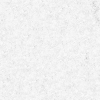
on Multiply
Voila ^_^
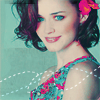
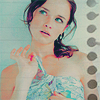
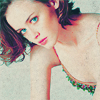
Other icons made with this colouring
Comments are greatly appriciated =]
Going from this:

to this:

Duplicate layer. Screen 65%
New selective color.
REDS
C: -100
M: 0
Y: 92
B: 33
YELLOWS
C: -100
M: 0
Y: 19
B: 0
WHITES
C: 56
New Layer: F2DEAE on Multiply 60%
New layer: 1B1D25 on Exclusion 100% (or you can change the opacity to whatever suits your picture)
New layer: FFE5F9 Soft Light 20%
New selective color layer:
REDS
C: -100
M: 25
Y: -77
B: 30
YELLOWS
C: -100
M: 0
Y: 45
B: -24
NEUTRALS
C: 48
Y: -3
New curves layer
RBG:
1st point- I: 208 O: 213
2nd point- I: 159 O:161
3rd point- I: 100 O:97
4th point: I: 43 O: 38
RED
1st point- I: 214 O: 213
2nd point- I: 165 O: 108
3rd point- I: 77 O: 46
BLUE
1st point- I: 206 O: 203
2nd point- I: 149 O:150
3rd point- I: 91 O: 68
4th point: I: 35 O: 39
Add a grungy texture like this one

on Multiply
Voila ^_^
Other icons made with this colouring


Comments are greatly appriciated =]