Omg another one.
Going from this: 
to this: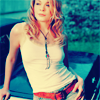
With Photoshop 7
Duplicate your base layer and set it to Screen. Put it to an opacity that makes it bright, and clear, but not blinding. I used 50%.

New Selective Colour Layer:
REDS:
C: -100
M: 100
Y: 100
B: -30
YELLOWS:
C: -100
M: 100
Y: 100
B: -40
NEUTRALS:
C: 35
M: -33
Y: -56
B: 0

Select the whole image and go to Edit, Copy Merged, then Paste. Set that layer to Soft Light.
Delete the screen layer.

New Colour Balance Layer:
Midtones: -63, 3, -53
Shadows: 13, -20, 17
Highlights: 8, -6, -7

You can leave it here, or continue…
Duplicate the base layer and bring it to the top. Set it to Luminosity 25-50% (you don't always have to do this...)

Fill a new layer with 001071 on Exclusion. I used 60% on this one, but you can play around with it.

New layer. Fill with either D2FCFF(light blue) OR FFE6F9(light pink) on Colour Burn 100%. For this, I used the light blue.

And that’s all. Woot.
Some other icons made with this colouring:


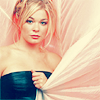

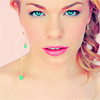
I love seeing what people make =]

to this:

With Photoshop 7
Duplicate your base layer and set it to Screen. Put it to an opacity that makes it bright, and clear, but not blinding. I used 50%.

New Selective Colour Layer:
REDS:
C: -100
M: 100
Y: 100
B: -30
YELLOWS:
C: -100
M: 100
Y: 100
B: -40
NEUTRALS:
C: 35
M: -33
Y: -56
B: 0

Select the whole image and go to Edit, Copy Merged, then Paste. Set that layer to Soft Light.
Delete the screen layer.

New Colour Balance Layer:
Midtones: -63, 3, -53
Shadows: 13, -20, 17
Highlights: 8, -6, -7

You can leave it here, or continue…
Duplicate the base layer and bring it to the top. Set it to Luminosity 25-50% (you don't always have to do this...)

Fill a new layer with 001071 on Exclusion. I used 60% on this one, but you can play around with it.

New layer. Fill with either D2FCFF(light blue) OR FFE6F9(light pink) on Colour Burn 100%. For this, I used the light blue.

And that’s all. Woot.
Some other icons made with this colouring:


I love seeing what people make =]