Icon Tutorial using PSP9
Here's an icon tutorial using Paint Shop Pro 9, I think it'd be pretty translatable, but I don't necessarily know...
Go from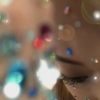
to
in very few steps.
Step 1: Get your base and clean it up as you'd like.

Step 2: Duplicate your base and set it to hardlight 100%.
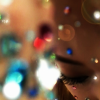
Step 3: Duplicate your original base again and bring it to the top. Set it to screen 100%.
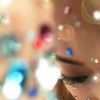
Step 4: Duplicate your original base again and bring it to the top. Set it to soft light 100%.

Step 5: Create a new layer and bring it to the top. Set it to saturation (legacy) 48%--or whichever works for your image--and fill it with 4406a0.

Step 6: (You can either leave it like that or) create a new top layer and set it to lighten 100% and fill with 250b3d.

Step 7: (Once again, you can leave it like that or) create a new top layer set to overlay 100% and put in this texture. *I did not make this texture, but I forget who did...so if you did or you know who did, just tell me.

Voilà!
*there might be additions to this with the other icons I made using this technique from the same batch...depending on if anyone is curious. If you'd like to see more of these, refer to this post at
gardentour. It's my free icon journal, you don't need to join to see the entry. It's just for your reference. But if you'd like to see tutorials for any of those, I could do that, too.
Icon featuring Ayumi Hamasaki in her kanariya music video--just spreading some Ayu love <3.
I might cross post this to other communities...not sure though, haha.
---------------------------------------------------------------------------------------------
Anyway, thanks! And comments are greatly appreciated! You can use that icon, if you'd like. Just make sure to credit me,
tokyoxjapanxfanor
gardentour.
Go from

to

in very few steps.
Step 1: Get your base and clean it up as you'd like.

Step 2: Duplicate your base and set it to hardlight 100%.

Step 3: Duplicate your original base again and bring it to the top. Set it to screen 100%.

Step 4: Duplicate your original base again and bring it to the top. Set it to soft light 100%.

Step 5: Create a new layer and bring it to the top. Set it to saturation (legacy) 48%--or whichever works for your image--and fill it with 4406a0.

Step 6: (You can either leave it like that or) create a new top layer and set it to lighten 100% and fill with 250b3d.

Step 7: (Once again, you can leave it like that or) create a new top layer set to overlay 100% and put in this texture. *I did not make this texture, but I forget who did...so if you did or you know who did, just tell me.

Voilà!
*there might be additions to this with the other icons I made using this technique from the same batch...depending on if anyone is curious. If you'd like to see more of these, refer to this post at
gardentour. It's my free icon journal, you don't need to join to see the entry. It's just for your reference. But if you'd like to see tutorials for any of those, I could do that, too.
Icon featuring Ayumi Hamasaki in her kanariya music video--just spreading some Ayu love <3.
I might cross post this to other communities...not sure though, haha.
---------------------------------------------------------------------------------------------
Anyway, thanks! And comments are greatly appreciated! You can use that icon, if you'd like. Just make sure to credit me,
tokyoxjapanxfanor
gardentour.