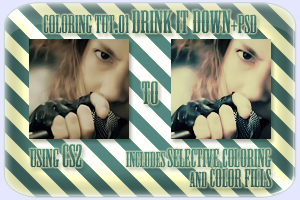
Coloring Tutorial - Drink It Down
Alright, first of all, prepare your base. Besides the usual cropping, reducing and sharpening (within reason), I recommend three steps that should make it easier to achieve a goodlooking icon with this tutorial.
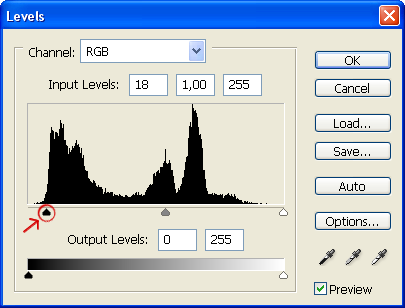
- Make sure your base is dark enough. Take a look at the Levels window. If it looks anything like this, drag the leftmost handle to the right (like I have in the example) until it's just inside the dark thingie. Terminology = Not my strong point. XD
I recommend you avoid using auto-levels to prepare your icon. You want to make the blacks blacker, but you do not want to make your whites whiter, not to mention what it'd do to the rest of the colors... *shudder* - Your base shouldn't be too colorful overall, but most importantly; make sure it isn't too yellow!
- While it's not absolutely necessary, your base should have a slightly greenish tint for this tutorial to be the most effective. I suggest using the PS Photo Filter set on Green or Deep Emerald for that. Don't overdo it though, you only want a slight tint.
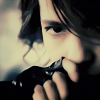
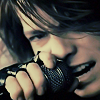
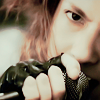
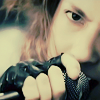
I used a screencap from L'Arc~en~Ciel's PV Drink It Down for this tutorial. The video already has muted dark colors and a greenish tint, so I didn't have to do anything to my base besides cropping it. Nyahaha-ehrm...
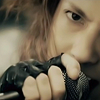
Go ahead and use my base if you want.
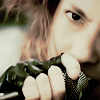
1. Ok, first step. Duplicate your base layer. Then go to Image/Adjustments/Desaturate to make your duplicate layer into grayscale. Now change the Blend Mode of your gray layer to Color Dodge and drag the opacity down to somewhere around 40% (depends on the icon, play around a bit). This brightens the icon and adds a bit of contrast.
Should look something like this:

2. Create a Selective Color layer with the following settings:
Reds:
-100, -33, +65, +40
Yellows:
-18, 0, -100, +13
Greens:
0, -13, +18, 0
Cyans:
+31, 0, -60, -19
Blues:
+61, 0, -26, +18
Magentas:
+24, -12, +35, -26
Whites:
+12, -36, -22, +19
Neutrals:
-7, 0, +2, -8
Blacks:
-5, 0, +19, +8
Make sure the Method is set to Relative. The important things here are the Reds and Yellows really, but I like adding/subtracting a bit of everything.
3. Create another Selective Color layer with the following settings:
Reds:
+14, 0, +14, +25
Yellows:
+9, 0, +15, 0
Greens:
0, -16, 0, 0
Cyans:
+24, 0, -7, +29
Blues:
+10, 0, -23, +11
Magentas:
0, -17, +7, 0
Whites:
-24, 0, +5, +7
Neutrals:
+9, -3, -6, -8
Blacks:
-4, 0, +7, +5
(this step can be skipped, because it's supposed to mellow out the red which we heightened in the previous step, but some bases don't have enough red in them to begin with).
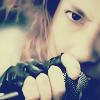
Again, make sure the Method is set to Relative.
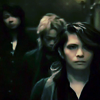
Now your icon should look something like this:
4. Copy your base layer and move it to the top of the layer list. Set it to Soft Light at 100%. Don't worry if this makes your icon look very dark, that's actually a good thing, because the following steps will brighten the whole thing again.

5. Add a dark blue Color Fill layer, set to Exclusion (I use #0F114B) at 100%.

6. Add a muted green Color Fill layer, set to Color Dodge (I use #9BCD7D) at 25%.
7. Copy your base layer again and move it to top. Set it to Pin Light at 100%. This brings back some contrast.
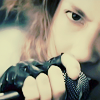
You're pretty much done now, but I like to darken my icons a little bit as a last step, so
8. Go to Select/All, then go to Edit/Copy Merged, and then Edit/Paste. Set this new layer you get to Multiply and drag the opacity down quite a bit. I find somewhere around 30% usually works, but again; Experiment.
And there you have it! My first coloring tutorial. Hope I did it right. ^_~
.psd is here.
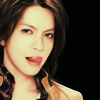
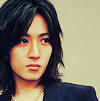
Some more icons made with this coloring: