(no subject)
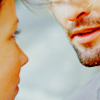
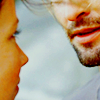
People have asked about the coloring on this icon a few times, and I could never remember how exactly I did it. I finally decided to sit down and try to recreate it. The coloring isn't exactly the same, but it's pretty close. =]
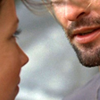
-->
+ written in cs3; not translatable (selective coloring).
+ psd inluded.
01. Resize your image, and prepare it as you normally would.

the next few steps I got from this tut at wicked_signs.
02. Create a new image, and fill it with #efede6.

03. copy and paste your picture into the new image, and set it to color burn.
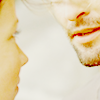
04. copy merged [shift + ctrl + c] and set to multiply.
duplicate this layer [ctrl + j], and set it to 50%.
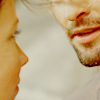
05. layer > new adjustment layer > color balance:
midtones: -40, 0 +40.
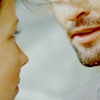
06. layer > new adjustment layer > brightness/contrast:
brightness: +5
contrast: +24.

07. layer > new adjustment layer > selective color:
reds: -35, 0, 0, -10
yellows: -40, 0, +10, 0
neutrals: 0, 0, -15, +5.

08. layer > new adjustment layer > hue/saturation:
(only change the saturation, don't mess with anything else)
master: +20
reds: +5
yellows: -5
09. layer > new adjustment layer > levels:
input: 35, 0.85, 245.

10. layer > new adjustment layer > selective color:
reds: +35, -10, 0, +20
yellows: 0, 0, +30, 0
11. layer > new adjustment layer > curves:
rgb: i: 95, o: 141
set this layer to 30%.

12. layer > new adjustment layer > selective color:
reds: -20, 0, 0, +10
yellows: 0, 0, -30, 0

13. create a new layer [ctrl + shift + n], and fill with #c6c6c6.
set to color burn, 20%.

14. merge, sharpen, add text, etc., and you're done!
- - - - -
original: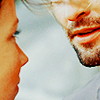
recreated:
I'd say it's pretty close. Yay. :D
other examples;

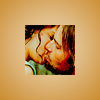


please comment if you download the psd. thanks!
if you have any questions, feel free to ask.
and i'd love to see your results! :D

-->

+ written in cs3; not translatable (selective coloring).
+ psd inluded.
01. Resize your image, and prepare it as you normally would.

the next few steps I got from this tut at wicked_signs.
02. Create a new image, and fill it with #efede6.

03. copy and paste your picture into the new image, and set it to color burn.

04. copy merged [shift + ctrl + c] and set to multiply.
duplicate this layer [ctrl + j], and set it to 50%.

05. layer > new adjustment layer > color balance:
midtones: -40, 0 +40.

06. layer > new adjustment layer > brightness/contrast:
brightness: +5
contrast: +24.

07. layer > new adjustment layer > selective color:
reds: -35, 0, 0, -10
yellows: -40, 0, +10, 0
neutrals: 0, 0, -15, +5.

08. layer > new adjustment layer > hue/saturation:
(only change the saturation, don't mess with anything else)
master: +20
reds: +5
yellows: -5

09. layer > new adjustment layer > levels:
input: 35, 0.85, 245.

10. layer > new adjustment layer > selective color:
reds: +35, -10, 0, +20
yellows: 0, 0, +30, 0

11. layer > new adjustment layer > curves:
rgb: i: 95, o: 141
set this layer to 30%.

12. layer > new adjustment layer > selective color:
reds: -20, 0, 0, +10
yellows: 0, 0, -30, 0

13. create a new layer [ctrl + shift + n], and fill with #c6c6c6.
set to color burn, 20%.

14. merge, sharpen, add text, etc., and you're done!
- - - - -
original:

recreated:

I'd say it's pretty close. Yay. :D
other examples;


please comment if you download the psd. thanks!
if you have any questions, feel free to ask.
and i'd love to see your results! :D