2 stock tutorials

to

AND
to
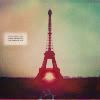
Made in Photoshop 7.0
TUTORIAL 1
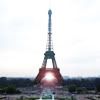
Original Image

STEP 1: Crop your image to the desired size.

STEP 2: Add a curves layer. Play around with the setting for your image. For this particular image, I used RGB: 80, 146. Do not flatten.

STEP 3: The clouds in the background weren't popping enough for me, so I added a clouds texture. I used this one by Sanami276 and shrunk it to fit the image. I set it to multiply at 100%. If you're fine with your image's background, then you can obviously skip this step.
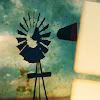
STEP 4: I then added this texture by babliz and set it to lighten at 100%. I went to edit » free transform to twist it around on the canvas until it was where I wanted it.

STEP 5: I added some tiny text over the window texture, and used the free transform tool to turn it sideways. You can use any tiny text you want. I suggest anything by Sanami276.

STEP 6: I added this texture (sorry I don't know who made it!). Set on screen 100% and move around until it's where you want it.

STEP 7: Duplicate your base and bring it to the top. Set on normal 72% (play with it for your own image).

STEP 8: Selective color layer:
Reds: C -100, M +100, Y +100, B 0
Yellows: C -39, M +40
Magentas: M +100
Neutrals: C +73, M -3, Y +13
Blacks: B +79
STEP 9: Flatten image and you're done!
---------------------------------------------------------
TUTORIAL 2
Original Image

STEP 1: Crop your image to the desired size. This image was already quite bright, but yours may not be. So duplicate your layer and set it to screen, or add a curves layer if necessary.

STEP 2: Selective color layer, set to normal, 92%:
Reds: C -5
Yellows: M -2, Y +28
Neutrals: C-48, M +65
Blacks: C -81, M -2, B-45

STEP 3: Add this texture by chaoticfay and set to Multiply 75%.

STEP 4: Add this texture by spooky_window and set to Color Burn 65%.
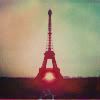
STEP 5: Add this texture by spooky_window and set to Soft Light 69%.

STEP 6: Create a new layer by clicking on the new layer icon on the layers palette. Use your rectangle tool to draw a small rectangle. Click on the paintbucket tool and fill the rectangle with a creamy, off-white color. Use the blur tool around the edges to make it look frayed. Add some tiny text over it.
STEP 7: Flatten image and you're done!