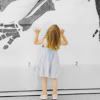
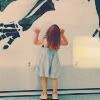
2 more stock tuts... i've got a ton of 'em
Since people seem to like them, I'll post a few more.

to
AND

to
Made in PS 7.0, should be translatable
Difficulty: Fairly easy, step-by-step. Should know basic PS lingo and where to find the tools, though.
TUT 1
See Original Image

STEP 1: Crop your base.

STEP 2: Duplicate your base and set it to Soft Light 72% (images vary)

STEP 3: Selective Color Layer:
Reds: C-100, Y+100
Neutrals: C +55, M+71, Y+100, B+7

STEP 4: Another selective color layer:
Reds: C-54, M +29, Y+48
Neutrals: C +58

STEP 5: Add a new dark blue layer (I used #002441). Set to exclusion.

STEP 6: Create a new layer (on layers palette, click on the icon that looks like a little piece of paper with the corner turned up). Go to your rectangle tool (first tool on left of toolbar). Draw a small rectangle in the corner of your image. Use the paintbucket tool to fill it with an off-white/cream color of your choice. You can move the layer around and even change the shape if you want by using the free transform tool under 'Edit'. Use the blur tool to blur the edges of the rectangle to give it a weathered look.

STEP 7: Add some tiny text and flatten the image- you're done!
------------------------------------
TUT 2
See Original Image

STEP 1: Crop your image to the desired size. Duplicate the base and set it to screen. Flatten it when you're done.

STEP 2: Add a selective color layer:
Reds: C -100, M +100, Y +100
Neutrals: C -12

STEP 3: Add this texture by spooky_window. Set to lighten 71%.

STEP 4: Add this texture by spooky_window. Set to Soft Light 100%.

STEP 5: Add this texture by spooky_window. Set to Soft Light 100%.

STEP 6: Optional. Crop or shrink this texture by Sanami276. I laid it over the horizon line just to where the trees are and set it to Multiply 100%. I then blurred the flat edges to blend in with the trees. This made a much prettier and visible sky.

STEP 7: I added a skinny tiny text down the middle. Flatten the image and you're done!

to

AND

to

Made in PS 7.0, should be translatable
Difficulty: Fairly easy, step-by-step. Should know basic PS lingo and where to find the tools, though.
TUT 1
See Original Image

STEP 1: Crop your base.

STEP 2: Duplicate your base and set it to Soft Light 72% (images vary)

STEP 3: Selective Color Layer:
Reds: C-100, Y+100
Neutrals: C +55, M+71, Y+100, B+7

STEP 4: Another selective color layer:
Reds: C-54, M +29, Y+48
Neutrals: C +58

STEP 5: Add a new dark blue layer (I used #002441). Set to exclusion.

STEP 6: Create a new layer (on layers palette, click on the icon that looks like a little piece of paper with the corner turned up). Go to your rectangle tool (first tool on left of toolbar). Draw a small rectangle in the corner of your image. Use the paintbucket tool to fill it with an off-white/cream color of your choice. You can move the layer around and even change the shape if you want by using the free transform tool under 'Edit'. Use the blur tool to blur the edges of the rectangle to give it a weathered look.

STEP 7: Add some tiny text and flatten the image- you're done!
------------------------------------
TUT 2
See Original Image

STEP 1: Crop your image to the desired size. Duplicate the base and set it to screen. Flatten it when you're done.

STEP 2: Add a selective color layer:
Reds: C -100, M +100, Y +100
Neutrals: C -12

STEP 3: Add this texture by spooky_window. Set to lighten 71%.

STEP 4: Add this texture by spooky_window. Set to Soft Light 100%.

STEP 5: Add this texture by spooky_window. Set to Soft Light 100%.

STEP 6: Optional. Crop or shrink this texture by Sanami276. I laid it over the horizon line just to where the trees are and set it to Multiply 100%. I then blurred the flat edges to blend in with the trees. This made a much prettier and visible sky.

STEP 7: I added a skinny tiny text down the middle. Flatten the image and you're done!