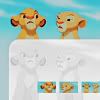
The lion King Tutorial
Photoshop CS2
Selective color // Photo Filter // Channel Mixer
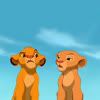
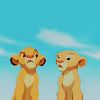
->
->
PLEASE POST COMMENTS/QUESTIONS/SUGGESTIONS etc here AT
expose42
COLORING
1. Crop your base::

2. Duplicate the base 2 times. Set the first one to screen and the second one to soft light. Sharpen one of this layers (and fade the sharpening if needed):
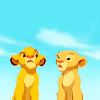
3. I want to tone down the orange and yellow so I added a photo filter adjustment layer (layer - new adjustment layer - photo filter). I used the cooling filter (82). Density 25% and preserve luminosity checked.
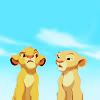
4. Next add a new selective color layer to enhance the yellow and cyan:
REDS: -40 0 0 0
NEUTRALS: 30 0 40 0
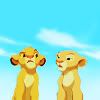
5. Add more blue with the channel mixer:
RED: 76 22 -40
GREEN: -10 100 0
BLUE: -10 0 100
Lower the opacity to 50%
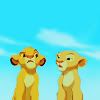
6. The colors are a bit too bright, espacially the blue sky is very saturated. Add another photo filter adjustment layer. I used the cooling filter (80). Density 25% and preserve luminosity checked.
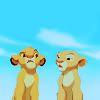
7. Add a new layer, fill with color #ffe0cf and change the blend mode to multiply.

TEXTURE
To create the texture(s) I used the shape tool.
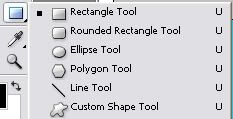
I only used the colors black and white. Black disappears when set on screen, white stays.
Create a nice looking composition:

Flatten it and place your colored base underneath it.
Set the texture to screen.
Duplicate the base several times and keep these duplicates underneath the texture..
Then arrange your pictures (resize, move,...):
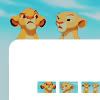
Next, paste your colored base above the texture.
Lower the opacity to 30%.
Then desaturate that image (image - adjustment - desaturate).
Add a layer mask to the desaturated image.
Go back to the texture layer and with the magic wand tool select all the black parts of that texture.

With the selection still there go back to the layer mask and fill the selection with black:

DONE

Selective color // Photo Filter // Channel Mixer

->

->

PLEASE POST COMMENTS/QUESTIONS/SUGGESTIONS etc here AT
expose42
COLORING
1. Crop your base::

2. Duplicate the base 2 times. Set the first one to screen and the second one to soft light. Sharpen one of this layers (and fade the sharpening if needed):

3. I want to tone down the orange and yellow so I added a photo filter adjustment layer (layer - new adjustment layer - photo filter). I used the cooling filter (82). Density 25% and preserve luminosity checked.

4. Next add a new selective color layer to enhance the yellow and cyan:
REDS: -40 0 0 0
NEUTRALS: 30 0 40 0

5. Add more blue with the channel mixer:
RED: 76 22 -40
GREEN: -10 100 0
BLUE: -10 0 100
Lower the opacity to 50%

6. The colors are a bit too bright, espacially the blue sky is very saturated. Add another photo filter adjustment layer. I used the cooling filter (80). Density 25% and preserve luminosity checked.

7. Add a new layer, fill with color #ffe0cf and change the blend mode to multiply.

TEXTURE
To create the texture(s) I used the shape tool.

I only used the colors black and white. Black disappears when set on screen, white stays.
Create a nice looking composition:

Flatten it and place your colored base underneath it.
Set the texture to screen.
Duplicate the base several times and keep these duplicates underneath the texture..
Then arrange your pictures (resize, move,...):

Next, paste your colored base above the texture.
Lower the opacity to 30%.
Then desaturate that image (image - adjustment - desaturate).
Add a layer mask to the desaturated image.
Go back to the texture layer and with the magic wand tool select all the black parts of that texture.

With the selection still there go back to the layer mask and fill the selection with black:

DONE
