Lord of the Rings Tutorials
Go from this:
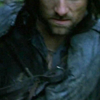
to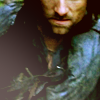
3 Tutorials, all with similar processes. Also, for:
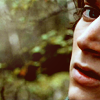
or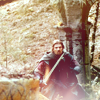
Program: Adobe Photoshop CS2
Includes: Color Fill layers, Color Balance, Levels, some texture/gradient use.
NO Selective Coloring.
Requested from this icon set H E R E
Tutorial copied from H E R E at my journal
Tutorial #1: Aragorn
From this cap from Crystal Fires Cap Archives:

Crop your image however you like. My original image was so dark, I'm using a version with a Screened layer at 100%.

Lighten up the image as much as needed.
I used 3 duplicated Screen Layers at 100% and one Softlight layer at 30% on top of those.
Fug, right? And kind of washed out. We'll get to contrast later on.
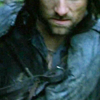
It's quite blue, so I want to add some brown and yellow. I make two Color Fill layers.
The first one I fill with a dark reddish brown (#571005) set at Exclusion 29%.
The second one I fill with an orangey yellow (#fba010) set at overlay 21%.
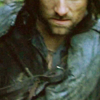
Yes, it's still ugly. But the layers will help smooth out some of the grainyness and add some richness, colorwise, in the long run (especially the exclusion layer).
Also, the yellow layer will be too strong on most images (I tend to go with it set at 6% or so), so keep that in mind.
Now, contrast. BENEATH the 2 color layers, I add a Levels layer (New Adjustment Layer --> Levels).
I got these results by playing around with the little sliding marks, so do the same with yours. I just put the numbers here because I can't take screenshots. Now for my favorite part: contrast!
I also fussed a bit with coloring in the color Channels. I did not alter the Output levels.
Channel: RBG. Input Levels --> 32, 1.00, 247
Channel: Red. Input Levels --> 0, 1.00, 255
Channel: Green. Input Levels --> 9, 1.00, 255
Channel: Blue. Input Levels --> 21, 0.93, 227
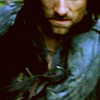
Much better. But I'm still not satisfied. I want some more reds and yellows, so on top of all those layers, I add a Color Balance Layer (New Adjustment Layer --> Color Balance). Again, adjust as needed for individual images.
Shadows: +1, +2, -5
Midtones: +10, -7, -3
Highlights: +10, +10, -8
Preserve Luminosity Checked
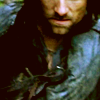
Finishing touches. I go down to my original layer (I don't condense until everything's finished).
I go Filter->Sharpen->, then Edit-> Fade Sharpen to 55%
If you sharpen ALL the layers, or duplicate from an already sharpened layer, you're going to get some crazy oversharpening. It doesn't matter which layer you sharpen/blur, whatever, just make sure it's only one.
Then I use the gradient tool, move the mouse down and to the left, and I have a light texture. I set it to Lighten 35%. Fin:

Tutorial #2: Frodo
Go from this: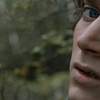
to -->
From this cap (same source):

Crop your image:

Lighten/Layer duplicates as you see fit. Here I used 2 Screen layers, the first at 100%, the second at 37%
On top of those, I have a Soft Light layer, 100%.
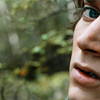
Now, I'm just going to use all the same layers I had before, but at different settings.
Dark Brown Exclusion layer 48%
Orangey Yellow Overlay Layer 7%
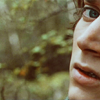
Underneath those, a Levels layer.
Channel: RBG. Input Levels --> 44, 1.00, 237
Channel: Red. Input Levels --> 8, 1.00, 252
Channel: Green. Input Levels --> 0, 1.00, 255
Channel: Blue. Input Levels --> 0, 1.00, 238
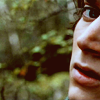
Color Balance! (New layer on very top.)
Shadows: 0, 0, 0
Midtones: +10, 0, 0
Highlights: +10, +10, -8
Preserve Luminosity Checked
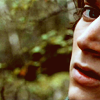
Final touches. I sharpen an image layer. It's a bit too grainy, so I use the Surface Blur filter and then go to Edit-->Fade Surface Blur so that it's subtle.
Then I create a new layer at the top. I use a size 13 paintbrush in white.
I put a blob in the corner, go to Filter-->Blur-->Gaussian Blur, 16.8 pixels
I set the layer Opacity to 41%, and FIN!

Tutorial #3: Boromir
Go from this: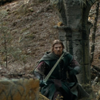
to -->
From this cap (same source):

Crop your image, then duplicate and screen. (2 Screen Layers at 100% and 1 Soft Light at 50%)

-->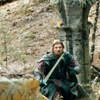
I kind of have no clue what I did with this one, except for 2 of the 3 light textures, so I'm kind of doing this one from scratch.
Dark Brown Exclusion Layer, 35%
Directly under that, a Levels Layer:
Channel: RBG. Input Levels --> 44, 1.00, 237
Channel: Red. Input Levels --> 8, 1.00, 252
Channel: Green. Input Levels --> 0, 1.00, 255
Channel: Blue. Input Levels --> 0, 1.00, 238
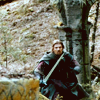
Still a bit gloomy, so I'll add a Color Balance Layer to lighten it up.
Shadows: 0, 0, 0
Midtones: +10, 0, 0
Highlights: +10, +10, -8
Preserve Luminosity Checked
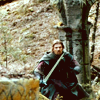
I honestly have no idea which texture I used last time, but this one seems to fit the bill, so we're going to use this texture from cielo_icons set at Screen 70%:
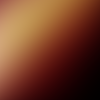
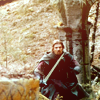
---->
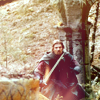
Next, a texture from lookslikerain at Screen 100%
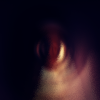
---->
Finally, I sharpen/FadeSharpen an image layer. I then create a new layer at the top and use a white 13px paintbrush at the bottom of the frame.
I go Filter-->Gaussian Blur 14.0 pixels, Layer Opacity 79%
Done!


to

3 Tutorials, all with similar processes. Also, for:

or

Program: Adobe Photoshop CS2
Includes: Color Fill layers, Color Balance, Levels, some texture/gradient use.
NO Selective Coloring.
Requested from this icon set H E R E
Tutorial copied from H E R E at my journal
Tutorial #1: Aragorn
From this cap from Crystal Fires Cap Archives:

Crop your image however you like. My original image was so dark, I'm using a version with a Screened layer at 100%.

Lighten up the image as much as needed.
I used 3 duplicated Screen Layers at 100% and one Softlight layer at 30% on top of those.
Fug, right? And kind of washed out. We'll get to contrast later on.

It's quite blue, so I want to add some brown and yellow. I make two Color Fill layers.
The first one I fill with a dark reddish brown (#571005) set at Exclusion 29%.
The second one I fill with an orangey yellow (#fba010) set at overlay 21%.

Yes, it's still ugly. But the layers will help smooth out some of the grainyness and add some richness, colorwise, in the long run (especially the exclusion layer).
Also, the yellow layer will be too strong on most images (I tend to go with it set at 6% or so), so keep that in mind.
Now, contrast. BENEATH the 2 color layers, I add a Levels layer (New Adjustment Layer --> Levels).
I got these results by playing around with the little sliding marks, so do the same with yours. I just put the numbers here because I can't take screenshots. Now for my favorite part: contrast!
I also fussed a bit with coloring in the color Channels. I did not alter the Output levels.
Channel: RBG. Input Levels --> 32, 1.00, 247
Channel: Red. Input Levels --> 0, 1.00, 255
Channel: Green. Input Levels --> 9, 1.00, 255
Channel: Blue. Input Levels --> 21, 0.93, 227

Much better. But I'm still not satisfied. I want some more reds and yellows, so on top of all those layers, I add a Color Balance Layer (New Adjustment Layer --> Color Balance). Again, adjust as needed for individual images.
Shadows: +1, +2, -5
Midtones: +10, -7, -3
Highlights: +10, +10, -8
Preserve Luminosity Checked

Finishing touches. I go down to my original layer (I don't condense until everything's finished).
I go Filter->Sharpen->, then Edit-> Fade Sharpen to 55%
If you sharpen ALL the layers, or duplicate from an already sharpened layer, you're going to get some crazy oversharpening. It doesn't matter which layer you sharpen/blur, whatever, just make sure it's only one.
Then I use the gradient tool, move the mouse down and to the left, and I have a light texture. I set it to Lighten 35%. Fin:

Tutorial #2: Frodo
Go from this:

to -->

From this cap (same source):

Crop your image:

Lighten/Layer duplicates as you see fit. Here I used 2 Screen layers, the first at 100%, the second at 37%
On top of those, I have a Soft Light layer, 100%.

Now, I'm just going to use all the same layers I had before, but at different settings.
Dark Brown Exclusion layer 48%
Orangey Yellow Overlay Layer 7%

Underneath those, a Levels layer.
Channel: RBG. Input Levels --> 44, 1.00, 237
Channel: Red. Input Levels --> 8, 1.00, 252
Channel: Green. Input Levels --> 0, 1.00, 255
Channel: Blue. Input Levels --> 0, 1.00, 238

Color Balance! (New layer on very top.)
Shadows: 0, 0, 0
Midtones: +10, 0, 0
Highlights: +10, +10, -8
Preserve Luminosity Checked

Final touches. I sharpen an image layer. It's a bit too grainy, so I use the Surface Blur filter and then go to Edit-->Fade Surface Blur so that it's subtle.
Then I create a new layer at the top. I use a size 13 paintbrush in white.
I put a blob in the corner, go to Filter-->Blur-->Gaussian Blur, 16.8 pixels
I set the layer Opacity to 41%, and FIN!

Tutorial #3: Boromir
Go from this:

to -->

From this cap (same source):

Crop your image, then duplicate and screen. (2 Screen Layers at 100% and 1 Soft Light at 50%)

-->

I kind of have no clue what I did with this one, except for 2 of the 3 light textures, so I'm kind of doing this one from scratch.
Dark Brown Exclusion Layer, 35%
Directly under that, a Levels Layer:
Channel: RBG. Input Levels --> 44, 1.00, 237
Channel: Red. Input Levels --> 8, 1.00, 252
Channel: Green. Input Levels --> 0, 1.00, 255
Channel: Blue. Input Levels --> 0, 1.00, 238

Still a bit gloomy, so I'll add a Color Balance Layer to lighten it up.
Shadows: 0, 0, 0
Midtones: +10, 0, 0
Highlights: +10, +10, -8
Preserve Luminosity Checked

I honestly have no idea which texture I used last time, but this one seems to fit the bill, so we're going to use this texture from cielo_icons set at Screen 70%:

---->

Next, a texture from lookslikerain at Screen 100%

---->

Finally, I sharpen/FadeSharpen an image layer. I then create a new layer at the top and use a white 13px paintbrush at the bottom of the frame.
I go Filter-->Gaussian Blur 14.0 pixels, Layer Opacity 79%
Done!
