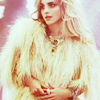
Tutorial #20 - Chase Crawford
Learn how to make the following.
from this
to this
this icon was made for Challenge #67 @
starsstills
Made in Photoshop CS.
Involves: curves, color balance, channel mixer
Step 1: Open up a new file 100x100 and add this texture to it by
Step 2: Then open up the picture of Chase and i used the pen tool and clicked around the background like this and then i deleted the background. you should have something like this
Step 3: After that get the easer tool and set it to a soft round brush at 20px for the Master Diameter and i just went around Chase and eased abit of him so that bits of him are transparent like this . and then i resized him so that it can fit into the middle of the icon and now drag to the icon where you put this texture.

Step 4: Curves
Input : 100 Output: 158

Step 5: Channel Mixer
Output channel: Red
source channels:
RED: +82
GREEN: -6
BLUE: +16
CONSTANT: 0

Step 6: Color Balance
MIDTONES: +65, +6, -32
SHADOWS: +14, 0, -29
HIGHLIGHTS: 0, 0, 0

Step 7: Hue/Saturation
Saturation : +12

Step 8: i added some text and thats about it.

well hope you enjoyed the tutorial. :)
Other Examples:


please direct all comments here
from this

to this

this icon was made for Challenge #67 @
starsstills
Made in Photoshop CS.
Involves: curves, color balance, channel mixer
Step 1: Open up a new file 100x100 and add this texture to it by
Step 2: Then open up the picture of Chase and i used the pen tool and clicked around the background like this and then i deleted the background. you should have something like this
Step 3: After that get the easer tool and set it to a soft round brush at 20px for the Master Diameter and i just went around Chase and eased abit of him so that bits of him are transparent like this . and then i resized him so that it can fit into the middle of the icon and now drag to the icon where you put this texture.

Step 4: Curves
Input : 100 Output: 158

Step 5: Channel Mixer
Output channel: Red
source channels:
RED: +82
GREEN: -6
BLUE: +16
CONSTANT: 0

Step 6: Color Balance
MIDTONES: +65, +6, -32
SHADOWS: +14, 0, -29
HIGHLIGHTS: 0, 0, 0

Step 7: Hue/Saturation
Saturation : +12

Step 8: i added some text and thats about it.

well hope you enjoyed the tutorial. :)
Other Examples:


please direct all comments here