(no subject)

»

Includes: curves, selective color, channel mixer & levels layers.
Made in PS CS3.
This is my very first tutorial, so please be nice :)
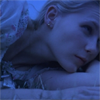
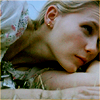
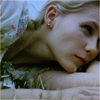
In this tutorial, we want to get rid of the overload of blue in this particular image (credit: screenmusings.) This method works great on most overly blue caps, but you might want to fiddle around with the values and opacities of each layer, according to the image you're using. That being said, let's get on with it!
1. Crop, resize and, if you prefer to do this before colouring, sharpen your base. I usually sharpen after I've added all my colour layers, because as you play around with the contrasts in icons, they tend to look sharper and the icon itself will need less sharpening. Like I said, whichever you prefer :)
2. Make a new curves layer.
RGB
Point 1: I: 23, O: 16
Point 2: I: 45, O: 65
Red
I: 178, O: 205
Blue
Point 1: I: 53, O: 17
Point 2: I: 128, O: 71
Point 3: I: 222, O: 184

3. Create a new selective color layer, method: relative.
Reds: -52, 0, +34, 100
Neutrals: -5, +1, +5, -5

4. Create a new channel mixer layer.
Red: 115, -15, 0
Blue: -15, +8, 100

5. Make a new brightness/contrast layer and up the contrast by 20.

6. Finally, create a new levels layer.
RGB: 13, 1,20, 255

And you're done!
Hope this is useful & feel free to show me your results in this post.