White Period Tutorial #2
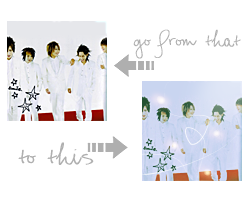
Credits: xloliconsx
Made in: AdobePhotoshop 7.0
Creator: star_jrock
[ Original Post]
E X A M P L E S:
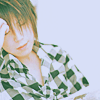
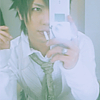
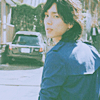
RULES:
∧ Comments would be awesome! :)
∧ Credit is not needed, unless you take one of the examples. xD
∧ Don't hotlink, please.
∧ Questions are welcomed.
∧ Your results would be gareto!
∧ Enjoy!
To make your graphic look nice with this tutorial, I sugest images that don't have too much yellow going on on the person's face, a white background or such and not too much blue.
Okay, open your image, resize it to your desired size. I "UNSHARP MASK" my image first with this setting, you can if you want to, but my image was a bit blurry:
UNSHARP MASK
amount: 50
radius: 1.0
threshold: 0
01. Layer > New Fill Layer > Solid Color
MODE: Exclusion OPACITY: 80%
COLOR: #3F563A


02. Layer > New Adjustment Layer > Selective Color
REDS:
cyan: -100
magenta: 0
yellow: 85
black: 0
YELLOWS:
cyan: 100
magenta: 60
yellow: -100
black: -70
WHITES:
cyan: 0
magenta: 0
yellow: -65
black: 0
NEUTRALS:
cyan: 5
magenta: 5
yellow: 9
black: -5


03. Layer > New Adjustment Layer > Chanel Mixer
RED:
red: 100
green: -10
blue: 0


04. Layer > New Adjustment Layer > Color Balance
MIDTONES:
-10 15 15
SHADOWS:
-20 5 5
HIGHLIGHTS:
22 6 20


05. Duplicate your main base, drag it to the top layers and set it to LUMINOSITY and change the opacity to 20%.


06. Layer > New Adjustment Layer > Curves
INPUT: 160
OUTPUT: 185


07. Layer > New Adjustment Layer > Selective Color
REDS:
cyan: -32
magenta: 16
yellow: -10
black: 0
YELLOWS:
cyan: -17
magenta: 0
yellow: 48
black: 0
WHITES:
cyan: 19
magenta: 0
yellow: -13
black: -10
NEUTRALS:
cyan: -15
magenta: 0
yellow: 9
black: 0


08. If you want, you can go ahead and add the light texture =>
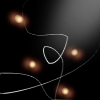
I used, that can be found over HERE, by me [star_jrock], and set it to SCREEN.


Want the .PSD? Go HERE to get it!