(no subject)
How to go
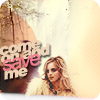
from
to
with PhotoShop CS2. Probably not translatable-includes Selective coloring.
I'm not very good at explaining, so try to keep up, and ask if something isn't clear.
Step 1: Take the base.
Step 2: With Polygonal Lasso Tool cut the subject.
Step 3: Fill the background. Layer->New Fill Layer->#fdfdfc
Step 4: The edges of the picture are still too sharp, so take Brush Tool and draw a line around the subject, smudge it until it fits perfectly around the body. Mine is this:
Step 5: Layer->New Adjustment layer->Curves
RGB: Point 1-input 158, output 202; Point 2-input 187, output 226
Red: Input 130, output 139
Step 6: Layer->New Fill Layer->#f1bbe0
Set on Color Burn.
Step 7: Layer->New Adjustment layer->Selective coloring
Red: -23 +3 +100 -21
Yellows: -49 0 +5 +3
Neutrals: -5 0 +39 +9
Blacks: +100 +2 +100 +100
Step 8: Layer->New Adjustment layer->Brightness/Contrast
Brightness +6
Step 9: Put this on top:
Got it from a tutorial by abernathi.
Set it to Normal Opacity 44%.
Step 10: Now take this texture:
and put it at the bottom of the icon.
It's originally by xtatiq I think.
Set to Lighten.
Step 11: Take this halftone texture:
It's from a tutorial by pale_ink.
Set it to Screen Opacity #15.
Step 12: Take this:
By sanami276.
Set it to Multiply.
Step 13: Put this on top:
Again by abernathi.
Set it to Soft Light.
You're done. Me, too. :D
Please comment to this post. Especially if you want the .psd. Pretty please.
Other examples with small changes: