Hey kids, it's tutorial time!
Made in Paint Shop Pro 7. Transferable.
Before: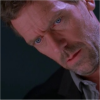
After: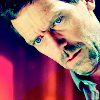
And guess what? NO CURVES! How great is that?
I've used this method a few times on a variety of different icons, but this one seemed to really stand out. Feel free to change it up as you wish and share your icons! Feedback is welcome. Other icons like the one featured in this tutorial can be found here. (This is my very first tutorial by the way.)
1.
Crop your base from the screencap, (this one I got from stelladives) and resize it to 100x100. Duplicate the layer.
2.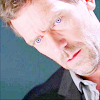
Sharpen the TOP LAYER ONLY and then set the layer blend mode to screen at 100% opacity. Duplicate the top layer 4 times. By now, your icon should have 6 layers, including the base.
3.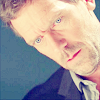
Underneath the top layer, create a new raster layer and fill it with #000040
. Set the layer blend mode to exclusion at 100% opacity. Duplicate that layer once. At this point, the icon should have 8 layers.
4.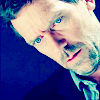
Merge all 8 layers together into one. Duplicate the layer and set the layer blend mode to soft light at 100% opacity. Create a new raster layer underneath the top and fill it with #A4DDF4
. Then set the layer blend mode to burn at 100% opacity. Duplicate the burn layer once, but lower its opacity to 75%. Duplicate the layer set at 75% 3 times. By now, you should have 7 layers making up your icon.
5.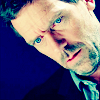
Create a new raster layer underneath the top layer and fill it with #EADCCD
. Set the layer blend mode to burn at 100% opacity.
6.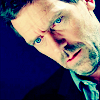
Create another new raster layer over the top layer and fill it with #E6E6E6
and set the layer blend mode to burn at 100% opacity.
7.
Take this lighting texture
(made by tihana) and paste it as a new layer. Set it's layer blend mode to screen at 100% opacity. Repeat step 6.
And you're done!
Before:

After:

And guess what? NO CURVES! How great is that?
I've used this method a few times on a variety of different icons, but this one seemed to really stand out. Feel free to change it up as you wish and share your icons! Feedback is welcome. Other icons like the one featured in this tutorial can be found here. (This is my very first tutorial by the way.)
1.

Crop your base from the screencap, (this one I got from stelladives) and resize it to 100x100. Duplicate the layer.
2.

Sharpen the TOP LAYER ONLY and then set the layer blend mode to screen at 100% opacity. Duplicate the top layer 4 times. By now, your icon should have 6 layers, including the base.
3.

Underneath the top layer, create a new raster layer and fill it with #000040

. Set the layer blend mode to exclusion at 100% opacity. Duplicate that layer once. At this point, the icon should have 8 layers.
4.

Merge all 8 layers together into one. Duplicate the layer and set the layer blend mode to soft light at 100% opacity. Create a new raster layer underneath the top and fill it with #A4DDF4

. Then set the layer blend mode to burn at 100% opacity. Duplicate the burn layer once, but lower its opacity to 75%. Duplicate the layer set at 75% 3 times. By now, you should have 7 layers making up your icon.
5.

Create a new raster layer underneath the top layer and fill it with #EADCCD

. Set the layer blend mode to burn at 100% opacity.
6.

Create another new raster layer over the top layer and fill it with #E6E6E6

and set the layer blend mode to burn at 100% opacity.
7.

Take this lighting texture

(made by tihana) and paste it as a new layer. Set it's layer blend mode to screen at 100% opacity. Repeat step 6.
And you're done!