Full icon tutorial (for PS7)
>> Please note: This tutorial is NOT meant to be copied 1:1 - so no need to use exactly that gradient or that brush or that pattern, ok? Please be creative and try something similar, but don't follow the steps dead right. Thank you for your attention. :-) <<

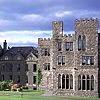
We start with the base.

Now I want to brighten it a bit. I choose Image > Adjust > Levels and play with the settings (to be honest, I work with adjustment-layers, but that's too complicated for me to explain, I hope you understand :-).
That's how it looks like now:

Next step - Image > Adjust > Hue/Saturation: choose "colorize" (I hope that's what it's called in english, I'm working with a German version of Photoshop ;) and set the parameters to 0/12/+10
Not it looks like this:

Next step is this gradient:

Set the layer with the gradient to "bright light" or "radiant" - however you call it (it comes right after "hardlight")
Now it looks like this:

Now we use a pattern like this:

Set the layer with the pattern to "darken".
Now it should look like this:

Final step - apply a border like this one:

Set the layer with the border to "multiply" and save your work.
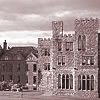
That's how it looks in the end:

It wasn't that difficult, was it? ;)
Thanks for reading my tutorial, any feedback would be lovely. :-)
We start with the base.
Now I want to brighten it a bit. I choose Image > Adjust > Levels and play with the settings (to be honest, I work with adjustment-layers, but that's too complicated for me to explain, I hope you understand :-).
That's how it looks like now:
Next step - Image > Adjust > Hue/Saturation: choose "colorize" (I hope that's what it's called in english, I'm working with a German version of Photoshop ;) and set the parameters to 0/12/+10
Not it looks like this:
Next step is this gradient:
Set the layer with the gradient to "bright light" or "radiant" - however you call it (it comes right after "hardlight")
Now it looks like this:
Now we use a pattern like this:
Set the layer with the pattern to "darken".
Now it should look like this:
Final step - apply a border like this one:
Set the layer with the border to "multiply" and save your work.
That's how it looks in the end:
It wasn't that difficult, was it? ;)
Thanks for reading my tutorial, any feedback would be lovely. :-)