Blurry Text Icon Tut...
Going from this 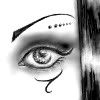
to this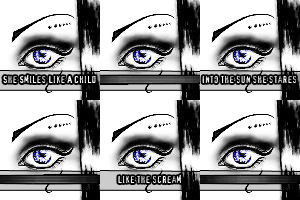
. Credit before I begin. For the base, basicbases. The song lyrics are Scream of the Butterfly by AcidBath. I use Photoshop CS and ImageReady as my programs, although this tutorial should be translatable to PSP. Click the cut for the tutorial.
Ok, so, we start with this base:
. Open it in Photoshop. I didn't have to do any cropping whatsoever because that was already done for me. The image itself is already in good condition, but, I'm going to do a few things to it to make it stand out better. First, I'm going to duplicate my base one time. If I mess up, I want to have the original to fall back on. Now, go to Filter>Sharpen>Sharpen. It should look like this:
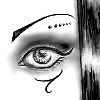
I don't want the image that sharp, so, on the sharpened layer, I choose the option to set it to Soft Light. Make sure the sharpened image is highlighted and then double click with your right mouse tool on the far right hand side of the layer. This will bring up a screen with property options. There should be a small box at the top of the screen that says "Normal." Change this to soft light. Now your image isn't as sharp as before. You should have something that looks like this:
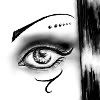
It's not an overly dramatic effect, but, there are subtle changes. If your image was overly blurry, you may want to decrease the opacity of the soft light layer some to allow the sharpen to bleed through more. I'm happy with the way my icon is right now, so, I'm going to proceed to the next step. Now, I want to add a little color to my icon. I prefer blue eyes, however, you can choose any color you like. Now I select my soft light layer and zoom in 3 times to make it big enough for me to work on just the pupil. You may decide to do more or less, this is just my preference. The zoom tool is located on the bottom right hand corner of your tool palette just above the colors. Click that, then click on the icon as many times as you would like to zoom in. Now, you need to select the Color Replacement Tool. This is located in the upper left hand corner of your tool palette. If your PS is set to the default settings, you need to right click on the Healing Brush Tool and select the Color Replacement Tool from the drop down menu. The icon representing it should be a paintbrush with an eye next to it. Next, if you don't already have them in your workspace, you need to pull up your swatches box. To do this, go to Window>Swatches. Now you should have a box of colors in your workspace. Click the color of your choice. Put your mouse over the image and it should change to a circle with a plus sign inside of it. Put it over the pupil, but don't click yet. Make sure that the circle is small enough to fill in the pupil area without affecting other areas of the eye. If it's not, go to the top left hand side of the screen just below Edit and left click the arrow beside Brush. Adjust the circle until it fits the pupil correctly. I used a size 4 brush. Got it? Ok. Let's move on.
Now that your circle fits, slowly drag it over the pupil area starting from the darkest part and going to the lightest. If you notice, the lighter areas aren't being filled with the color. That's fine. We want to stay as close to the original picture as possible. To make the color darker, run your color replacement tool over it a few more times. Now you should have something that looks like this:
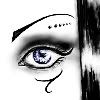
It's still too light for my tastes, but that's ok. We're going to fix that in this step. Duplicate the image with the pupil replacement color once. It should be set to soft light automatically because you're duplicating the soft light layer. You should now have something that looks like this:
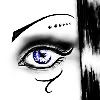
Ok, now I'm going to make the box for my animation. First, I want to use my Rectangle tool to create a box just below the eye. Select the Rectangle tool just below the Text Tool. Your foreground color should be set to black. Now, drag the rectangle tool into a box wherever you want the box to be. I chose right at the base of my eye. You can put it wherever you'd like. This is now what we have:
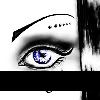
Ugly right? No problem. Create a new layer above the box layer. Go to Layer>New>Layer and click ok. You should have a transparent background with nothing on it. Drag the new layer below the layer with your black box. Make sure the box layer is selected on top of the new layer and then click on the arrow at the top of the layers palette. Scroll down to Merge Down on the drop down menu. Now, your black box should be in a new layer all by itself. But, it's still too dark. Double click twice with the left mouse tool and decrease the fill opacity of the layer. Mine is set to 20%. You should now have something similar to this:
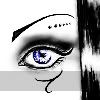
Much better. But, my box looks kind of plain. So, now I'm going to go back to my rectangle tool. This time though, I'm going to right click on it and pull up the drop down menu. I now select the line tool. With black still as my foreground color, I'm going to carefully drag the line tool across the top of the box. Now I have a black line on top. Go back to Layer>New>Layer and create a new layer. Drag it below the line tool. Now, highlight the line tool by clicking on it and once again, go to your arrow and click, merge down. Repeat the following to make a line just below the box. Now we have this:
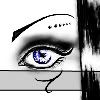
Now, you want to have a base on which to put your text. Click on the arrow again but this time, choose Merge Visible. All of your layers should combine to make just a single layer. I'm using lyrics from Scream of the Butterfly by AcidBath. You can use whatever you want. First, I create a new text layer. I go to my tools palette and choose the text tool this time. I drag it over the image inside the box where I want it and type in my text. You may have to adjust it to get it where you want it. The easiest way to do this is to type the text first, then choose the font and size. I chose XBAND Rough/Regular/22 pt. Once your text is in, center it as much as possible. You can use any color for the text you want. I chose white. This is what I now have:
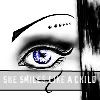
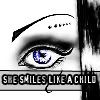
The white text is kind of hard to read. So, I'm going to make sure my text box is highlighted in my layers palette and then go to the bottom of the palette and clip on the little "f" icon. This brings up options for what I can do to that layer in form of a drop down menu. I'm going to choose "Stroke." Now, a little window pops up. This time, I want the settings to be as follows:
Size: 2px
Position: Outside
Blend Mode: Normal
Opacity: 100%
Fill Type: Color
Color: 000000
If you've followed me so far, this is the image you should now have:
Ok, now duplicate your base again, and drag it to the very top of all the layers. Do the same to the text base. You should now have 4 layers in your layer palette. Two bases and two text layers. Click the eyes next to the top base layer and the top text layer and make sure that either the bottom base layer or the bottom text layer are highlighted and both of them have the little eyes checked. To give you an idea of what I mean, here's a screenshot:
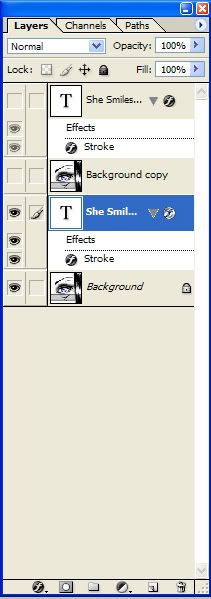
Make sure that your layer palette looks exactly like mine or you'll definitely mess up from this point on. Now, go to your arrow on the layer palette again, and Merge Visible. You should have 3 layers now. One of your base with the text merged in it, one of your base with no text and one with the text itself. Click the little eye next to the merged layer. It's no longer a visible layer, and will no longer be grouped when we merge the visible layers. Now, duplicate your text layer and base layer again, and drag them to the top. NOT THE MERGED ONE! Make sure your text layer is on top of your base layer. Now, click the little eyes next to the second set of duplicated layers and go to your first set of duplicated layers. Highlight the text layer by clicking on it. Your layer palette should now look like this:
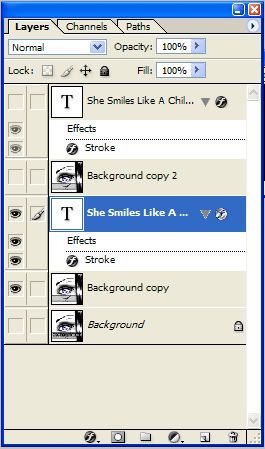
Ok, here comes the tricky part. With your text layer selected go to Filter>Motion Blur. A screen will pop up saying the layer needs to be rasterized and do you want to proceed. Click ok and a screen will pop up with settings. The settings are as follows:
Angle: 0
Distance: 50 pixels
Click ok. You should now have something that looks like this on your screen:
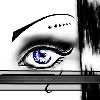
Now, don't click on any other layers yet. Go to your arrow and click Merge Visible. Now you have 4 layers in your palette. The original merged base, the merged blurred text base, the duplicated base with no text and the duplicated text. Click the little eye next to the blur base. Now, click on the base with no text and duplicate it again. This time, instead of just duplicating the text base, double click on the T with the left mouse button. The text should be highlighted. Change the text to the second sentence or word or whatever. Now, duplicate that text. Drag it to the top of the duplicated base and then click the little eyes next to the top two duplicates. Highlight the first text layer. Merge visible. Click the eye next to the merged layer. Duplicate the text and base layers again. Drag them to the top. Click the little eyes. Highlight the original text again. The time, you should just have to go to Filter>Motion Blur. Motion Blur should be the very first option at the top of your filters. Motion blur the text and then merge visible. Repeat these steps until all of the text you want is on your icon.
Ok, now that you've got all of the layers you want, go to File>Edit in ImageReady. This automatically throws all of your layers into ImageReady. You should have three screens up. One should say the name of your image at the top and be a preview of the actual image size. It will have one image in it right now. The next is your layers palette. And finally, your animation box, which also only has one frame in it right now. This is a screen shot of my workspace so that you can see what I mean:
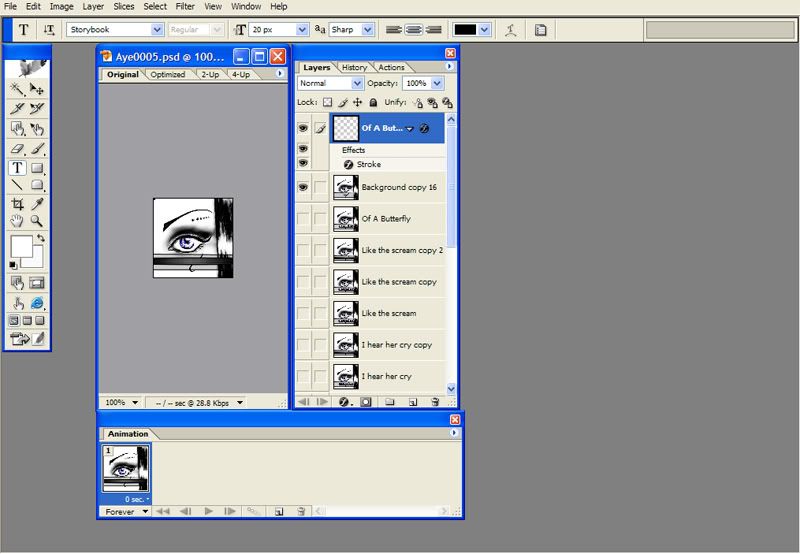
If any of these things are missing from your workspace, go to Window and make sure that there are checks beside Animation, Layers and Options. Ok, now we're going to make our layers into animation frames. On the long, rectangular box, click the small arrow in the top right hand corner. Click on "Make Frames From Layers." Now, all of your layers should be in the box. I have 18 frames. They don't all fit on my screen, but that's ok. This is a screenshot of what your animation box should be similar to:

Now, if I click my play button now, I'm going to get this:
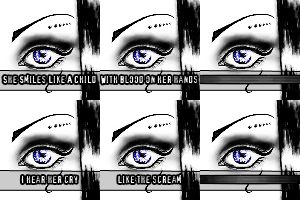
Waaaaay too fast. So, I'm going to adjust the speed. For each of my clear text frames, I'm going to set it at 1.0 seconds. For each of my blurred text layers, I'm going to set them at 0.2 seconds. Now when I hit play, I have my finished product:

Now, to save it as an animation, you have to go to File>Save Optimized As. If you just try to Save As, it won't save it in the right format. Name it and there ya go. I hope this tutorial was as informative as possible and not overly confusing. I would really love to see what you make with it.
-Kim

to this

. Credit before I begin. For the base, basicbases. The song lyrics are Scream of the Butterfly by AcidBath. I use Photoshop CS and ImageReady as my programs, although this tutorial should be translatable to PSP. Click the cut for the tutorial.
Ok, so, we start with this base:

. Open it in Photoshop. I didn't have to do any cropping whatsoever because that was already done for me. The image itself is already in good condition, but, I'm going to do a few things to it to make it stand out better. First, I'm going to duplicate my base one time. If I mess up, I want to have the original to fall back on. Now, go to Filter>Sharpen>Sharpen. It should look like this:

I don't want the image that sharp, so, on the sharpened layer, I choose the option to set it to Soft Light. Make sure the sharpened image is highlighted and then double click with your right mouse tool on the far right hand side of the layer. This will bring up a screen with property options. There should be a small box at the top of the screen that says "Normal." Change this to soft light. Now your image isn't as sharp as before. You should have something that looks like this:

It's not an overly dramatic effect, but, there are subtle changes. If your image was overly blurry, you may want to decrease the opacity of the soft light layer some to allow the sharpen to bleed through more. I'm happy with the way my icon is right now, so, I'm going to proceed to the next step. Now, I want to add a little color to my icon. I prefer blue eyes, however, you can choose any color you like. Now I select my soft light layer and zoom in 3 times to make it big enough for me to work on just the pupil. You may decide to do more or less, this is just my preference. The zoom tool is located on the bottom right hand corner of your tool palette just above the colors. Click that, then click on the icon as many times as you would like to zoom in. Now, you need to select the Color Replacement Tool. This is located in the upper left hand corner of your tool palette. If your PS is set to the default settings, you need to right click on the Healing Brush Tool and select the Color Replacement Tool from the drop down menu. The icon representing it should be a paintbrush with an eye next to it. Next, if you don't already have them in your workspace, you need to pull up your swatches box. To do this, go to Window>Swatches. Now you should have a box of colors in your workspace. Click the color of your choice. Put your mouse over the image and it should change to a circle with a plus sign inside of it. Put it over the pupil, but don't click yet. Make sure that the circle is small enough to fill in the pupil area without affecting other areas of the eye. If it's not, go to the top left hand side of the screen just below Edit and left click the arrow beside Brush. Adjust the circle until it fits the pupil correctly. I used a size 4 brush. Got it? Ok. Let's move on.
Now that your circle fits, slowly drag it over the pupil area starting from the darkest part and going to the lightest. If you notice, the lighter areas aren't being filled with the color. That's fine. We want to stay as close to the original picture as possible. To make the color darker, run your color replacement tool over it a few more times. Now you should have something that looks like this:

It's still too light for my tastes, but that's ok. We're going to fix that in this step. Duplicate the image with the pupil replacement color once. It should be set to soft light automatically because you're duplicating the soft light layer. You should now have something that looks like this:

Ok, now I'm going to make the box for my animation. First, I want to use my Rectangle tool to create a box just below the eye. Select the Rectangle tool just below the Text Tool. Your foreground color should be set to black. Now, drag the rectangle tool into a box wherever you want the box to be. I chose right at the base of my eye. You can put it wherever you'd like. This is now what we have:

Ugly right? No problem. Create a new layer above the box layer. Go to Layer>New>Layer and click ok. You should have a transparent background with nothing on it. Drag the new layer below the layer with your black box. Make sure the box layer is selected on top of the new layer and then click on the arrow at the top of the layers palette. Scroll down to Merge Down on the drop down menu. Now, your black box should be in a new layer all by itself. But, it's still too dark. Double click twice with the left mouse tool and decrease the fill opacity of the layer. Mine is set to 20%. You should now have something similar to this:

Much better. But, my box looks kind of plain. So, now I'm going to go back to my rectangle tool. This time though, I'm going to right click on it and pull up the drop down menu. I now select the line tool. With black still as my foreground color, I'm going to carefully drag the line tool across the top of the box. Now I have a black line on top. Go back to Layer>New>Layer and create a new layer. Drag it below the line tool. Now, highlight the line tool by clicking on it and once again, go to your arrow and click, merge down. Repeat the following to make a line just below the box. Now we have this:

Now, you want to have a base on which to put your text. Click on the arrow again but this time, choose Merge Visible. All of your layers should combine to make just a single layer. I'm using lyrics from Scream of the Butterfly by AcidBath. You can use whatever you want. First, I create a new text layer. I go to my tools palette and choose the text tool this time. I drag it over the image inside the box where I want it and type in my text. You may have to adjust it to get it where you want it. The easiest way to do this is to type the text first, then choose the font and size. I chose XBAND Rough/Regular/22 pt. Once your text is in, center it as much as possible. You can use any color for the text you want. I chose white. This is what I now have:

The white text is kind of hard to read. So, I'm going to make sure my text box is highlighted in my layers palette and then go to the bottom of the palette and clip on the little "f" icon. This brings up options for what I can do to that layer in form of a drop down menu. I'm going to choose "Stroke." Now, a little window pops up. This time, I want the settings to be as follows:
Size: 2px
Position: Outside
Blend Mode: Normal
Opacity: 100%
Fill Type: Color
Color: 000000
If you've followed me so far, this is the image you should now have:

Ok, now duplicate your base again, and drag it to the very top of all the layers. Do the same to the text base. You should now have 4 layers in your layer palette. Two bases and two text layers. Click the eyes next to the top base layer and the top text layer and make sure that either the bottom base layer or the bottom text layer are highlighted and both of them have the little eyes checked. To give you an idea of what I mean, here's a screenshot:

Make sure that your layer palette looks exactly like mine or you'll definitely mess up from this point on. Now, go to your arrow on the layer palette again, and Merge Visible. You should have 3 layers now. One of your base with the text merged in it, one of your base with no text and one with the text itself. Click the little eye next to the merged layer. It's no longer a visible layer, and will no longer be grouped when we merge the visible layers. Now, duplicate your text layer and base layer again, and drag them to the top. NOT THE MERGED ONE! Make sure your text layer is on top of your base layer. Now, click the little eyes next to the second set of duplicated layers and go to your first set of duplicated layers. Highlight the text layer by clicking on it. Your layer palette should now look like this:

Ok, here comes the tricky part. With your text layer selected go to Filter>Motion Blur. A screen will pop up saying the layer needs to be rasterized and do you want to proceed. Click ok and a screen will pop up with settings. The settings are as follows:
Angle: 0
Distance: 50 pixels
Click ok. You should now have something that looks like this on your screen:

Now, don't click on any other layers yet. Go to your arrow and click Merge Visible. Now you have 4 layers in your palette. The original merged base, the merged blurred text base, the duplicated base with no text and the duplicated text. Click the little eye next to the blur base. Now, click on the base with no text and duplicate it again. This time, instead of just duplicating the text base, double click on the T with the left mouse button. The text should be highlighted. Change the text to the second sentence or word or whatever. Now, duplicate that text. Drag it to the top of the duplicated base and then click the little eyes next to the top two duplicates. Highlight the first text layer. Merge visible. Click the eye next to the merged layer. Duplicate the text and base layers again. Drag them to the top. Click the little eyes. Highlight the original text again. The time, you should just have to go to Filter>Motion Blur. Motion Blur should be the very first option at the top of your filters. Motion blur the text and then merge visible. Repeat these steps until all of the text you want is on your icon.
Ok, now that you've got all of the layers you want, go to File>Edit in ImageReady. This automatically throws all of your layers into ImageReady. You should have three screens up. One should say the name of your image at the top and be a preview of the actual image size. It will have one image in it right now. The next is your layers palette. And finally, your animation box, which also only has one frame in it right now. This is a screen shot of my workspace so that you can see what I mean:

If any of these things are missing from your workspace, go to Window and make sure that there are checks beside Animation, Layers and Options. Ok, now we're going to make our layers into animation frames. On the long, rectangular box, click the small arrow in the top right hand corner. Click on "Make Frames From Layers." Now, all of your layers should be in the box. I have 18 frames. They don't all fit on my screen, but that's ok. This is a screenshot of what your animation box should be similar to:

Now, if I click my play button now, I'm going to get this:
Waaaaay too fast. So, I'm going to adjust the speed. For each of my clear text frames, I'm going to set it at 1.0 seconds. For each of my blurred text layers, I'm going to set them at 0.2 seconds. Now when I hit play, I have my finished product:

Now, to save it as an animation, you have to go to File>Save Optimized As. If you just try to Save As, it won't save it in the right format. Name it and there ya go. I hope this tutorial was as informative as possible and not overly confusing. I would really love to see what you make with it.
-Kim