006; Icon Tutorials [3]
Basically just copied and pasted my tutorials from twilight_touch; these were made sometime in 2006. <--omgOLD
Seeing as how I'm sick, I figured I'd use my time stuck indoors for something constructive. So, here are some, sadly not all, of the tutorials I was asked to make...weeks ago. *shame* Oh, and if I'm vague or incomprehensible, feel free to ask, I don't bite!
All these tutorials are made for Photoshop 7 but should be translatable to other programs.
- Requested by sidh; won Second & Best Adaption @ mangaicontest
This to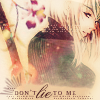

Crop to and prep your base. Try to crop a more interesting image, I usually keep the rule of thirds in mind but that might be a bit extreme for some. Then I usually Sharpen the base once and then duplicating it three times with those three layers set to Screen, Soft Light, and Multiply (all 100%) Multiply being the top layer and Screen the bottom. Of course, each image varies so you may need more or less layers and every person has their own way of doing this (some like the Auto Contrast/Color/Levels controls, some do nothing) so...have at it and experiment. Flatten when you've finished.
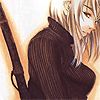

Create a new layer and fill it with #002157. Set it to Exclusion at 100% (This step is not necessary for all images and in truth, wasn't all that necessary for this one either. I just do it because it's now a habit. :P)
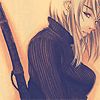
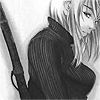
Duplicate the base layer and drag it above the Exclusion layer. Desaturate it and then set it to Overlay 100%.
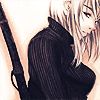
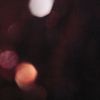
Choose a light texture, I chose this one (by unknown) and set it to Lighten 100%
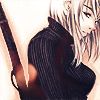
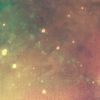
I wanted color and sparkle so I took this texture by immoral and set it to Linear Light 100%.
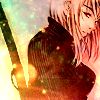
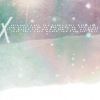
Take this texture by colorfilter and flip it horizontal. (Edit>Transform>Flip Horizontal) Set it to Hard Light 100%. Duplicate that layer. Pick one to turn brown and click on the eye next to the other layer so that you cannot see it. To turn the texture brown first choose a brown color and have it as your foreground color in the Switch Foreground & Background Color boxes. Then go to Image>Adjustments>Hue/Saturation. Check the box that reads Colorize and drag the saturation arrow where you see fit. (My own settings were: Hue-30, Saturation - 48, Lightness - 0). Mask out anything that covers up her face, namely the X on the textures. You can also erase them out but I prefer masks in case I make a mistake. Put the same mask on the unchanged original texture and then hide it again.
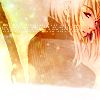
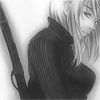
Duplicate the base layer and drag it to the top. Then Guassian Blur it by 1 pixel and set it to Overlay 100%. Not much of a difference yet.
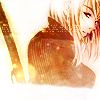
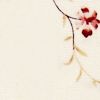
Take a flower texture (I used one by colorfilter) and set it to Multiply 100%.
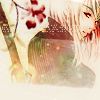

Another Exclusion layer of of #002157, set it to 50% this time though.

Duplicate the base layer again and Guassian Blur it by about 4 pixels. Set it to Soft Light.
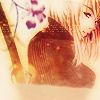
1st document
This is where it gets a little...weird. Go back through all your layers and click on the eye next to the original version of colorfilter's texture so that it is now visible Then hide the brown version. Go to the History Palette and click on the left most button (entitled Create New Document From Current State). Flatten the SECOND document.
2nd document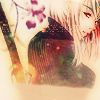
2nd document
Drag the second document on top of the first and set it to Color 50%.
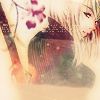
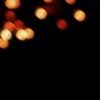
And because I love light textures, I took another one (by unknown) and set it to Lighten 100%.
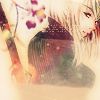
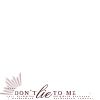
I added tiny text and a decoration (by unknown) and added text in 18th Century and Old Scrpt. Choose the text color by using the Eyedropper Tool to pick a darker color from your image. That way the text will blend in nicely and not contrast too harshly with the rest of the icon. Done~

- Requested by baine; won First @ ff_eye_candy *JOIN THEM~*
- Start - - Finish -
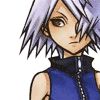
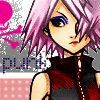

Prep your base. I duplicated it four times. The layers were, from bottom to top: Normal 200%, Screen 100%, Soft Light 100%, Multiply 85%. Flatten.
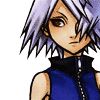

Floodfill a new layer with #002157. Set to Exclusion 100%. I masked it so that it would only show on Fujin, since I don't want it to appear on the background that I'm going to add.
*An easy way to mask this is to select all the areas of white in the background with the Magic Wand tool and then select inverse (either through Select>Inverse or Shift+Ctrl+I)*
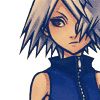

Duplicate the base and drag it to the top. Set to Overlay 100%.
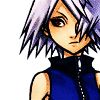
Using the pen tool, trace around Fujin's shirt. Once you've closed that path, right click on it and Make Selection. Create a new layer and make the selection a mask.

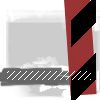
Fill (I have most of my textures set as patterns) the masked layer with a striped texture (mine is by aconite) and set it to Color 100%. Then move it around until you're satisfied. Mine was moved to the lower right corner because I wanted to create a colored block effect on Fujin's shirt.
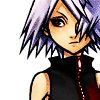

Create a new layer. Select the area you masked in the previous layer and fill it with color on the new layer. (I choose the same color as the red in the texture, #790000.) I only wanted one block though, so I used a hard 5 pixel brush to mask everything out but the little area I wanted the red in. (Upper left of her shirt) Rather dark eh?
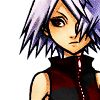
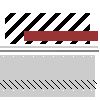
Create a new layer, fill it with another striped texture with the same coloring (mine is again by aconite). Mask it to only Fujin's shirt (just select the previous mask) and set it to Overlay 100%. This not only brightens the coloring but also adds another stripe across the shirt.
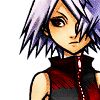

Color in her lips with a Soft Round 2-3 pixel brush. I just traced around her lips, where there was already shadow markings. I apparently got lucky because she looks rather like she's pouting. ^^;; I used the same red as Fujin's shirt and set the opacity to 50% while the Layer Mode remained Normal.


Duplicate the previous layer and set it to Soft Light. Opacity remains the same.
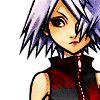

I had no idea what color to make her eyeshadow so I just randomly picked purple. XD Use a Hard Round 3 pixel brush to carefully go over the eye. The lines there help too, just trace them. Set the layer to Color 100%.


Duplicate the layer but set it to Soft Light 100%.

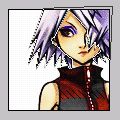
Use the pen tool and carefully select her hair. Not that hard since the BG is white and her hair is clearly defined. Make a new layer (so that the hair color is on its own) and set it to Color 100% then go back and select the path (Right Click on the Path>Make Selection).
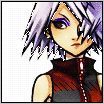
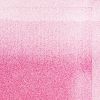
Fill in the selection with a pink colored texture by aconite (How to define textures as patterns for PS can be found here.
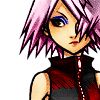

Duplicate the Color layer but change the layer mode to Lighten and the Opacity to 30%.
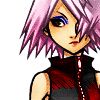

I then wanted to make her face a little paler so I colored it in with white and set it to Overlay 30%.

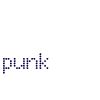
I added "punk" in #0D004C Only When I Do Fonts.
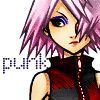

Add a decoration brush by yumei_k in #EC008C.
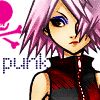

Go underneath the base layer and create a new layer. Fill it with an interesting looking texture but one that's not too busy. You don't want to draw too much attention away from Fujin. I chose this one by grrliz
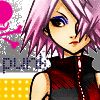

The yellow doesn't match though so I decided to change it to another color. Create a new layer and set it to Color 100%. Select the yellow area with the Rectangular Marquee Tool. Fill with #400000, which is the same red of Fujin's new shirt.
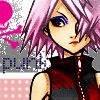

Duplicate the red layer. Set it to Color Burn 15%. Now you're done~

- Made for ff_eye_candy; won Second @ ff_eye_candy *JOIN THEM~*
This to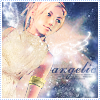

Crop & prep your base. I flipped it horizontally and duplicated it twice, setting both layers to Screen 100% since the base was a tad dark.
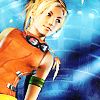

New layer of #002157 set to Exclusion 100.
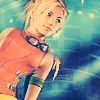
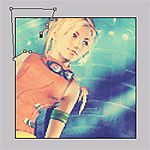
Use the pen tool to select all areas of the background (basically trace around Rikku). I zoomed up about 300% and when I finished, my Path Palette looked like this.
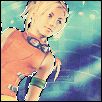
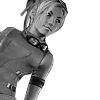
Duplicate the base layer and desaturate it. Set to Overlay 45%. It makes only a slight difference but it's there. I masked it (made the mask from the Paths) so that it only showed up on Rikku and not the background.
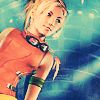
*Remember, all those paths are there for you to make masks instead of having to color things in by hand.*
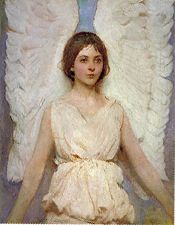
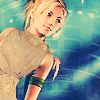
Went underneath the exclusion layer for the next two layers. Mask in this angel image (which I found through google) and rotate it clockwise until the belt falls to about where Rikku's waist is.
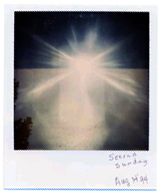
Mask in a new background to give it a "heavenly" feel as well as change the lighting. Used this image which I, again, found via google.
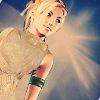
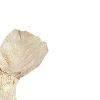
Duplicate the Robe layer and drag it above the blue exclusion and the B&W Overlay layers. Set it to Hard Light 80%.


Duplicate the robe again but set it to Soft Light 100%.
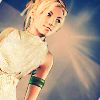
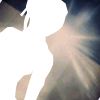
Duplicate the new background and drag it to the top. Set it to Overlay 100%.
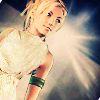
Ewwww...
I noticed a little spot of blue underneath Rikku's arm and I covered it up with paint that was the same color as her skin. Feel free to skip this since not everyone is a freak like me. ;P Finished Result: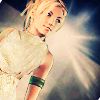
Yay~

I then drew in a belt in #CF9F7A and set to 50%. Again, done because I care about the little things too much.
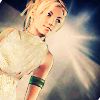
Select Rikku's armband from your Path Palette. Fill in a new layer with #EAC117 and set to Vivid Light 100%.
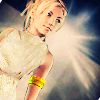

Duplicate that layer but set it to Color 100%.
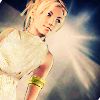
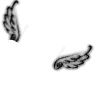
Add wings in #FFFFFF with a brush from for_victory. Masked out anything that covered up Rikku's body.
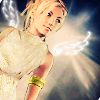

Now for the sparklies~ I added this light texture (by unknown but I'm thinking soulspring) and set it to Overlay 100%. Mask out anything that may be covering Rikku's face.
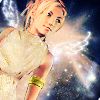

Put in some text. I wrote "angelic" in #070E2D & English111 Vivace BT. I also duplicated the layer to increase opacity.
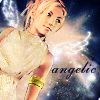

Duplicate the star texture, drag it above the two text layers, and set it to Screen 80%.
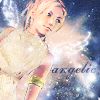

Select the entire canvas and go to Edit> Stroke by 2 pixels.
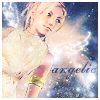

Use a dotted border brush (by unknown) for the outer most border.
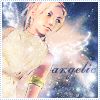
Stick some tiny text (by terra_katta) underneath "angelic" and icon finished.

I don't recommend following these tutorials to the letter.
Each image is different so some steps may not be needed or may even make the icon look worse. Also, creativity is key, so experiment with different colors, textures, etc. I hope you enjoyed these tutorials and if you would like to see more, please join the community!
That said, I'd love to see what you all have done or any other comment/questions you may have. (These are my first tutorials after all. XD)
Seeing as how I'm sick, I figured I'd use my time stuck indoors for something constructive. So, here are some, sadly not all, of the tutorials I was asked to make...weeks ago. *shame* Oh, and if I'm vague or incomprehensible, feel free to ask, I don't bite!
All these tutorials are made for Photoshop 7 but should be translatable to other programs.
- Requested by sidh; won Second & Best Adaption @ mangaicontest
This to


Crop to and prep your base. Try to crop a more interesting image, I usually keep the rule of thirds in mind but that might be a bit extreme for some. Then I usually Sharpen the base once and then duplicating it three times with those three layers set to Screen, Soft Light, and Multiply (all 100%) Multiply being the top layer and Screen the bottom. Of course, each image varies so you may need more or less layers and every person has their own way of doing this (some like the Auto Contrast/Color/Levels controls, some do nothing) so...have at it and experiment. Flatten when you've finished.


Create a new layer and fill it with #002157. Set it to Exclusion at 100% (This step is not necessary for all images and in truth, wasn't all that necessary for this one either. I just do it because it's now a habit. :P)


Duplicate the base layer and drag it above the Exclusion layer. Desaturate it and then set it to Overlay 100%.


Choose a light texture, I chose this one (by unknown) and set it to Lighten 100%


I wanted color and sparkle so I took this texture by immoral and set it to Linear Light 100%.


Take this texture by colorfilter and flip it horizontal. (Edit>Transform>Flip Horizontal) Set it to Hard Light 100%. Duplicate that layer. Pick one to turn brown and click on the eye next to the other layer so that you cannot see it. To turn the texture brown first choose a brown color and have it as your foreground color in the Switch Foreground & Background Color boxes. Then go to Image>Adjustments>Hue/Saturation. Check the box that reads Colorize and drag the saturation arrow where you see fit. (My own settings were: Hue-30, Saturation - 48, Lightness - 0). Mask out anything that covers up her face, namely the X on the textures. You can also erase them out but I prefer masks in case I make a mistake. Put the same mask on the unchanged original texture and then hide it again.


Duplicate the base layer and drag it to the top. Then Guassian Blur it by 1 pixel and set it to Overlay 100%. Not much of a difference yet.


Take a flower texture (I used one by colorfilter) and set it to Multiply 100%.


Another Exclusion layer of of #002157, set it to 50% this time though.


Duplicate the base layer again and Guassian Blur it by about 4 pixels. Set it to Soft Light.

1st document

This is where it gets a little...weird. Go back through all your layers and click on the eye next to the original version of colorfilter's texture so that it is now visible Then hide the brown version. Go to the History Palette and click on the left most button (entitled Create New Document From Current State). Flatten the SECOND document.
2nd document

2nd document

Drag the second document on top of the first and set it to Color 50%.


And because I love light textures, I took another one (by unknown) and set it to Lighten 100%.


I added tiny text and a decoration (by unknown) and added text in 18th Century and Old Scrpt. Choose the text color by using the Eyedropper Tool to pick a darker color from your image. That way the text will blend in nicely and not contrast too harshly with the rest of the icon. Done~

- Requested by baine; won First @ ff_eye_candy *JOIN THEM~*
- Start - - Finish -


Prep your base. I duplicated it four times. The layers were, from bottom to top: Normal 200%, Screen 100%, Soft Light 100%, Multiply 85%. Flatten.


Floodfill a new layer with #002157. Set to Exclusion 100%. I masked it so that it would only show on Fujin, since I don't want it to appear on the background that I'm going to add.
*An easy way to mask this is to select all the areas of white in the background with the Magic Wand tool and then select inverse (either through Select>Inverse or Shift+Ctrl+I)*


Duplicate the base and drag it to the top. Set to Overlay 100%.


Using the pen tool, trace around Fujin's shirt. Once you've closed that path, right click on it and Make Selection. Create a new layer and make the selection a mask.


Fill (I have most of my textures set as patterns) the masked layer with a striped texture (mine is by aconite) and set it to Color 100%. Then move it around until you're satisfied. Mine was moved to the lower right corner because I wanted to create a colored block effect on Fujin's shirt.


Create a new layer. Select the area you masked in the previous layer and fill it with color on the new layer. (I choose the same color as the red in the texture, #790000.) I only wanted one block though, so I used a hard 5 pixel brush to mask everything out but the little area I wanted the red in. (Upper left of her shirt) Rather dark eh?


Create a new layer, fill it with another striped texture with the same coloring (mine is again by aconite). Mask it to only Fujin's shirt (just select the previous mask) and set it to Overlay 100%. This not only brightens the coloring but also adds another stripe across the shirt.


Color in her lips with a Soft Round 2-3 pixel brush. I just traced around her lips, where there was already shadow markings. I apparently got lucky because she looks rather like she's pouting. ^^;; I used the same red as Fujin's shirt and set the opacity to 50% while the Layer Mode remained Normal.


Duplicate the previous layer and set it to Soft Light. Opacity remains the same.


I had no idea what color to make her eyeshadow so I just randomly picked purple. XD Use a Hard Round 3 pixel brush to carefully go over the eye. The lines there help too, just trace them. Set the layer to Color 100%.


Duplicate the layer but set it to Soft Light 100%.


Use the pen tool and carefully select her hair. Not that hard since the BG is white and her hair is clearly defined. Make a new layer (so that the hair color is on its own) and set it to Color 100% then go back and select the path (Right Click on the Path>Make Selection).


Fill in the selection with a pink colored texture by aconite (How to define textures as patterns for PS can be found here.


Duplicate the Color layer but change the layer mode to Lighten and the Opacity to 30%.


I then wanted to make her face a little paler so I colored it in with white and set it to Overlay 30%.


I added "punk" in #0D004C Only When I Do Fonts.


Add a decoration brush by yumei_k in #EC008C.


Go underneath the base layer and create a new layer. Fill it with an interesting looking texture but one that's not too busy. You don't want to draw too much attention away from Fujin. I chose this one by grrliz


The yellow doesn't match though so I decided to change it to another color. Create a new layer and set it to Color 100%. Select the yellow area with the Rectangular Marquee Tool. Fill with #400000, which is the same red of Fujin's new shirt.


Duplicate the red layer. Set it to Color Burn 15%. Now you're done~

- Made for ff_eye_candy; won Second @ ff_eye_candy *JOIN THEM~*
This to


Crop & prep your base. I flipped it horizontally and duplicated it twice, setting both layers to Screen 100% since the base was a tad dark.


New layer of #002157 set to Exclusion 100.


Use the pen tool to select all areas of the background (basically trace around Rikku). I zoomed up about 300% and when I finished, my Path Palette looked like this.


Duplicate the base layer and desaturate it. Set to Overlay 45%. It makes only a slight difference but it's there. I masked it (made the mask from the Paths) so that it only showed up on Rikku and not the background.


*Remember, all those paths are there for you to make masks instead of having to color things in by hand.*
Went underneath the exclusion layer for the next two layers. Mask in this angel image (which I found through google) and rotate it clockwise until the belt falls to about where Rikku's waist is.


Mask in a new background to give it a "heavenly" feel as well as change the lighting. Used this image which I, again, found via google.


Duplicate the Robe layer and drag it above the blue exclusion and the B&W Overlay layers. Set it to Hard Light 80%.


Duplicate the robe again but set it to Soft Light 100%.


Duplicate the new background and drag it to the top. Set it to Overlay 100%.

Ewwww...
I noticed a little spot of blue underneath Rikku's arm and I covered it up with paint that was the same color as her skin. Feel free to skip this since not everyone is a freak like me. ;P Finished Result:

Yay~

I then drew in a belt in #CF9F7A and set to 50%. Again, done because I care about the little things too much.


Select Rikku's armband from your Path Palette. Fill in a new layer with #EAC117 and set to Vivid Light 100%.


Duplicate that layer but set it to Color 100%.


Add wings in #FFFFFF with a brush from for_victory. Masked out anything that covered up Rikku's body.


Now for the sparklies~ I added this light texture (by unknown but I'm thinking soulspring) and set it to Overlay 100%. Mask out anything that may be covering Rikku's face.


Put in some text. I wrote "angelic" in #070E2D & English111 Vivace BT. I also duplicated the layer to increase opacity.


Duplicate the star texture, drag it above the two text layers, and set it to Screen 80%.


Select the entire canvas and go to Edit> Stroke by 2 pixels.


Use a dotted border brush (by unknown) for the outer most border.


Stick some tiny text (by terra_katta) underneath "angelic" and icon finished.

I don't recommend following these tutorials to the letter.
Each image is different so some steps may not be needed or may even make the icon look worse. Also, creativity is key, so experiment with different colors, textures, etc. I hope you enjoyed these tutorials and if you would like to see more, please join the community!
That said, I'd love to see what you all have done or any other comment/questions you may have. (These are my first tutorials after all. XD)