(no subject)
Okay so I'm back with a brand new whack.(lol. Mkay, I couldn't resist...xD) My wonderful uport wanted to know how I made an icon in my last icon post. People have been wondering about my coloring so, I guess this one tutorial closer to Courtney's secrets. XD; Just know that half the coloring I use are found by total accident from expirimentation. *kicked*
Let's get started, K?
We'll be going from
this:
to this:
I'm using PSP7, but I'm sure it's translatable.
Okay, Okay. Dinner is almost ready so let's see if I can get this done in about...five minutes. Just like the last, this is a simple tutorial (not as simple as the last though, unfort.) but once you get the hang of it it'll only take you maybe 1-2 minutes to complete.
So let's take our base already. Mine is a screencap from Ayumi Hamasaki's 'evolution' PV but you can pick any one you like.
So I'm taking Ayu :
: and I'm going to duplicate the base and set it to 'Screen'. Got that? Okay.
Next we're going to go to Color Balance (Layers>>New Adjustment Layer>>Color Balance). Alright, 'Midtones' should already be checked but make sure 'Preserve Luminosity' is checked. Okay, set the color Blue to 100 and then hit 'OK' and the bottom of the box. Leave the new layer to 'Normal'.
Got that? Hope you're not confused!
Now what I want you to do is duplicate that Color Balance layer. (This will be set to 'Normal' as well...)
Now we're going to add a 'Hue/Saturation/Lightness' layer (Layers>>New Adjustment Layer>>Hue/Saturation/Lightness). Set the Saturation to 39 and hit 'OK' at the bottom of that lovely box. This new layer will be set to 'Normal' as well.
Now the Curves layer (Layers>>New Adjustment Layer>>Curves). Channel should be set to 'RGB'. Put in the following:
Input: 61 Output: 0. Hit 'OK' at the bottom of the box and that layer will be set to 'Normal'.
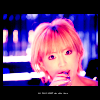
AND DUNTA DUNTA DUNTA DUN! You're done, that's it. It's over. Your icon should be looking something like this :

.
Just a note, if you used a different base, the icon will of course look different from the one I used but it should still be looking savvy snazzy. If you have any questions or problems just leave a comment and let me know! I'll do my best to help!
But if you still don't have any problems/questions, still leave a comment and let me know how the tutorial worked for ya! =)
Other icons made with this tutorial:


Let's get started, K?
We'll be going from
this:

to this:

I'm using PSP7, but I'm sure it's translatable.
Okay, Okay. Dinner is almost ready so let's see if I can get this done in about...five minutes. Just like the last, this is a simple tutorial (not as simple as the last though, unfort.) but once you get the hang of it it'll only take you maybe 1-2 minutes to complete.
So let's take our base already. Mine is a screencap from Ayumi Hamasaki's 'evolution' PV but you can pick any one you like.
So I'm taking Ayu :

: and I'm going to duplicate the base and set it to 'Screen'. Got that? Okay.
Next we're going to go to Color Balance (Layers>>New Adjustment Layer>>Color Balance). Alright, 'Midtones' should already be checked but make sure 'Preserve Luminosity' is checked. Okay, set the color Blue to 100 and then hit 'OK' and the bottom of the box. Leave the new layer to 'Normal'.
Got that? Hope you're not confused!
Now what I want you to do is duplicate that Color Balance layer. (This will be set to 'Normal' as well...)
Now we're going to add a 'Hue/Saturation/Lightness' layer (Layers>>New Adjustment Layer>>Hue/Saturation/Lightness). Set the Saturation to 39 and hit 'OK' at the bottom of that lovely box. This new layer will be set to 'Normal' as well.
Now the Curves layer (Layers>>New Adjustment Layer>>Curves). Channel should be set to 'RGB'. Put in the following:
Input: 61 Output: 0. Hit 'OK' at the bottom of the box and that layer will be set to 'Normal'.
AND DUNTA DUNTA DUNTA DUN! You're done, that's it. It's over. Your icon should be looking something like this :

.
Just a note, if you used a different base, the icon will of course look different from the one I used but it should still be looking savvy snazzy. If you have any questions or problems just leave a comment and let me know! I'll do my best to help!
But if you still don't have any problems/questions, still leave a comment and let me know how the tutorial worked for ya! =)
Other icons made with this tutorial:


