Basic Use of the Hair Binning Tool
You need:
A copy and basic knowledge of SimPE : http://sims.ambertation.de/realdownload.shtml
An installed version of Theo’s colour binning tool. Remember to check his site to make sure you have the most up to date version: http://theos.chewbakkas.net/tools/color-binning-tool.html
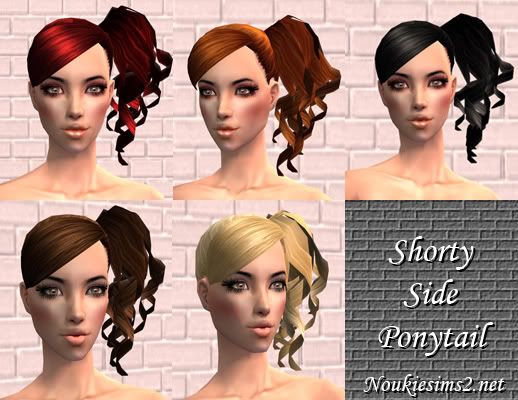
Some hair that you want to bin: For this example I’ll be using this unbinned hair by Nouk. - It’s a good idea to keep all the hair files together in a clearly labelled folder while binning.
First, and I mean this, back up the files you're about to edit.
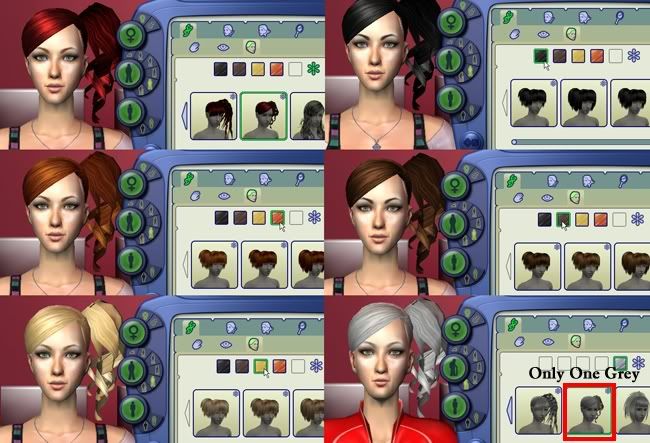
We're going to start by opening bodyshop to check that the hair isn’t already binned.
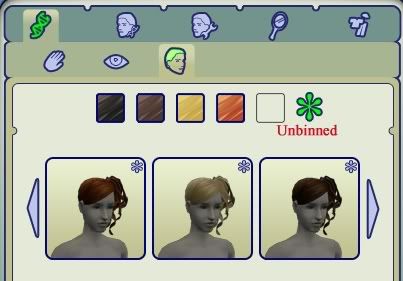
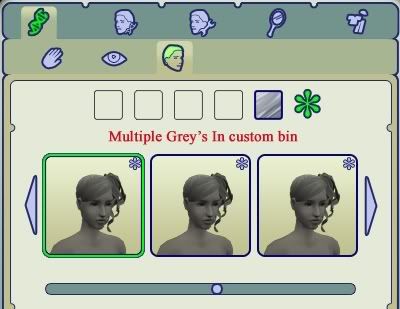
As we can see it isn't, plus when we check under elder there are multiple versions of grey. Now close down bodyshop.
Our aims when binning are to group all the hair into the same family so when you switch between colour groups it stays in the same style and to eliminate excess versions of the grey stage.
Binning
1) Open SimPE. Click on the 'Tools menu and select 'Color Binning Tool'

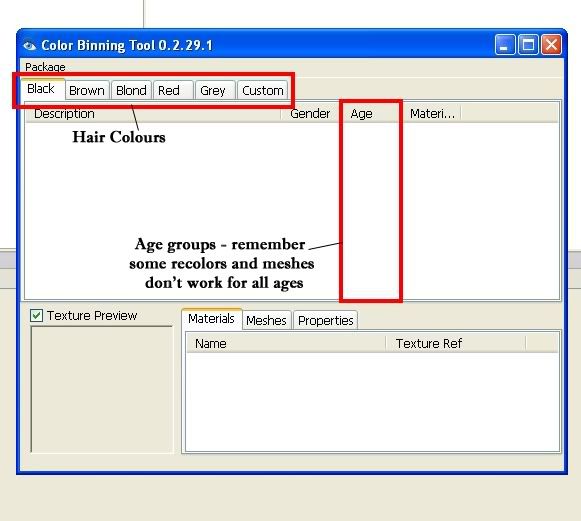
2) The plugin's main window should appear. Note the hair colour tabs - Black is selected as default.
Also note the age ranges - these become important is the hairstyle does not cover all age ranges.
3) Since black is already selected we'll open up that package first. Go to the 'Package' menu select open and navigate to the file you want. Luckily in this case it's clearly labelled.
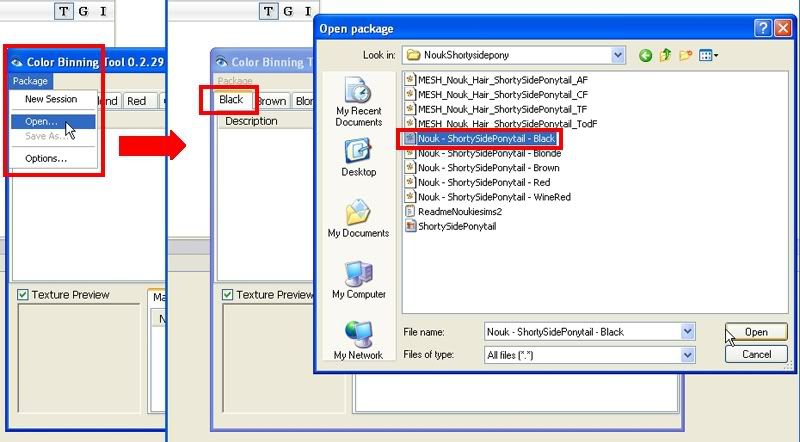
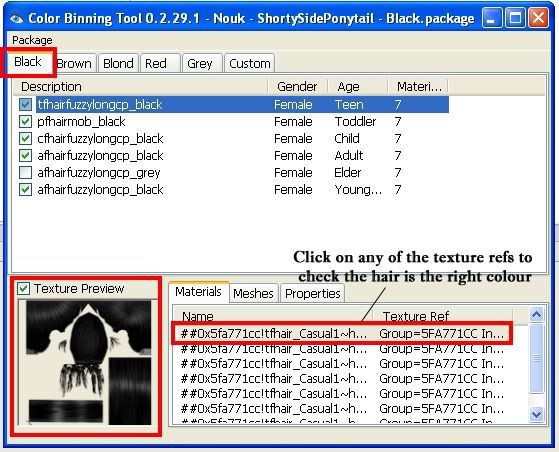
4) Despite the labelling we still want to check it's the right colour. So click on one of the age ranges the creator said the mesh/recolor covers - be warned some in recolors the creator will not alter the other age ranges to match so don't use them to check! Then at the bottom of the screen in the 'Materials' tab click on any of the texture references. Click the box next to 'Texture Preview' and a preview of the colour will show up in the box to the left.
As you can see below it was labelled properly and is black.
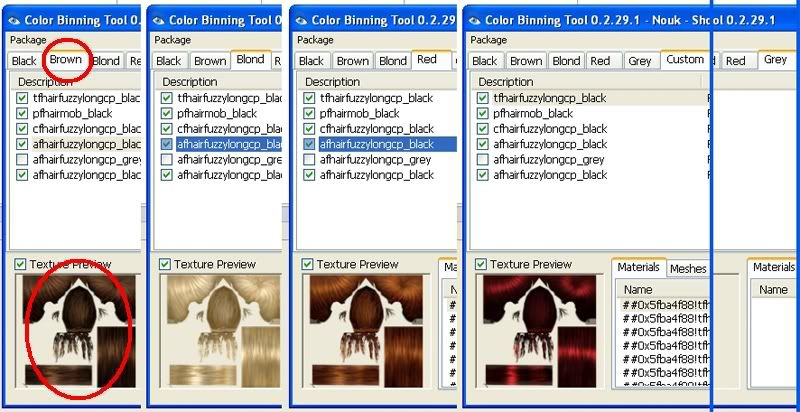
5) Click on the ‘Brown’ hair tab and repeat the procedure in 4 this time loading the hair you want in the brown bin. Continue to do this until you’ve filled all the tabs you have colours for.
6) If the colour you've loaded into the tab is not the right one due to mislabelling(or you being dozy) it's easy to move it to the correct tab. As you can see below I've mistakenly loaded Blonde hair into the Brown tab, whoops.
To fix it I simply left click in the description area and drag my mouse to select all the age groups. I then right click on the selected files in the description area so a menu pops up.
Then simply select 'Move To' and then the correct hair colour.

7) As you can see here I've correctly put the hairs into the right tabs.
In this case the wine red is unnatural so I've put it in the 'Custom' tab and there is no specifically grey recolor (some sites such as XMsims do provide one) so that tab stays empty.
Please also note that in the four colours show here none has the box next to the grey hair ticked.
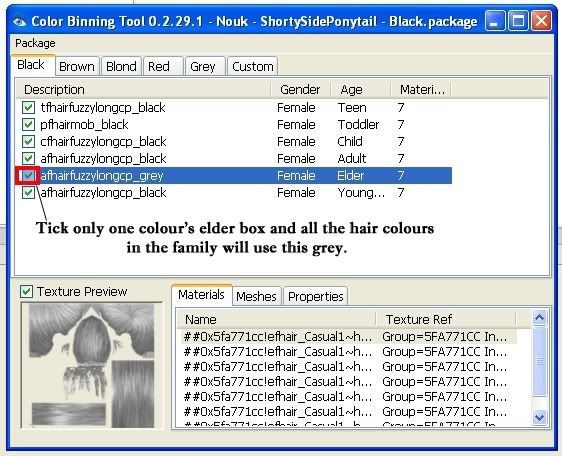
8) When binning the hairs the tool gives you a number of options (more on some of the others later)the one we're interested in currently is the grey/elder hairtone.
We can either check all the boxes next to the 'Elder' age range which would mean we'd still have multiple greys or we can pick one which will be used as the grey for all recolors that appear in the same family.
Having looked at all the grey's they're identical (not always the case!) so I've picked the grey that comes with the black recolor for all of the ones I'm binning to use.
9) We're almost there so let's have a look at the options menu.
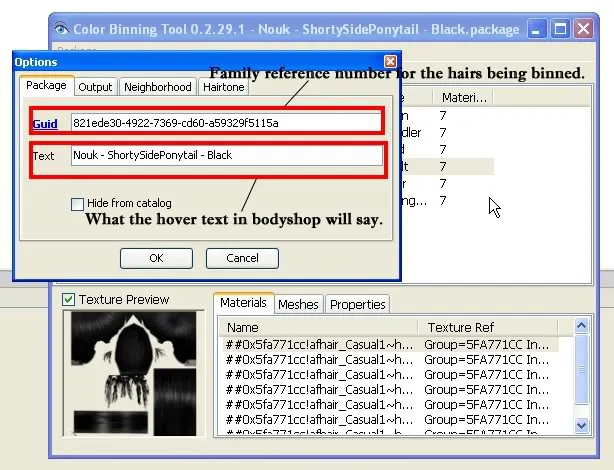
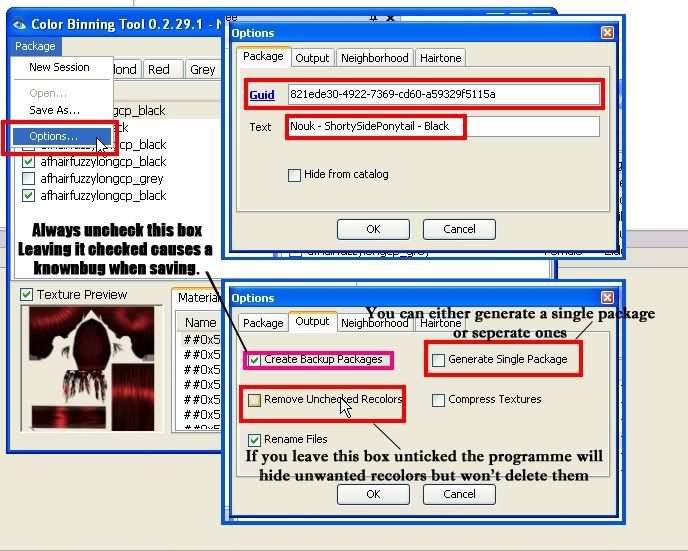
Go to the 'Package' menu and select 'Options' then click on the 'Package' tab.
The 'Guid' is what assigns a hair to a family. When we repackage using the binning tool it changes the other 4/5 colours you are binning so they all use the same Guid and so when you switch for colour to colour in bodyshop the style remains the same.
The 'Text' is what will show up as hovertext in bodyshop when you move the mouse over the thumbnail of the hairstyle. Currently in this case 'Nouk - ShortySidePonytail - Black' will appear over all colours. Therefore I'm going to delete the word 'Black' so they will all read 'Nouk - ShortySidePonytail'
10) Click on the 'Output' tab. This shows us the options for the output. Most important for us is the 'Generate Single Package' tick box. This is a matter of personal preference you can either have the tool combine all the recolors you've opened into one big file or you can generate single packages.
NB. If you do generate single packages and you also chose to have all the colours use one recolor's version of grey remember you need to have that colour in your downloads folder so that the others display properly.
Important! - Leaving ‘Create Backup Packages’ checked causes a known bug that interferes with saving so uncheck it!
Once you've finished playing with the options click on OK.
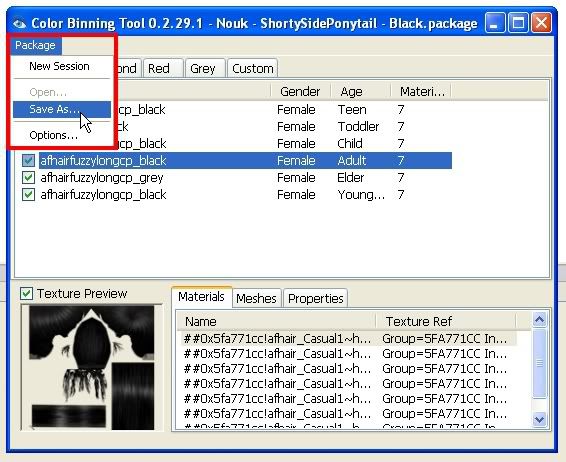
11) We've finished rebinning so now we're going to save.
Go to the 'Package' menu and select 'Save As.'
Give the file a name and save.
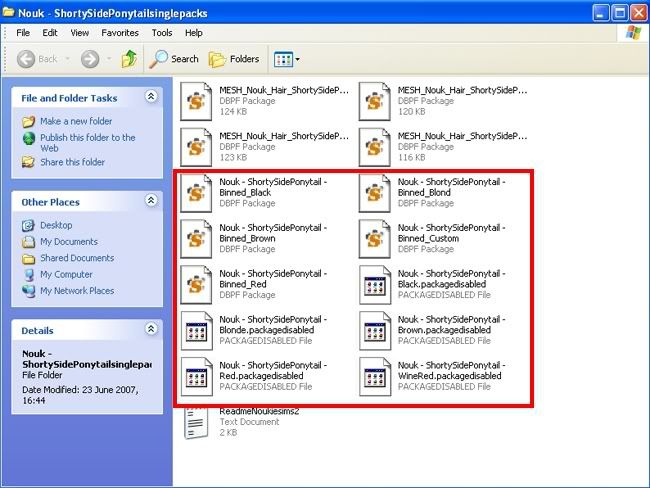
12) As you can see I chose to generate single packages and I now have my 5 newly binned packages plus the 5 original .package files which the binning tool has disabled for me. They're finished!
12) I've put them back in my downloads folder and re-opened bodyshop. I select the custom colour then switch to the others and huzzah it keeps the same style automatically. Also note when I switch the sim to elder only one version of grey appears in the bin.
Of course if you want to bin a hair that has more than 5 colours it becomes slightly more difficult. But as I'm lazy I'll stop now and explain that later.
Download the tut as a word file here (mediafire) or mirrored on sendspace here.