#34 - Trash Tutorial.
Going from:
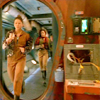
to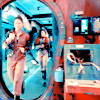
Involves selective coloring. Sorry non-PS users...
Begin with base:
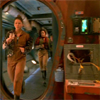
Now, duplicate your base and set the layer to SCREEN as many times as needed (I did mine 5 times). Although for this particular tutorial, you many want to go back and add the SCREEN layers at the end:
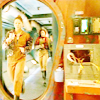
Really bright, right?
Go to Layer>New Adjustment Layer>COLOR BALANCE, enter in:
MIDTONES: -45, -5, 24
NO HIGHLIGHTS OR SHADOWS
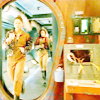
Go to Layer>New Adjustment Layer>BRIGHTNESS/CONTRAST, enter in:
BRIGHTNESS: -49
CONTRAST: 39
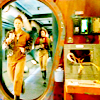
Yay, contrast!
Anways, now it's time for the annoying selective color part. I'm really sorry for all the numbers, but as you can see, this tutorial is pretty short, so bear with it, please.
Go to Layer>New Adjustment Layer>SELECTIVE COLOR, enter in:
REDS: -100, 27, -22, 16
YELLOWS: 100, -30, -100, 39
GREENS: 100, 15, -65, 29
CYANS: 100, -66, -100, 0
BLUES: 100, 11, -49, 61
MAGENTAS: -80, -80, 100, 81
WHITES: 100, 9, -14, 8
NEUTRALS: 18, 3, -14, 5
BLACKS: 0, 0, 0, 100
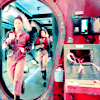
DUPLICATE (CTRL+J) that SELECTIVE COLOR layer, but change:
REDS: 39, -20, 17, 14
YELLOWS: 100, -10, -21, 39
LEAVE ALL OTHERS THE SAME

And it's done! Although, if it's too blue for you (that rhymes), then go to Layer>New Adjustment Layer>HUE/SATURATION, enter in -44 in the CYANS: SATURATION slot.
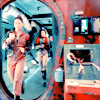
Any questions or comments or results or joining of the community is welcome!!!
****PSD file****
Other examples:

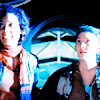
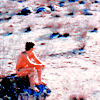

<-that's my favorite :) (it makes me wanna say, "GIRL POWER!")
-Kelsey

to

Involves selective coloring. Sorry non-PS users...
Begin with base:

Now, duplicate your base and set the layer to SCREEN as many times as needed (I did mine 5 times). Although for this particular tutorial, you many want to go back and add the SCREEN layers at the end:

Really bright, right?
Go to Layer>New Adjustment Layer>COLOR BALANCE, enter in:
MIDTONES: -45, -5, 24
NO HIGHLIGHTS OR SHADOWS

Go to Layer>New Adjustment Layer>BRIGHTNESS/CONTRAST, enter in:
BRIGHTNESS: -49
CONTRAST: 39

Yay, contrast!
Anways, now it's time for the annoying selective color part. I'm really sorry for all the numbers, but as you can see, this tutorial is pretty short, so bear with it, please.
Go to Layer>New Adjustment Layer>SELECTIVE COLOR, enter in:
REDS: -100, 27, -22, 16
YELLOWS: 100, -30, -100, 39
GREENS: 100, 15, -65, 29
CYANS: 100, -66, -100, 0
BLUES: 100, 11, -49, 61
MAGENTAS: -80, -80, 100, 81
WHITES: 100, 9, -14, 8
NEUTRALS: 18, 3, -14, 5
BLACKS: 0, 0, 0, 100

DUPLICATE (CTRL+J) that SELECTIVE COLOR layer, but change:
REDS: 39, -20, 17, 14
YELLOWS: 100, -10, -21, 39
LEAVE ALL OTHERS THE SAME

And it's done! Although, if it's too blue for you (that rhymes), then go to Layer>New Adjustment Layer>HUE/SATURATION, enter in -44 in the CYANS: SATURATION slot.

Any questions or comments or results or joining of the community is welcome!!!
****PSD file****
Other examples:


<-that's my favorite :) (it makes me wanna say, "GIRL POWER!")
-Kelsey