#67 - Park Yoochun Tutorial.
Going from:
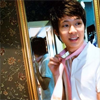
to
Translatable.
1. Begin with base:

2. Duplicate base and set layer to SCREEN (my percentage is at 76%, but this depends on your picture). I also SHARPENED (Filter>Sharpen) the SCREEN layer:

3. Create a new layer filled with #9ad0f1 and set the layer to (COLOR) BURN 100%:

>
4. Create a new layer filled with #eed9c8 and set the layer to SOFT LIGHT 100%:
>
5. Create a new layer filled with #2f2e2e and set the layer to EXCLUSION 100%:

>
6. Go to Layer>New Adjustment Layer>HUE/SATURATION(/LIGHTNESS), enter in:
MASTER: SATURATION: 23
(leave all others alone)

7. Go to Layer>New Adjustment Layer>COLOR BALANCE, enter in:
MIDTONES: 10, -21, 8
SHADOWS: -15, 18, 0
NO HIGHLIGHTS, CHECK PRESERVE LUMINOSITY

8. Go back to your base layer, duplicate it, drag it to the top of your layers, and set the layer to SCREEN 50%:

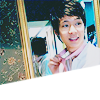
And the coloring is complete~ Now, if you wish to continue...
9. Now, using this texture by me, paste it on top of the layers and set it to SCREEN 100%:

>
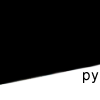
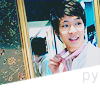
10. In 15pt Arial font, I wrote "py" for Park Yoochun in black, then I RASTERIZED (Layer>Rasterize>Type) the layer, and finally, I MERGED (Layer>Merge Down) the text layer with the texture layer (that's set to SCREEN):
>
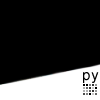
11. Using part of this brush by jougen_no_tsuki, paste it on the texture layer in black:
>
And the icon is done! Comments, questions, and joining/watching the comm is welcome~
(This is also kind of like my previous tutorial, btw)
>>>.PSD file<<< (hopefully it works...)
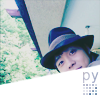
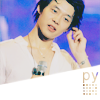
Other examples:
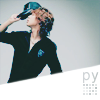

-Kelsey

to

Translatable.
1. Begin with base:

2. Duplicate base and set layer to SCREEN (my percentage is at 76%, but this depends on your picture). I also SHARPENED (Filter>Sharpen) the SCREEN layer:

3. Create a new layer filled with #9ad0f1 and set the layer to (COLOR) BURN 100%:

>

4. Create a new layer filled with #eed9c8 and set the layer to SOFT LIGHT 100%:

>

5. Create a new layer filled with #2f2e2e and set the layer to EXCLUSION 100%:

>

6. Go to Layer>New Adjustment Layer>HUE/SATURATION(/LIGHTNESS), enter in:
MASTER: SATURATION: 23
(leave all others alone)

7. Go to Layer>New Adjustment Layer>COLOR BALANCE, enter in:
MIDTONES: 10, -21, 8
SHADOWS: -15, 18, 0
NO HIGHLIGHTS, CHECK PRESERVE LUMINOSITY

8. Go back to your base layer, duplicate it, drag it to the top of your layers, and set the layer to SCREEN 50%:

And the coloring is complete~ Now, if you wish to continue...
9. Now, using this texture by me, paste it on top of the layers and set it to SCREEN 100%:

>

10. In 15pt Arial font, I wrote "py" for Park Yoochun in black, then I RASTERIZED (Layer>Rasterize>Type) the layer, and finally, I MERGED (Layer>Merge Down) the text layer with the texture layer (that's set to SCREEN):

>

11. Using part of this brush by jougen_no_tsuki, paste it on the texture layer in black:

>

And the icon is done! Comments, questions, and joining/watching the comm is welcome~
(This is also kind of like my previous tutorial, btw)
>>>.PSD file<<< (hopefully it works...)
Other examples:


-Kelsey