Tutorial # 1
This was requested by hyujin, and I hope it is worded well enough for people to follow along. This tutorial is image heavy, so those with dial up might have to wait a few minutes for all images to load. Photoshop 7.0 was used to make this icon, although I'm fairly sure all steps can transfer to older versions or PSP.
We're starting out with THIS image of Larsa Solidor from Final Fantasy XII:
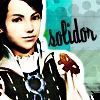
We want to get to this finished product:

Here's how.
STEP ONE:
Open up the image. For this, it's best to use an image with a solid colored background, or a background you can easily erase. If the image you chose has a background, just zoom in and use the eraser tool to get rid of the background, so that it's just the character left. Do some resizing to get the image to the size you want. For the image of Larsa, I shrunk it down to about 200 pixels.
STEP TWO:
Make a new file, 100x100 pixels with a transparent background. Using the wand tool, select the solid colored background and then inverse the selection so that you only have the character selected. Move the selection into the 100x100 icon. Situate the subject wherever you'd like them to be, that part is entirely up to you and what you think looks best.
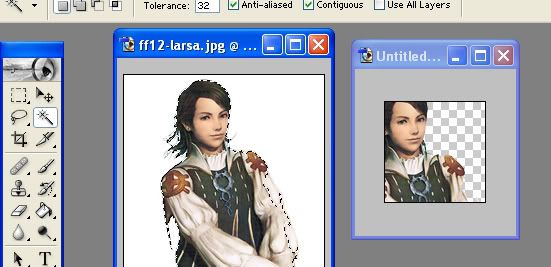
STEP THREE:
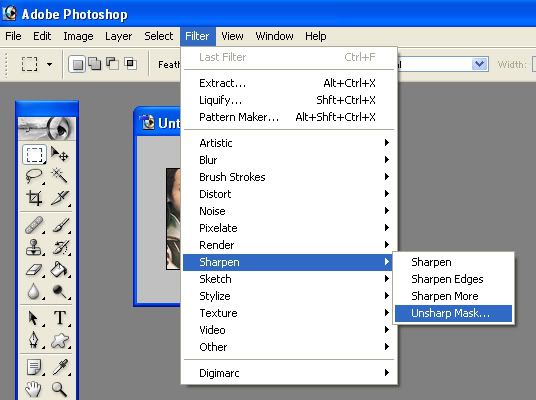
Now that you have your subject in place, go to Filter > Sharpen > Unsharp Mask.
Once you open up the Unsharpen Mask screen, make sure the little box off to the right that says Preview is checked. That way, you can see the changes you're making before you press okay. The numbers that I used for the image of Larsa may not be the right numbers for your image, if you're using a different one. I don't reccommend going any higher than 60 for the Amount and about 15 for the Radius. Here are the exact numbers I used.
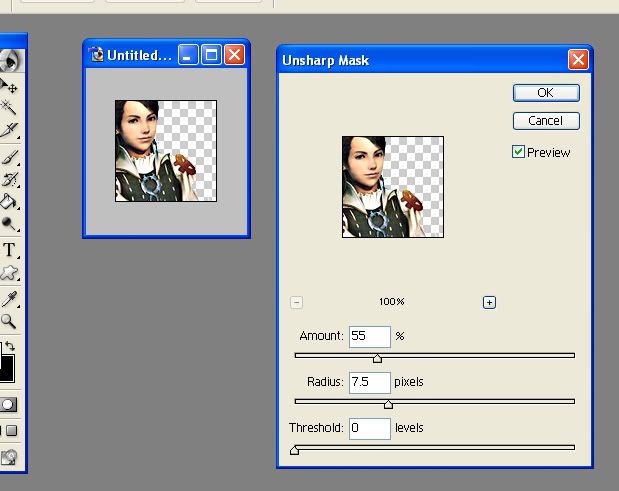
Once you get the image to look more bright and colorful (but not overly red/orange/yellow, or too blinding) click okay.
STEP FOUR:
Once you've completed the Unsharp Mask, go ahead and duplicate the layer. Set the new layer to hard light. Duplicate the layer one more time, and make sure this one is set to hard light as well. You should have three layers of your image total. The base, and two set on hard light. Make sure that you're working with the top layer (which should be on hard light), and then go up to your menu and go to Image > Adjustments > Desaturate.
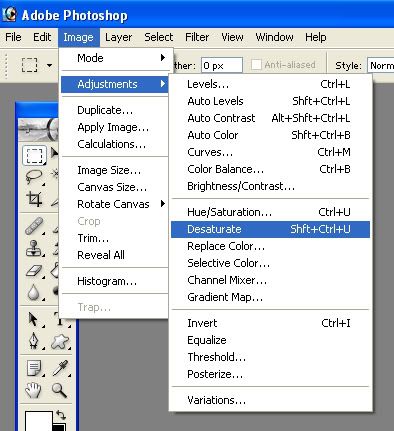
You should notice a big change in the coloring. You may need to decrease the opacity of this layer. I had to bring mine down to about 70%.
STEP FIVE:
Whee. You've got the main focus of the icon taken care of, so let's move along to the background and finishing touches.
I used THIS texture by gender. You can use whatever you'd like, whatever you think looks best. Sometimes, I have to fiddle around and sample quite a few backgrounds before I find a texture that I think goes decently.
Once you've decided on a background, place it down below the first layer of Larsa (or whoever you're making an icon of). Once the background is in place, I like to use a 5 point solid brush and draw an outline around Lara. To do this, I just make a new layer above the background, but below Larsa. I zoom in about 200% and then use the paintbrush to draw an outline. I'm sure there are other ways of doing this, but this is the way I've found to be easiest and quickest.
Once the outline is in place, use the text tool to type whatever you'd like. I happened to decide to use Larsa's last name, and I used dyspepsia set on strong, at 36pt. Once I had typed in what I wanted, I used the arrow tool to tilt the text just a bit, and that's that.
Here's my final product:

Here are a few other icons I made using the same process.
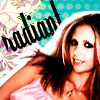
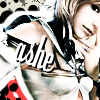
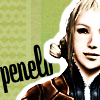
This process does not work well on most images of real people. It works best with images of cartoon, anime, and video game characters. You have to fiddle around with curves and saturation in order to get images of real people to end up looking right using these steps. Of course, you can skip the layers of hard light and desaturation, and just go from there if you'd like. :D
This was incredibly long, but I hope it helps!
We're starting out with THIS image of Larsa Solidor from Final Fantasy XII:
We want to get to this finished product:
Here's how.
STEP ONE:
Open up the image. For this, it's best to use an image with a solid colored background, or a background you can easily erase. If the image you chose has a background, just zoom in and use the eraser tool to get rid of the background, so that it's just the character left. Do some resizing to get the image to the size you want. For the image of Larsa, I shrunk it down to about 200 pixels.
STEP TWO:
Make a new file, 100x100 pixels with a transparent background. Using the wand tool, select the solid colored background and then inverse the selection so that you only have the character selected. Move the selection into the 100x100 icon. Situate the subject wherever you'd like them to be, that part is entirely up to you and what you think looks best.

STEP THREE:
Now that you have your subject in place, go to Filter > Sharpen > Unsharp Mask.

Once you open up the Unsharpen Mask screen, make sure the little box off to the right that says Preview is checked. That way, you can see the changes you're making before you press okay. The numbers that I used for the image of Larsa may not be the right numbers for your image, if you're using a different one. I don't reccommend going any higher than 60 for the Amount and about 15 for the Radius. Here are the exact numbers I used.

Once you get the image to look more bright and colorful (but not overly red/orange/yellow, or too blinding) click okay.
STEP FOUR:
Once you've completed the Unsharp Mask, go ahead and duplicate the layer. Set the new layer to hard light. Duplicate the layer one more time, and make sure this one is set to hard light as well. You should have three layers of your image total. The base, and two set on hard light. Make sure that you're working with the top layer (which should be on hard light), and then go up to your menu and go to Image > Adjustments > Desaturate.

You should notice a big change in the coloring. You may need to decrease the opacity of this layer. I had to bring mine down to about 70%.
STEP FIVE:
Whee. You've got the main focus of the icon taken care of, so let's move along to the background and finishing touches.
I used THIS texture by gender. You can use whatever you'd like, whatever you think looks best. Sometimes, I have to fiddle around and sample quite a few backgrounds before I find a texture that I think goes decently.
Once you've decided on a background, place it down below the first layer of Larsa (or whoever you're making an icon of). Once the background is in place, I like to use a 5 point solid brush and draw an outline around Lara. To do this, I just make a new layer above the background, but below Larsa. I zoom in about 200% and then use the paintbrush to draw an outline. I'm sure there are other ways of doing this, but this is the way I've found to be easiest and quickest.
Once the outline is in place, use the text tool to type whatever you'd like. I happened to decide to use Larsa's last name, and I used dyspepsia set on strong, at 36pt. Once I had typed in what I wanted, I used the arrow tool to tilt the text just a bit, and that's that.
Here's my final product:
Here are a few other icons I made using the same process.


This process does not work well on most images of real people. It works best with images of cartoon, anime, and video game characters. You have to fiddle around with curves and saturation in order to get images of real people to end up looking right using these steps. Of course, you can skip the layers of hard light and desaturation, and just go from there if you'd like. :D
This was incredibly long, but I hope it helps!