Tutorial #3 - Double Will Character Icon Tutorial
Here is the promised tutorial for the character icons that I made that can be found here. It's for PSP but Im pretty sure it can be translated to PS. I'll do a double tutorial. One for the image on the left like this
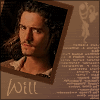
and one for the image one the right like this
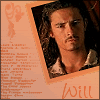
Seen as I got a request for some more Will turner icons, Ill do two of him for the tutorials. Here goes.
You'll be making these two icons. We'll call them W1 and W2.
W1
W2
This tutorial is so very easy, that im writing it in my Anger Management (more like cause of anger) and science classes. First off, you choose the image(s) you want to use. Ill use these two.
W1
W2
Crop the picture so its of the persons face. Then resize the image so its around 70x70 pixels. If you're going for W1, while cropping position the face a bit on the right. If you're going for W2, position the face on the left, like so
W1
W2
Now create a new 100x100 white image. copy and paste the pic onto it as a new layer. Now take the selection tool and select the picture like this
W1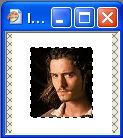
W2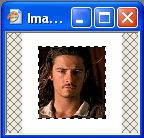
Go to selections > modify > expand. Set it to 5 and click ok. Now choose the fill tool. Choose a color from the image and fill in the selection like this
W1 (#f8ac7a)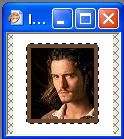
W2 (#6b472d)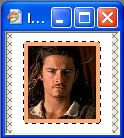
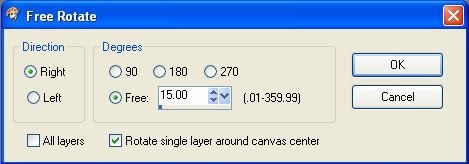
Now the corners will probably look rounded like mine. If so, press Ctrl+D to unselect the image and use the paint brush tool and fill in the corners. Now go to image > rotate > free rotate. If you are going for W1 use these settings
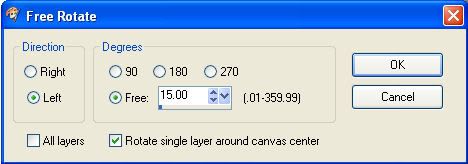
If you're going for W2 use these settings
Move the pic into its respective corner. Now you have this.
W1
W2
Create a new raster layer between the background and raster 1. Fill it with the same color you used for the border for the image, then lower it to 50% opacity.
W1 (#6b472d)
W2 (#f8ac7a)
Now create a new raster layer on top of everything. Fill it with a gradient that goes with the color scheme of your icon. I use these and these gradients from crumblingwalls for most of my icons. For these two Im going to use these.
W1
at 76% opacity W2
at 78% opacity.
Now you should have this
W1
W2
Now create a new raster layer on top of everything. I use this brush
by callmefreak
Now, use the same color you used for the border earlier (W1 #6b472d W2 #f8ac7a)
NOTE 1
If you went for a dark icon like W1, set the brush layer to screen. If you went for a light icon like W2, set the brush layer to multiply.
NOTE 2
If you're going for W1, you'll need to go to image > mirror for the brush layer.
Now you'll have this.
W1
W2
Now erase the parts of the brush on the image of Will. Now you have this
W1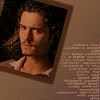
W2
You can fool around with the opacity of this layer. Now time for the text. Take the text tool and type in the text you want. I used "Will" in the font Barbara Hand for both of the icons. For the text to look right, follow NOTE 1. Now you have this.
W1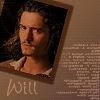
W2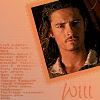
You can now use a small decorative brush in the top left or right corner. I usually use these brushes in different sizes and rotations.


Apply the brush on a new layer and use NOTE 1 again. Then, create a new layer and add a simple 1 px black border and fade it a bit (if you wish). And you're done!
W1
W2
If you have any questions, Please ask! I have two other tutorials that i made in the past.
One for this icon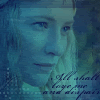
can be found here.
One for this icon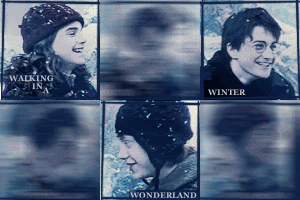
can be found here.
All of my credits can be found on my credits page.
~Lady Maethoriel
'Ú chebin estel anim'

and one for the image one the right like this

Seen as I got a request for some more Will turner icons, Ill do two of him for the tutorials. Here goes.
You'll be making these two icons. We'll call them W1 and W2.
W1

W2

This tutorial is so very easy, that im writing it in my Anger Management (more like cause of anger) and science classes. First off, you choose the image(s) you want to use. Ill use these two.
W1

W2

Crop the picture so its of the persons face. Then resize the image so its around 70x70 pixels. If you're going for W1, while cropping position the face a bit on the right. If you're going for W2, position the face on the left, like so
W1

W2

Now create a new 100x100 white image. copy and paste the pic onto it as a new layer. Now take the selection tool and select the picture like this
W1

W2

Go to selections > modify > expand. Set it to 5 and click ok. Now choose the fill tool. Choose a color from the image and fill in the selection like this
W1 (#f8ac7a)

W2 (#6b472d)

Now the corners will probably look rounded like mine. If so, press Ctrl+D to unselect the image and use the paint brush tool and fill in the corners. Now go to image > rotate > free rotate. If you are going for W1 use these settings

If you're going for W2 use these settings

Move the pic into its respective corner. Now you have this.
W1

W2

Create a new raster layer between the background and raster 1. Fill it with the same color you used for the border for the image, then lower it to 50% opacity.
W1 (#6b472d)

W2 (#f8ac7a)

Now create a new raster layer on top of everything. Fill it with a gradient that goes with the color scheme of your icon. I use these and these gradients from crumblingwalls for most of my icons. For these two Im going to use these.
W1

at 76% opacity W2

at 78% opacity.
Now you should have this
W1

W2

Now create a new raster layer on top of everything. I use this brush

by callmefreak
Now, use the same color you used for the border earlier (W1 #6b472d W2 #f8ac7a)
NOTE 1
If you went for a dark icon like W1, set the brush layer to screen. If you went for a light icon like W2, set the brush layer to multiply.
NOTE 2
If you're going for W1, you'll need to go to image > mirror for the brush layer.
Now you'll have this.
W1

W2

Now erase the parts of the brush on the image of Will. Now you have this
W1

W2

You can fool around with the opacity of this layer. Now time for the text. Take the text tool and type in the text you want. I used "Will" in the font Barbara Hand for both of the icons. For the text to look right, follow NOTE 1. Now you have this.
W1

W2

You can now use a small decorative brush in the top left or right corner. I usually use these brushes in different sizes and rotations.


Apply the brush on a new layer and use NOTE 1 again. Then, create a new layer and add a simple 1 px black border and fade it a bit (if you wish). And you're done!
W1

W2

If you have any questions, Please ask! I have two other tutorials that i made in the past.
One for this icon

can be found here.
One for this icon

can be found here.
All of my credits can be found on my credits page.
~Lady Maethoriel
'Ú chebin estel anim'