ICON TUTORIAL!!!
HI!!!
how are you guys??? doing good?? hope so, i'm dong great! :D hehe i've just finished some shores ,and i'm back with you to gave you this "lovely" tutorial i made a couple of days ago
so here it goes... :D
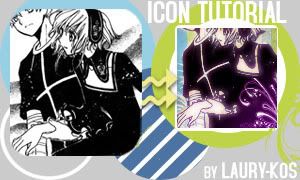
-Made with ps CS
-Textures
-Layer mask use
-Translatable
-I took this image from Tsubasa Rc manga chap 142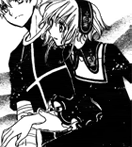
(so damn cute)
-Open a new document , size 100x100
-Take this Texture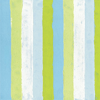
by sanami276
-Then create a new layer , use this brush
#FFFFFF by ca_pris
-Paste your manga image, resize it and crop it the way you like it :) ,sharpen if necessary.
-Now , i have to erase the withe background for my image, so the texture can be seen , go layer>create a new layer mask>reveal All ; erase the white parts so you can see the texture behind :).
-how does a layer mask work?,when you create layer mask for any layer,it will create a new "white layer" besides it, then your color palete will only be "black and white" ,it's very easy in fact,:
+use a round brush (always use the brushes).
+black color brushes will allow you to "erase" parts of the image;the real thing is that it only hides it ,like a mask :).
+white color brush will be use anytime you think you have "erase" to much, change your color brush to white to make appear your image again :).
-Create a new layer, set as multiply i used %52 it depends, took a rounded brush and i started to paint the skin of sakura&syaoran ,i used #FBE5BD
-Paste this texture
made by reve_lucide set as multiply %65
-Paste this gradient
made by ??? set as Lighten 100%
-Paste this other gradient
,set as Lighten 53%
-Now create a new layer set as normal , i used this brush
also made by ca_pris color #FFFFFF ,put it where ever you want to :3.
-Duplicate you base(your base can be diplicate with the layer mask , but if you don't like it ,you can erase it from your base go layer>remove layer mask>apply),bring it to the top, set as Overlay %100.
-To the dupliacted base, go filter>guassian blur, i used like 1.8 , set as you like, but don't go over 4.5!.
~almost done..
-Create a new adjustment layer Brightnes & Contrast
+Brightness -5 Contrast +3
-Create a new adjustment layer Hue/saturation
+Master saturation +8 Yellow +13
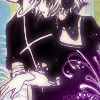
And your are done!!! *teeheee* , you can add Text, light textures, what ever, i hope you guys like it :D.
Tips:
+not copy exactly , it depends on your image, but it works with every kind.
+it all depends on your taste.
+Keep working with the layer mask is so useful!.
*Questions?? comments??? anything?? :D don't hesitate to tell me!
you are free to FRiend ME :D <3
MY OTHER TUTORIALS [ check them out ;)]

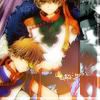
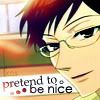
COMMENTS ARE LOVE
THANKS FOR PASSING BY
<3
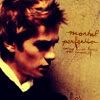
Other icons made with this tutorial:
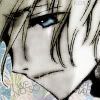
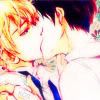
how are you guys??? doing good?? hope so, i'm dong great! :D hehe i've just finished some shores ,and i'm back with you to gave you this "lovely" tutorial i made a couple of days ago
so here it goes... :D

-Made with ps CS
-Textures
-Layer mask use
-Translatable
-I took this image from Tsubasa Rc manga chap 142

(so damn cute)
-Open a new document , size 100x100
-Take this Texture

by sanami276
-Then create a new layer , use this brush

#FFFFFF by ca_pris
-Paste your manga image, resize it and crop it the way you like it :) ,sharpen if necessary.
-Now , i have to erase the withe background for my image, so the texture can be seen , go layer>create a new layer mask>reveal All ; erase the white parts so you can see the texture behind :).
-how does a layer mask work?,when you create layer mask for any layer,it will create a new "white layer" besides it, then your color palete will only be "black and white" ,it's very easy in fact,:
+use a round brush (always use the brushes).
+black color brushes will allow you to "erase" parts of the image;the real thing is that it only hides it ,like a mask :).
+white color brush will be use anytime you think you have "erase" to much, change your color brush to white to make appear your image again :).
-Create a new layer, set as multiply i used %52 it depends, took a rounded brush and i started to paint the skin of sakura&syaoran ,i used #FBE5BD
-Paste this texture

made by reve_lucide set as multiply %65
-Paste this gradient

made by ??? set as Lighten 100%
-Paste this other gradient

,set as Lighten 53%
-Now create a new layer set as normal , i used this brush

also made by ca_pris color #FFFFFF ,put it where ever you want to :3.
-Duplicate you base(your base can be diplicate with the layer mask , but if you don't like it ,you can erase it from your base go layer>remove layer mask>apply),bring it to the top, set as Overlay %100.
-To the dupliacted base, go filter>guassian blur, i used like 1.8 , set as you like, but don't go over 4.5!.
~almost done..
-Create a new adjustment layer Brightnes & Contrast
+Brightness -5 Contrast +3
-Create a new adjustment layer Hue/saturation
+Master saturation +8 Yellow +13
And your are done!!! *teeheee* , you can add Text, light textures, what ever, i hope you guys like it :D.
Tips:
+not copy exactly , it depends on your image, but it works with every kind.
+it all depends on your taste.
+Keep working with the layer mask is so useful!.
*Questions?? comments??? anything?? :D don't hesitate to tell me!
you are free to FRiend ME :D <3
MY OTHER TUTORIALS [ check them out ;)]
COMMENTS ARE LOVE
THANKS FOR PASSING BY
<3
Other icons made with this tutorial: