tutorial #3
OK, today we'll do from this to 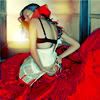
I did with this tuto many & many icons, I thinks it's really simple and beatiful
Requested by threeeyespei princesslaurina
Made in PS CS
Just 7 step
Rules & Notes:
[-] if you like this tut, comment please, it make me happy ^__^
[--] if something don't come out just ask me
[---] don't take this icons and tut as your own
[----] if you like this and other tuts, you are really welcome to friend me ;)
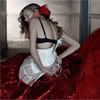
O1. crop, rotate and do what you want
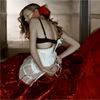
O2. create a new Color Balance layer:
Midtones (-10; -15; -20)
Shadows (10; 5; -10)
Highlights (0; 0; 0)
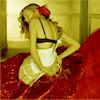
O3. create a new layer, fill it with #fffc00,
and change the layer mode to Soft Light
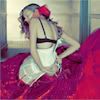
O4. create a new Selective Color layer:
Reds (-100; 0; 100; 100)
Yellows (-25; 0; -30; 0)
Magentas (-100; -100; -100; 0)
Neutrals (65; -20; -80; 15)
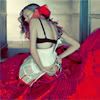
O5. create a new Selective Color layer:
Reds (-100; 100; 100; 100)
Yellows (0; 0; -65; 0)
Neutrals (0; 0; 0; 15)
Blacks (0; 0; 0; 20)
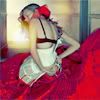
O6. drag this texture (by Sanami276), set it to Screen

O7. create a new Selective Color layer:
Reds (-70; 15; 100; 100)
Cyans (100; -60: -100: 100)
Blues (0; 0; 0; 100)
Neutrals (10; 0; 10; 0)
Black (0; 0; 0; 100)
Then you are done. Play with it. Than you can add some texts, texture, brushes and etc.
And I would wait your beatiful results ;)
Other examples with the SIMILAR coloring:


I did with this tuto many & many icons, I thinks it's really simple and beatiful
Requested by threeeyespei princesslaurina
Made in PS CS
Just 7 step
Rules & Notes:
[-] if you like this tut, comment please, it make me happy ^__^
[--] if something don't come out just ask me
[---] don't take this icons and tut as your own
[----] if you like this and other tuts, you are really welcome to friend me ;)

O1. crop, rotate and do what you want

O2. create a new Color Balance layer:
Midtones (-10; -15; -20)
Shadows (10; 5; -10)
Highlights (0; 0; 0)

O3. create a new layer, fill it with #fffc00,
and change the layer mode to Soft Light

O4. create a new Selective Color layer:
Reds (-100; 0; 100; 100)
Yellows (-25; 0; -30; 0)
Magentas (-100; -100; -100; 0)
Neutrals (65; -20; -80; 15)

O5. create a new Selective Color layer:
Reds (-100; 100; 100; 100)
Yellows (0; 0; -65; 0)
Neutrals (0; 0; 0; 15)
Blacks (0; 0; 0; 20)

O6. drag this texture (by Sanami276), set it to Screen

O7. create a new Selective Color layer:
Reds (-70; 15; 100; 100)
Cyans (100; -60: -100: 100)
Blues (0; 0; 0; 100)
Neutrals (10; 0; 10; 0)
Black (0; 0; 0; 100)
Then you are done. Play with it. Than you can add some texts, texture, brushes and etc.
And I would wait your beatiful results ;)
Other examples with the SIMILAR coloring:


