Tutorial 3
I'm going to show you how to make this in Gimp.
It's pretty simple and very quick. I'm going to try and explain it as best as I can. You can always ask questions.
STEP 1
The first thing we have to do is get our base ready. We'll be using this texture by Hybrid Genesis(I think) as our base.
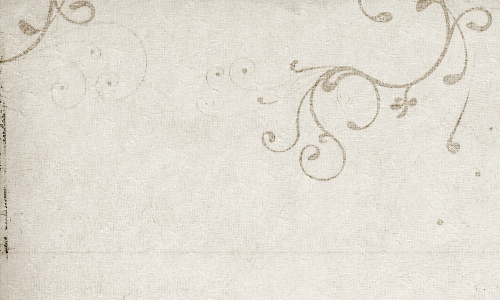
Crop out a section of the texture 500x300. You should have something like this.
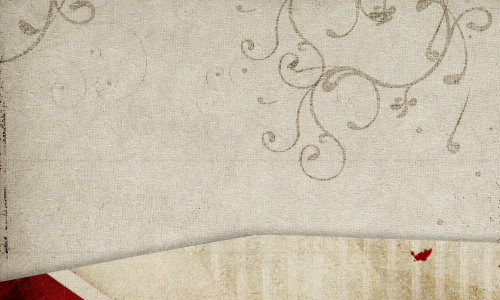
Then you're going to paste the same texture over the cropped one. Set it to Multiply at 100. Move it around until you find a style that you like. Here's what my base looks like now.
STEP 2
Go ahead and color your images. It doesn't matter what you do. I have three images going into the animation not counting the image in the base.
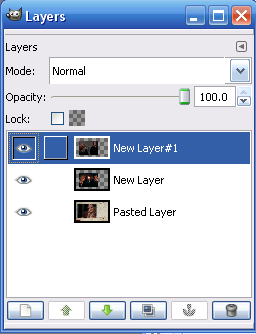
After you're finished coloring your images go ahead and resize the images so they're small enough to fit onto the banner. I think mine were around 300x222 but I'm not completely sure. Make three new layers(depending on how many pictures you have)and paste all of your images on the banner. Make sure they're exactly on top of each other or it will look really weird. You will also have to have the first image(the one right above the base in the layers palette)merged down with the base. Just like this:
STEP 3
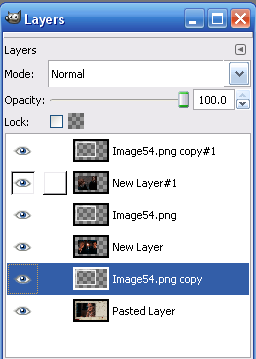
It looks very boring so I'm going to add a frame to go around the animation using this texture(please tell me if you know who made it). Just open it as a layer. Then duplicate it two times so there are three frames in the layers palette. You're going to have to put a frame over each image you have. Just like here
Before duplicating the frame make sure it's over the images and fits in alright and then you can duplicate the frame without having to move it.
Then right click in the layers palette and merge down the frames.
STEP 4
I still think it looks too plain so I got another image of Ron and Hermione. I colored it and then cut out the background.(I did all the cutting and coloring in PSP because I don't get along well with Gimp)
I resized it a bit and put it towards the side. Now, I wanted the picture to be in front of the whole animation. I duplicated the new image two times and placed them above each images like I did with the frame in Step 2. Just like this:
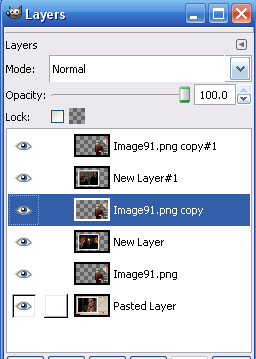
Merge down the new images just like you did with the frames.
STEP 5
Now go to Filters-->Animation-->Optimize for GIF
A new image should pop up. Click on it and then go to the layers palette. It should look something like this:
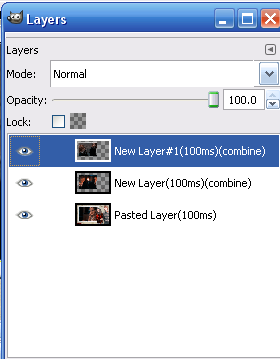
You're going to have to change it because the animation will go way too fast. Double click on the layers and change each of the to 1000(or whatever speed you would like).
STEP 6
That's it! Now all you have to do is save it. Remember to save it as a gif. Match your settings with mine:
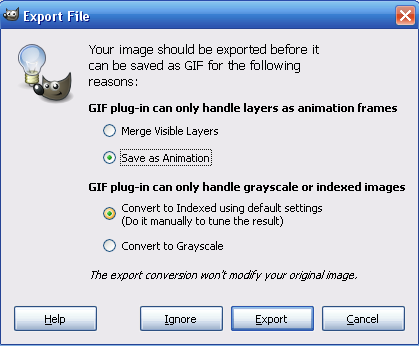
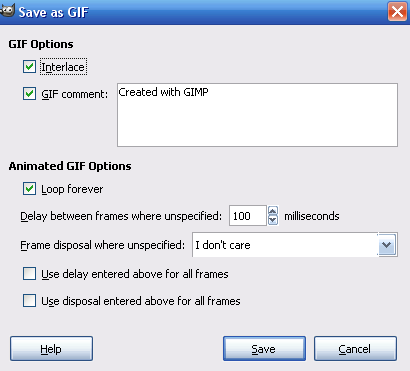
If you're having any trouble at all just ask and I'll try to help.
It's pretty simple and very quick. I'm going to try and explain it as best as I can. You can always ask questions.
STEP 1
The first thing we have to do is get our base ready. We'll be using this texture by Hybrid Genesis(I think) as our base.
Crop out a section of the texture 500x300. You should have something like this.

Then you're going to paste the same texture over the cropped one. Set it to Multiply at 100. Move it around until you find a style that you like. Here's what my base looks like now.

STEP 2
Go ahead and color your images. It doesn't matter what you do. I have three images going into the animation not counting the image in the base.
After you're finished coloring your images go ahead and resize the images so they're small enough to fit onto the banner. I think mine were around 300x222 but I'm not completely sure. Make three new layers(depending on how many pictures you have)and paste all of your images on the banner. Make sure they're exactly on top of each other or it will look really weird. You will also have to have the first image(the one right above the base in the layers palette)merged down with the base. Just like this:

STEP 3
It looks very boring so I'm going to add a frame to go around the animation using this texture(please tell me if you know who made it). Just open it as a layer. Then duplicate it two times so there are three frames in the layers palette. You're going to have to put a frame over each image you have. Just like here

Before duplicating the frame make sure it's over the images and fits in alright and then you can duplicate the frame without having to move it.
Then right click in the layers palette and merge down the frames.
STEP 4
I still think it looks too plain so I got another image of Ron and Hermione. I colored it and then cut out the background.(I did all the cutting and coloring in PSP because I don't get along well with Gimp)
I resized it a bit and put it towards the side. Now, I wanted the picture to be in front of the whole animation. I duplicated the new image two times and placed them above each images like I did with the frame in Step 2. Just like this:

Merge down the new images just like you did with the frames.
STEP 5
Now go to Filters-->Animation-->Optimize for GIF
A new image should pop up. Click on it and then go to the layers palette. It should look something like this:

You're going to have to change it because the animation will go way too fast. Double click on the layers and change each of the to 1000(or whatever speed you would like).
STEP 6
That's it! Now all you have to do is save it. Remember to save it as a gif. Match your settings with mine:


If you're having any trouble at all just ask and I'll try to help.