Casting and molding in fiberglass
Safety:
Gloves: ALWAYS wear gloves while handling resin and fiberglass cloth/mat. Disposable gloves are preferable, as they will become gummed up horribly with the resin, and little flaked off glass pieces, and such. To APPLY fiberglass, you don't really need anything heavy duty. Thin latex gloves work for me. Once it has hardened, you will want something more thick to protect against glass splinters. When you are wrking with theraw materials, gloves are absolutely not an option. Once it is all set up and hardened, protective gloves depend on your personal preferance, just eb ready to get some glass splinters in your fingers if you choose not to.
Goggles: For safety's sake, it's a good idea to use goggles while working with hardened resin. I'v never had a shard break off and launch itself for my eyeball, but hey' it could happen. It would also be quite terrible to have the dust suddenly blow up into your eyes. If you wear contact lenses normally, either wear goggles over them, or switch to your spectacles. If glass particles got under the lens, no good could ever come of it.
Dust mask: ABSOLUTELY MUST BE WORN while sanding. Your body can not break down glass. If you inhale glass particles, those that do not get caught up and cleanaed away in your mucous are going to live in your lungs forever. Make sure that you pick up a dust mask that is rated for working in fiberglass. The ratings should be listed on the back of the packaging. Some people recommend respirators. This seems excessive to me, but it truely would be the most safe thing.
Heat: Resin hardens through a chemical process that makes it EXTREMELY hot. Hot enough to melt through thin plastic cups (oops) and foam brushes (......oops....) it also just generally enjoys dissolving things. Make sure that you put your fiberglass in a stury container. I recommend a thick but flexible bowl shaped container. You can make oz markings yourself, and you can flex and break the fiberglass out after it hardens with each batch. Do not add an excess amount of catalyst. This can apparently actually heat the resin to the point that it ignights it's own fumes.
Chemicals: As mentioned, resin likes to eat through things. This includes your skin. The catalyst is also apparently very very corrosive. Point is, don't get this stuff on your skin. Wear gloves and be careful with it. Also, use a drop cloth. I favor those with felt on one side and plastic on the other. The felt top will stop the liquid from flowing out, and the plastic keeps it from seeping through.
Fumes: Resin makes 'em. Work in a well ventilated area, preferably outside. Make sure that in advance you pick out a place where your project can stay outside for a few weeks until the resin COMPLETELY cures (It will get hard very very very fast, but after that, takes a few weeks to reach complete hardness. During this time it CAN become warped if you put weird stress on it, so be cautious) until it is completely cures, it will continue to release stink particles, and your family will hate you. These particles will fill your whole home, regardless of the size of your project, or your home, and they will whine about it every time they walk into the house. >_<
Weather conditions: Not so much a safety issue, but it works here with the other anecdotes. Resin sets up differently accordign to temperature and humidity. Make sure you play with this stuff in advance to see how it specifically needs to be tweaked for your area. Exposure to sunlight will over time set fiberglass up. This means if you store it in a clear container outside, you will get a solid death mass of unsuable substance (oops) this also means that your projects will set up more quickly and with better quality if you leave them in the sun. This shoudl be fter they are taken out of the latex mold, as latex haaaate sunshine. Fiberglass will not set up in the cold. This means you should plan your fiberglassing projects during the warmer months, or if you HAVE to do it in the winter, find a heated garage you can keep it in, or bring a prtable heater outside and put it near your fiberglass project.
IF YOU SKIPPED THAT PLEASE GO BACK AND READ IT. YOU ARE DEALING WITH CHEMICALS THAT CAN AND WILL BURN OFF YOUR SKIN.
Okay, now onto the topic! There are some fantastic tutorials out there on how to laminate fiberglass on top of an object, to lend it stregth. This works out wonderfully for most applications, and is MUCH easier and cheaper than the method outlined here. This is for if you want to make MULTIPLE CASTINGS of a fiberglass object (perhaps you have a team of Anbu and want perfectly matched masks) or are trying to make a HIGHLY DETAILED cast, and do not want to do so by layering other substances on top of a sturdy fiberglass base. This is also useful if you want to work with a material that is unsuitable to be used as a prop (oil based clay, heavy woods, fragile foams, etc).
Materials:
Base object/scupture/whatever
Brush on latex (can be found at Hobby Lobby, and special FX makeup supply places)
Brush for Latex (can be rinsed, but almost ends up pretty junky looking by end of project. Don't use your nice brush. Foam brushes also work well or latex)
Cheesecloth (optional, gives strength to your latex mold. Super cheap. worth it.)
Plaster of Paris (huge bags of the stuff can be picked up at Home Depot for cheaaaap.)
Retaining wall (to keep your plaster from wreaking havok on your kingdom. I use my old legos. <3)
Fiberglass Cloth/Mat (cloth is easier to form shapes with, mat is stronger. Cloth is suitable for most cosplay projects)
Fiberglass Resin (comes in a huge jug. Usually near bondo. Ask empolyees where the bondo is. Asking where the fiberglass is will confuse them.)
Extra Catalyst (fiberglass almost always comes with catalyst. But it's never enough for the huge jug.)
Disposable gloves (for while you apply the fiberglass)
Sturdy gloves (optional, for handling cured fiberglass)
Goggles (optional again)
Dust mask (SO not optional)
Container to mix resin in (get something with flexible sides. It's great if it already comes with oz markings, if not, you cn put them there your self, or carve in notches or whatever.
Junky brushes (In the glue section of Home Depot, they sell a 6 pack of crappy tin brushes. They are the best thing for fiberglass EVER. Suoper cheap. I love them. Some employees may not know where they are, on account of them being so filthy and worthless.)
Sand paper (In HEAVY grit. you'll need this to trim up the piece
Heavy duty scissors (To cut through the cloth. can also be used on cured fiberglass cloth sometimes. Don't use the nice ones. Seriously. You're cutting glass.)
Bondo (technically, an option, but I ALWAYs end up with mistakes to fill in. Some people use wood putty.)
Language for the purpose of this tutorial:
Object: The original item, sculpture, etc that you wish to make a fiberglass copy of.
Mold: Negative copy of the original object. A mold is in the opposite shape of what you want your final object to be in. It is laid over the original object.
Cast: Copies that come out of the mold, and the process of making those copies. These will be identical to the original object.
Step1! Your basic object
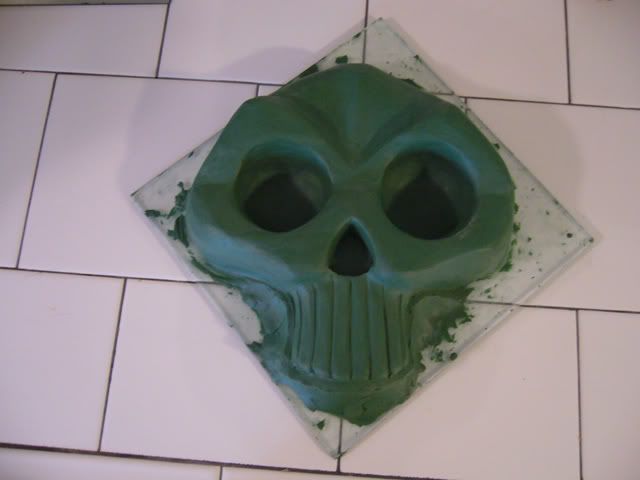
Today, I'm going to be demonstrating on a clay sculpt of the skull codpiece for Izzy Sparks. Do NOT put petroleum jelly on anything you will make a latex cast of. The petrol will eat the latex, they hate each other. You may notice that around the jaw line of the mold, it becomes suddenly hideous and weird. That is a retainign wall. My mask ends there at a much higher place than the back of the mask. To keep me from having to deal with paster leaving under the mask or whatever, a big hideous peice of clay juts out from the side at a very obvious angle. This will be trimmed off. The Skull is sitting on the same surface I sculpted it on. This turned out to be a hube problem when it came time to pull everything off. I recommend transferring your sculpt onto something with a flexible back, like wax paper, seran wrap, a taped down rubbish bag, etc. Latex doesn't really bond to much, so you usually don't need anything to help you separate the latex mold from your original object (called a "release agent") just gently peel the latex free.
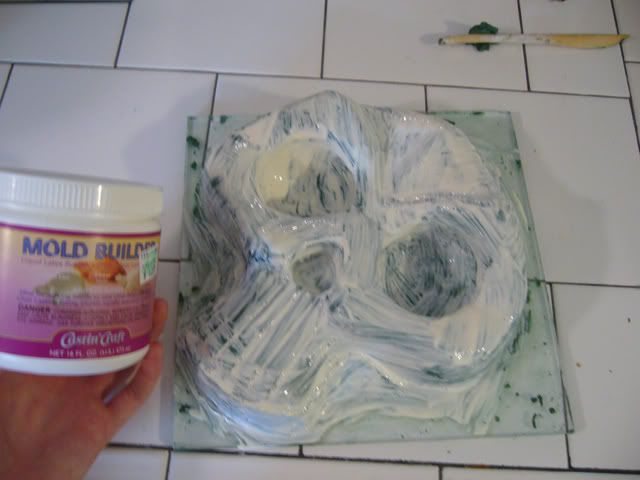
Step 2! Latex is brushed on. Very boring. Do your best to prevent air bubbles. I have set up a 10 sided die next to my project to help me keep track of the number of layers I am putting on. I decided I want 10. Each time I brush on another layer, I turn the die so the next number is face up. Brush on latex contains ammonia. The ammonia evaporates, and rubber is left behind. Unfortunately, this means your project will smell terrible. I gave each layer a full day to cure, because I had nothing better to do, and no rush.
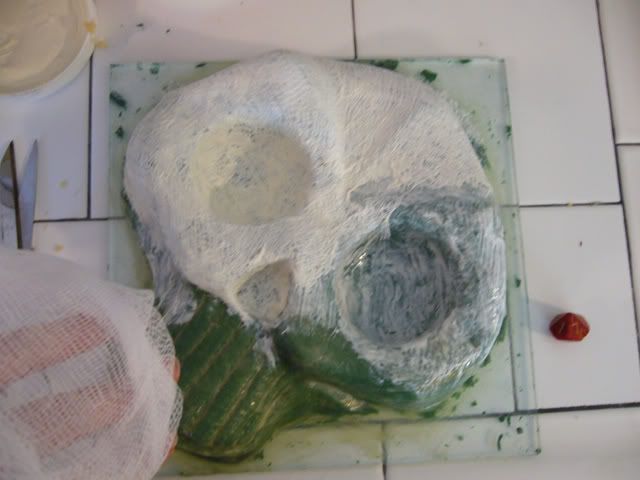
Eventually, I started cutting up peices of the cheesecloth, and laying them out on the freshly brushed layer of latex. This will make the mold very durable. It will be able to last for multiple castings, and will be able to better hold it's shape.
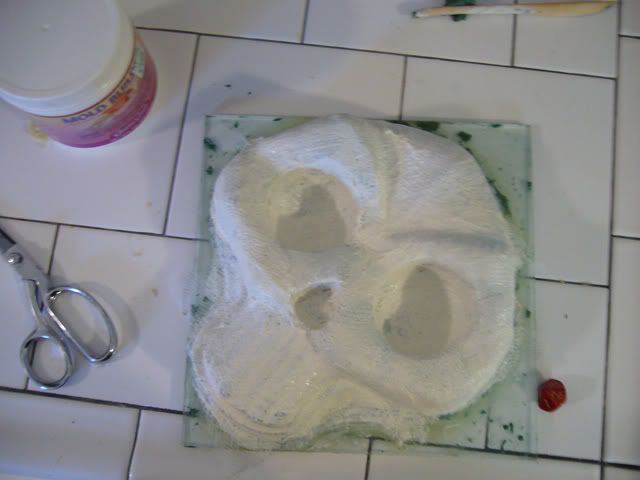
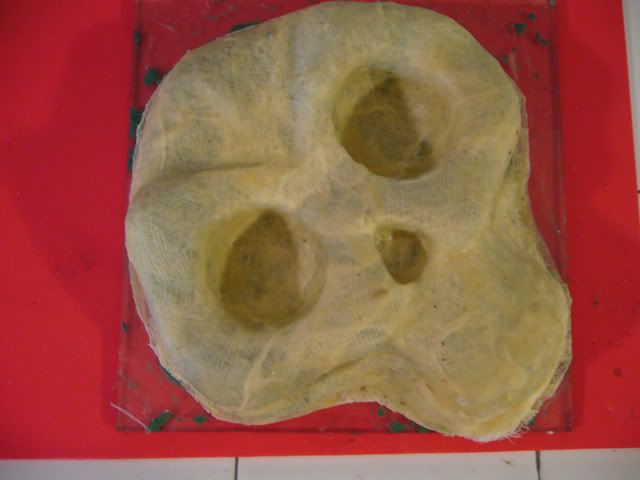
Plese note, the latex is also brushed in the area immediately around my object, about 1/2 an inch in all directions. This will help me separate the mold from the mother mold
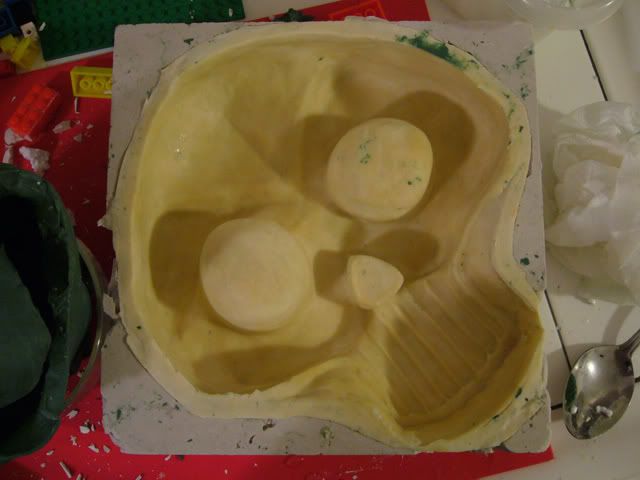
Step 3! Mother mold! Latex is fairly flexible. just squeezing it the hollow object, you will be able to see the shape distort. So what if it distorts while you are making your casts? Unthinkable! For this reason, a mother mold is made. It is a hideous lumpy thing made of a more durable material, in this case, plaster. The plaster will cradle the latex mold, and keep it from warping while you are making the cast, then when the cast hardens, you lift the latex mold out, and just peeeeeel it off the cast.
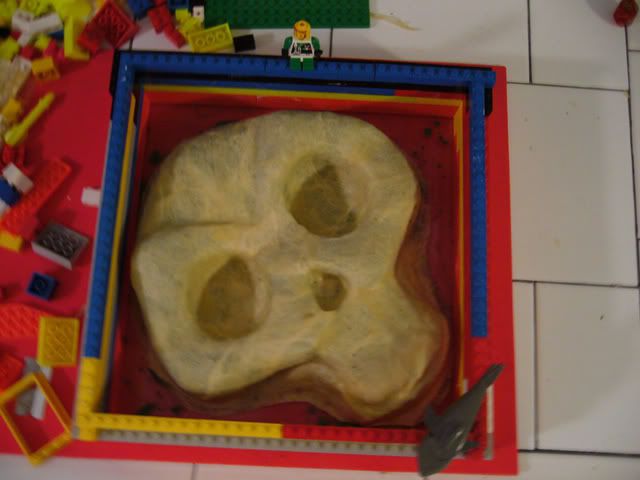
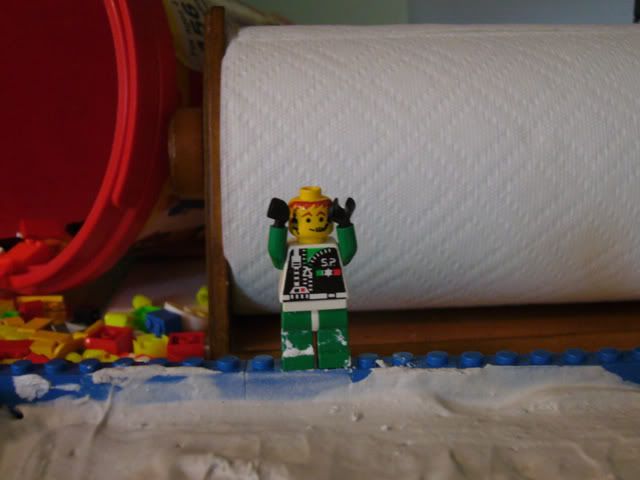
First, a retaining wall must be made. This keeps the plaster from slopping all over your counter. Some people just continually re-pile the plaster on top of itself until it sets up, and that's fine, but your mother mold ends up lump shaped. I like doing it this way because my mother mold ends up with a flat bottom, making it MUCH easier to work with. Legos are my material of choice. Just snap them together in whatever shape outlines your object. Plaster won't adhere to their surface, and can easily be brushed off.
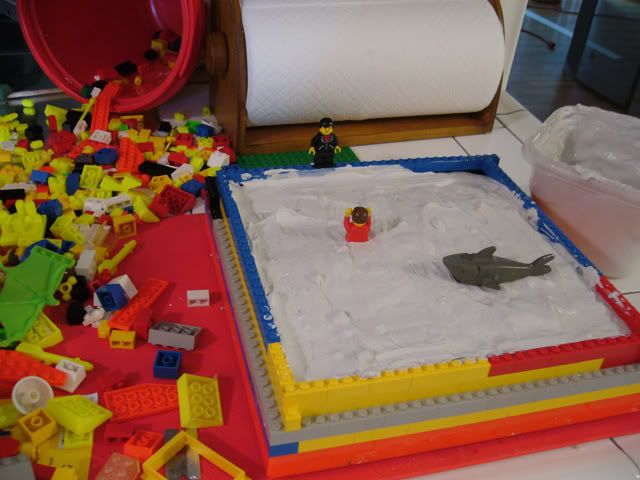
Plaster is poured in! Plaster does not dry, it also cures. Plaster cures by heating up as well. It can also get VERY VERY hot. For this reason, don't do anything insane like dunking your whole forarm in plaster in an attempt to make a cast of it. People have gotten third degree burns from this, and it's horrifying, as the palster is hardening, so you have absolutely no way to get your arm out of the thing that is burning you until you find something to chisel it off. I've heard horror stories. Don't do this. But for today's application, the plaster will be your friendly friend. : D The sack will have instructions on amount of water to plater to mix. Most people ignore these and just mix it back and forth until you have a pancake batter consistancy. I ignore the directions. I'm so hip.
If you';re super defensive of the strutural integrity of your legos, I guess you can put petroleum jelly on them.
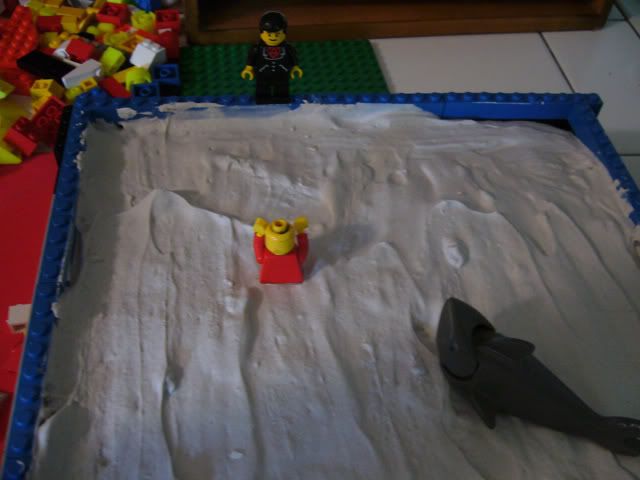
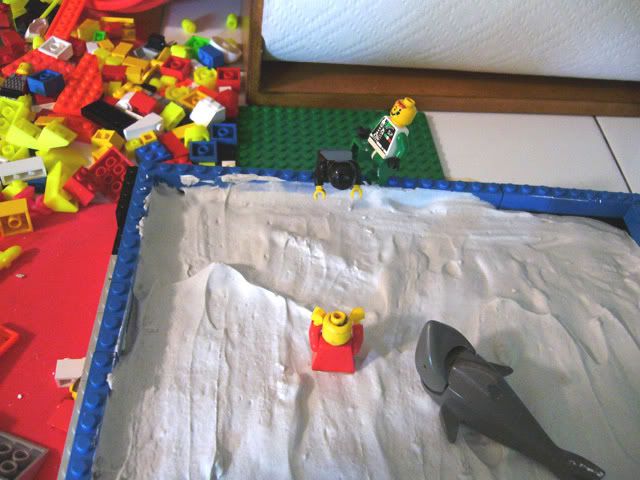
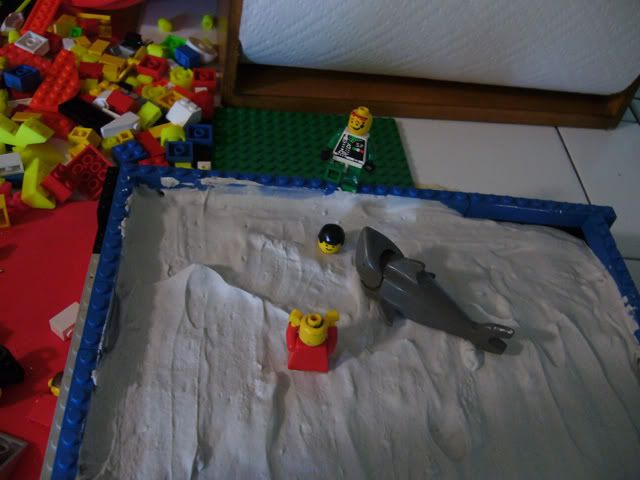
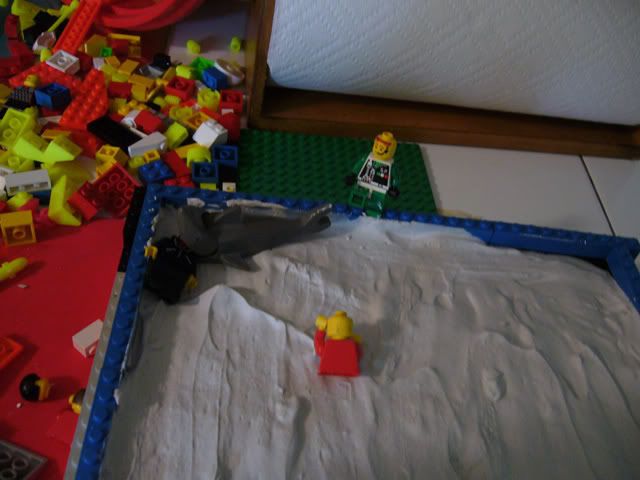
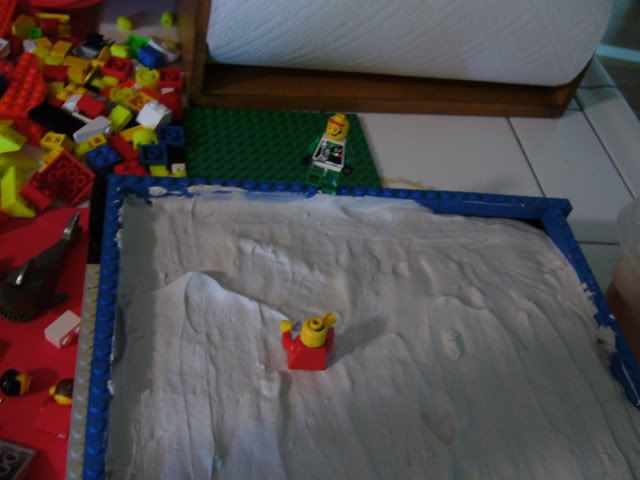
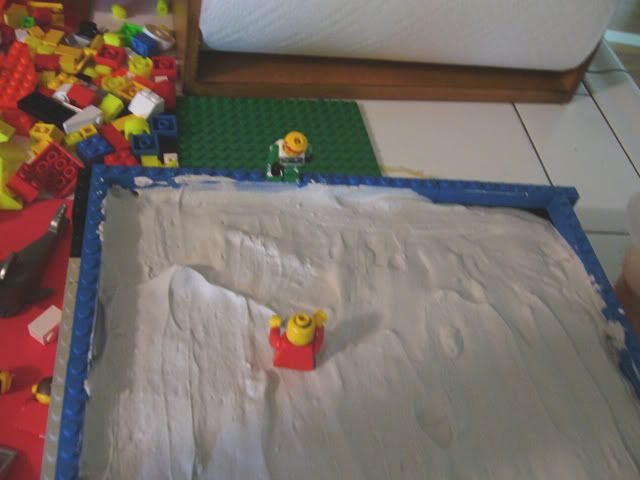
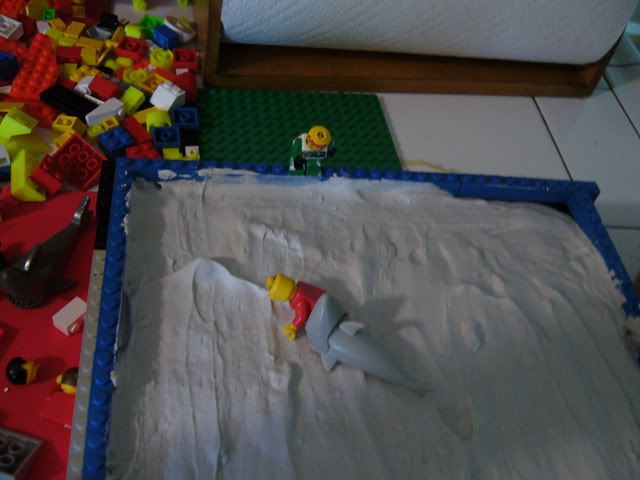
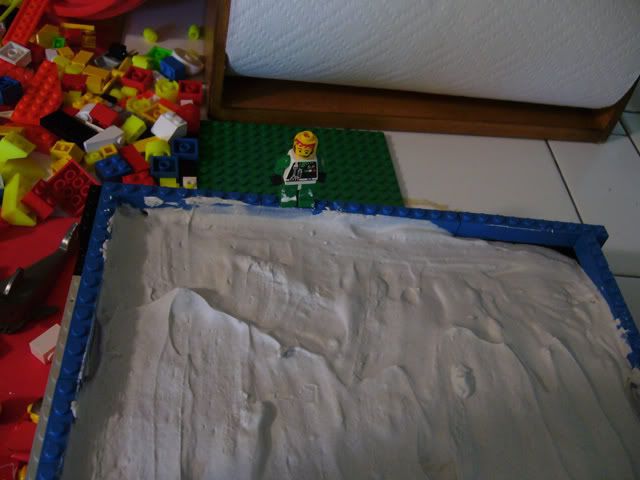
Step 4! Leave it the hell alone!
Let it sit there and reflect on it's life for a day or so. Then flip the whole ordeal over, and gently pry your mold out of the mothermold. With 10 layers of latex : cheesecloth, this mold is pretty forgiving of any abuse it needs to take to be freed. After you get the pieces all separate, put the mold back in the mother mold (you can take the object away now, you're done with it) and leave it for another day or so. The latex has probably absorbed moisture from the mothermold and needs to dry out again.
Step 5! Fiberglass
I can't really handle my camera and my sigerglass death at the same time... and it would be pretty dangerous for my overpriced little piece of digital tech. So ha ha! No real pictures to speak of (I suck) Put on your gloves, cut your cloth (do wear gloves while cutting the cloth, or teeny tiny harmless shards of glass will get in your hands and make your itch) put it all in a junky bowl to keep it from blowing around or scattering, mix yoru resin and catalyst, and get ready for a PARTY HARD. I personally will start with layer of JUST mixed resin. I pour or bush it into the mold, and then just kind of swish the mold slowly around to keep it distributed until it cures and hardens. Usually only takes a few minutes for resin to harden, so either work quickly, or work in small batches (I like small batches) Some people will tunk the cloth in the resin and slap it down that way. Good for covering large areas fast, but adds a LOT of weight to your piece. More resin will not add strength. Resin only needs to be used enough to lightly coat the piece, to fuse the glass together. Once the fiberglass cloth changes color, becomind transparent, that is as much as it needs for strength. Your brushes will inevitably cure into a solid, single death bristle, toss them. Your gloves will get gummed up. Replace them. The resin on the sides of your mixing container will cure. Peel it off and toss it. Take frequent breaks. uncured and cured resin fuse together just fine, so it's not like you need to get ti all done in one go. . 2 layers is sufficient for most cosplay applications. More if you espect it to be under stress Since the codpiece is right where my guitar rests, it will ikely take a lot of banging, even just from walking, so it has extra layers for strentgth, particularly on the thin jaw. Weapons, and peices you will lean on or puch weight on, similarly should probably get more layers. If you need a lot of extra strength, consider using fiberglass mat on the inside layers, for more strength. I've never used more than 4 layers of fiberglass in a prop. Additional layers will weight you down, and add uneccisary strength. You only want as much as you need.
Step 6! The Return of Leave it the hell alone!
Give it a few days to just really reflect upon it's fiberglassiness, and set up. It will make it less likely to warp during the full and complete curing process.
Step 7! Survey the damage!
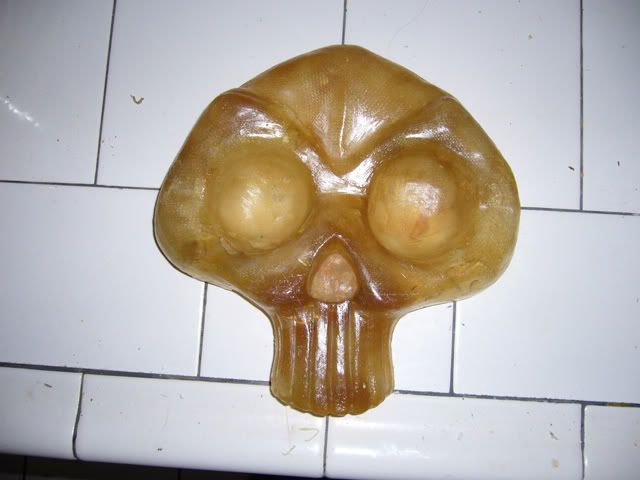
Mold comes out of mothermold. Cast comes out of mold. Look your peice over, see where it will need trimming, take notice of any air bubble holes. These will be filled in with bondo, and sanded back out. Any imperfections/fingerprints, etc left by the original object can be sanded down. Rough edges trimmed up and sanded. Basically, make it all pretty-like. If your peice needs a metallic finish, and thus extensive sanding, wait until it has time to fully cure, and then do the sanding to a glass-like smoothness. before that, it will still be a bit plastic-y and prone to gouging. It is normal for your peice to feel tacky to the touch until it has had time to fully cure. If is stull feels tacky after a week or two, it's likely a humidity issue. Put it in a place with a de-humidifier to help it along. If this place is inside, be forwarned, the fumes are no longer a major threat uless you have a reparatory condition) but it will still stink the place the hell up.
Step 8! Finish up!
I recommend letting it sit around for a few weeks before painting, but it won't majorly degrade in quality or anything like that from not doing so. Fiberglass accept all paints I've played with on it, though I usually just spraypaint. You can drill holes in it, glue it, bake things on it, get it wet, do whatever. You can continue to make casts off yoru mold until it tears, or some part gets stretched out under stress or whatever. If you aren't planning on making a bunch of copies, you won't need your mold as durable as the one i made here (5 layers of latex with 3 of cheesecolth in there should be more than adaquate) but I made this one very sturdy for the purposes of this tutorial.
Please please please post feedback, positive or negative, or anything you feel I need to clarify. Once this tutorial is in it's final form it will be posted to the limit break website, so I'd liiike to hget it all fixed up now, while it's easy to fix, before we need to go making website updates to add details. There is no finished product photo, as I plan on getting that one when the costume is done and being worn.
Gloves: ALWAYS wear gloves while handling resin and fiberglass cloth/mat. Disposable gloves are preferable, as they will become gummed up horribly with the resin, and little flaked off glass pieces, and such. To APPLY fiberglass, you don't really need anything heavy duty. Thin latex gloves work for me. Once it has hardened, you will want something more thick to protect against glass splinters. When you are wrking with theraw materials, gloves are absolutely not an option. Once it is all set up and hardened, protective gloves depend on your personal preferance, just eb ready to get some glass splinters in your fingers if you choose not to.
Goggles: For safety's sake, it's a good idea to use goggles while working with hardened resin. I'v never had a shard break off and launch itself for my eyeball, but hey' it could happen. It would also be quite terrible to have the dust suddenly blow up into your eyes. If you wear contact lenses normally, either wear goggles over them, or switch to your spectacles. If glass particles got under the lens, no good could ever come of it.
Dust mask: ABSOLUTELY MUST BE WORN while sanding. Your body can not break down glass. If you inhale glass particles, those that do not get caught up and cleanaed away in your mucous are going to live in your lungs forever. Make sure that you pick up a dust mask that is rated for working in fiberglass. The ratings should be listed on the back of the packaging. Some people recommend respirators. This seems excessive to me, but it truely would be the most safe thing.
Heat: Resin hardens through a chemical process that makes it EXTREMELY hot. Hot enough to melt through thin plastic cups (oops) and foam brushes (......oops....) it also just generally enjoys dissolving things. Make sure that you put your fiberglass in a stury container. I recommend a thick but flexible bowl shaped container. You can make oz markings yourself, and you can flex and break the fiberglass out after it hardens with each batch. Do not add an excess amount of catalyst. This can apparently actually heat the resin to the point that it ignights it's own fumes.
Chemicals: As mentioned, resin likes to eat through things. This includes your skin. The catalyst is also apparently very very corrosive. Point is, don't get this stuff on your skin. Wear gloves and be careful with it. Also, use a drop cloth. I favor those with felt on one side and plastic on the other. The felt top will stop the liquid from flowing out, and the plastic keeps it from seeping through.
Fumes: Resin makes 'em. Work in a well ventilated area, preferably outside. Make sure that in advance you pick out a place where your project can stay outside for a few weeks until the resin COMPLETELY cures (It will get hard very very very fast, but after that, takes a few weeks to reach complete hardness. During this time it CAN become warped if you put weird stress on it, so be cautious) until it is completely cures, it will continue to release stink particles, and your family will hate you. These particles will fill your whole home, regardless of the size of your project, or your home, and they will whine about it every time they walk into the house. >_<
Weather conditions: Not so much a safety issue, but it works here with the other anecdotes. Resin sets up differently accordign to temperature and humidity. Make sure you play with this stuff in advance to see how it specifically needs to be tweaked for your area. Exposure to sunlight will over time set fiberglass up. This means if you store it in a clear container outside, you will get a solid death mass of unsuable substance (oops) this also means that your projects will set up more quickly and with better quality if you leave them in the sun. This shoudl be fter they are taken out of the latex mold, as latex haaaate sunshine. Fiberglass will not set up in the cold. This means you should plan your fiberglassing projects during the warmer months, or if you HAVE to do it in the winter, find a heated garage you can keep it in, or bring a prtable heater outside and put it near your fiberglass project.
IF YOU SKIPPED THAT PLEASE GO BACK AND READ IT. YOU ARE DEALING WITH CHEMICALS THAT CAN AND WILL BURN OFF YOUR SKIN.
Okay, now onto the topic! There are some fantastic tutorials out there on how to laminate fiberglass on top of an object, to lend it stregth. This works out wonderfully for most applications, and is MUCH easier and cheaper than the method outlined here. This is for if you want to make MULTIPLE CASTINGS of a fiberglass object (perhaps you have a team of Anbu and want perfectly matched masks) or are trying to make a HIGHLY DETAILED cast, and do not want to do so by layering other substances on top of a sturdy fiberglass base. This is also useful if you want to work with a material that is unsuitable to be used as a prop (oil based clay, heavy woods, fragile foams, etc).
Materials:
Base object/scupture/whatever
Brush on latex (can be found at Hobby Lobby, and special FX makeup supply places)
Brush for Latex (can be rinsed, but almost ends up pretty junky looking by end of project. Don't use your nice brush. Foam brushes also work well or latex)
Cheesecloth (optional, gives strength to your latex mold. Super cheap. worth it.)
Plaster of Paris (huge bags of the stuff can be picked up at Home Depot for cheaaaap.)
Retaining wall (to keep your plaster from wreaking havok on your kingdom. I use my old legos. <3)
Fiberglass Cloth/Mat (cloth is easier to form shapes with, mat is stronger. Cloth is suitable for most cosplay projects)
Fiberglass Resin (comes in a huge jug. Usually near bondo. Ask empolyees where the bondo is. Asking where the fiberglass is will confuse them.)
Extra Catalyst (fiberglass almost always comes with catalyst. But it's never enough for the huge jug.)
Disposable gloves (for while you apply the fiberglass)
Sturdy gloves (optional, for handling cured fiberglass)
Goggles (optional again)
Dust mask (SO not optional)
Container to mix resin in (get something with flexible sides. It's great if it already comes with oz markings, if not, you cn put them there your self, or carve in notches or whatever.
Junky brushes (In the glue section of Home Depot, they sell a 6 pack of crappy tin brushes. They are the best thing for fiberglass EVER. Suoper cheap. I love them. Some employees may not know where they are, on account of them being so filthy and worthless.)
Sand paper (In HEAVY grit. you'll need this to trim up the piece
Heavy duty scissors (To cut through the cloth. can also be used on cured fiberglass cloth sometimes. Don't use the nice ones. Seriously. You're cutting glass.)
Bondo (technically, an option, but I ALWAYs end up with mistakes to fill in. Some people use wood putty.)
Language for the purpose of this tutorial:
Object: The original item, sculpture, etc that you wish to make a fiberglass copy of.
Mold: Negative copy of the original object. A mold is in the opposite shape of what you want your final object to be in. It is laid over the original object.
Cast: Copies that come out of the mold, and the process of making those copies. These will be identical to the original object.

Step1! Your basic object
Today, I'm going to be demonstrating on a clay sculpt of the skull codpiece for Izzy Sparks. Do NOT put petroleum jelly on anything you will make a latex cast of. The petrol will eat the latex, they hate each other. You may notice that around the jaw line of the mold, it becomes suddenly hideous and weird. That is a retainign wall. My mask ends there at a much higher place than the back of the mask. To keep me from having to deal with paster leaving under the mask or whatever, a big hideous peice of clay juts out from the side at a very obvious angle. This will be trimmed off. The Skull is sitting on the same surface I sculpted it on. This turned out to be a hube problem when it came time to pull everything off. I recommend transferring your sculpt onto something with a flexible back, like wax paper, seran wrap, a taped down rubbish bag, etc. Latex doesn't really bond to much, so you usually don't need anything to help you separate the latex mold from your original object (called a "release agent") just gently peel the latex free.

Step 2! Latex is brushed on. Very boring. Do your best to prevent air bubbles. I have set up a 10 sided die next to my project to help me keep track of the number of layers I am putting on. I decided I want 10. Each time I brush on another layer, I turn the die so the next number is face up. Brush on latex contains ammonia. The ammonia evaporates, and rubber is left behind. Unfortunately, this means your project will smell terrible. I gave each layer a full day to cure, because I had nothing better to do, and no rush.

Eventually, I started cutting up peices of the cheesecloth, and laying them out on the freshly brushed layer of latex. This will make the mold very durable. It will be able to last for multiple castings, and will be able to better hold it's shape.


Plese note, the latex is also brushed in the area immediately around my object, about 1/2 an inch in all directions. This will help me separate the mold from the mother mold
Step 3! Mother mold! Latex is fairly flexible. just squeezing it the hollow object, you will be able to see the shape distort. So what if it distorts while you are making your casts? Unthinkable! For this reason, a mother mold is made. It is a hideous lumpy thing made of a more durable material, in this case, plaster. The plaster will cradle the latex mold, and keep it from warping while you are making the cast, then when the cast hardens, you lift the latex mold out, and just peeeeeel it off the cast.

First, a retaining wall must be made. This keeps the plaster from slopping all over your counter. Some people just continually re-pile the plaster on top of itself until it sets up, and that's fine, but your mother mold ends up lump shaped. I like doing it this way because my mother mold ends up with a flat bottom, making it MUCH easier to work with. Legos are my material of choice. Just snap them together in whatever shape outlines your object. Plaster won't adhere to their surface, and can easily be brushed off.

Plaster is poured in! Plaster does not dry, it also cures. Plaster cures by heating up as well. It can also get VERY VERY hot. For this reason, don't do anything insane like dunking your whole forarm in plaster in an attempt to make a cast of it. People have gotten third degree burns from this, and it's horrifying, as the palster is hardening, so you have absolutely no way to get your arm out of the thing that is burning you until you find something to chisel it off. I've heard horror stories. Don't do this. But for today's application, the plaster will be your friendly friend. : D The sack will have instructions on amount of water to plater to mix. Most people ignore these and just mix it back and forth until you have a pancake batter consistancy. I ignore the directions. I'm so hip.
If you';re super defensive of the strutural integrity of your legos, I guess you can put petroleum jelly on them.


Step 4! Leave it the hell alone!
Let it sit there and reflect on it's life for a day or so. Then flip the whole ordeal over, and gently pry your mold out of the mothermold. With 10 layers of latex : cheesecloth, this mold is pretty forgiving of any abuse it needs to take to be freed. After you get the pieces all separate, put the mold back in the mother mold (you can take the object away now, you're done with it) and leave it for another day or so. The latex has probably absorbed moisture from the mothermold and needs to dry out again.
Step 5! Fiberglass
I can't really handle my camera and my sigerglass death at the same time... and it would be pretty dangerous for my overpriced little piece of digital tech. So ha ha! No real pictures to speak of (I suck) Put on your gloves, cut your cloth (do wear gloves while cutting the cloth, or teeny tiny harmless shards of glass will get in your hands and make your itch) put it all in a junky bowl to keep it from blowing around or scattering, mix yoru resin and catalyst, and get ready for a PARTY HARD. I personally will start with layer of JUST mixed resin. I pour or bush it into the mold, and then just kind of swish the mold slowly around to keep it distributed until it cures and hardens. Usually only takes a few minutes for resin to harden, so either work quickly, or work in small batches (I like small batches) Some people will tunk the cloth in the resin and slap it down that way. Good for covering large areas fast, but adds a LOT of weight to your piece. More resin will not add strength. Resin only needs to be used enough to lightly coat the piece, to fuse the glass together. Once the fiberglass cloth changes color, becomind transparent, that is as much as it needs for strength. Your brushes will inevitably cure into a solid, single death bristle, toss them. Your gloves will get gummed up. Replace them. The resin on the sides of your mixing container will cure. Peel it off and toss it. Take frequent breaks. uncured and cured resin fuse together just fine, so it's not like you need to get ti all done in one go. . 2 layers is sufficient for most cosplay applications. More if you espect it to be under stress Since the codpiece is right where my guitar rests, it will ikely take a lot of banging, even just from walking, so it has extra layers for strentgth, particularly on the thin jaw. Weapons, and peices you will lean on or puch weight on, similarly should probably get more layers. If you need a lot of extra strength, consider using fiberglass mat on the inside layers, for more strength. I've never used more than 4 layers of fiberglass in a prop. Additional layers will weight you down, and add uneccisary strength. You only want as much as you need.
Step 6! The Return of Leave it the hell alone!
Give it a few days to just really reflect upon it's fiberglassiness, and set up. It will make it less likely to warp during the full and complete curing process.

Step 7! Survey the damage!
Mold comes out of mothermold. Cast comes out of mold. Look your peice over, see where it will need trimming, take notice of any air bubble holes. These will be filled in with bondo, and sanded back out. Any imperfections/fingerprints, etc left by the original object can be sanded down. Rough edges trimmed up and sanded. Basically, make it all pretty-like. If your peice needs a metallic finish, and thus extensive sanding, wait until it has time to fully cure, and then do the sanding to a glass-like smoothness. before that, it will still be a bit plastic-y and prone to gouging. It is normal for your peice to feel tacky to the touch until it has had time to fully cure. If is stull feels tacky after a week or two, it's likely a humidity issue. Put it in a place with a de-humidifier to help it along. If this place is inside, be forwarned, the fumes are no longer a major threat uless you have a reparatory condition) but it will still stink the place the hell up.
Step 8! Finish up!
I recommend letting it sit around for a few weeks before painting, but it won't majorly degrade in quality or anything like that from not doing so. Fiberglass accept all paints I've played with on it, though I usually just spraypaint. You can drill holes in it, glue it, bake things on it, get it wet, do whatever. You can continue to make casts off yoru mold until it tears, or some part gets stretched out under stress or whatever. If you aren't planning on making a bunch of copies, you won't need your mold as durable as the one i made here (5 layers of latex with 3 of cheesecolth in there should be more than adaquate) but I made this one very sturdy for the purposes of this tutorial.
Please please please post feedback, positive or negative, or anything you feel I need to clarify. Once this tutorial is in it's final form it will be posted to the limit break website, so I'd liiike to hget it all fixed up now, while it's easy to fix, before we need to go making website updates to add details. There is no finished product photo, as I plan on getting that one when the costume is done and being worn.