Icon Tutorial #1
Going from:
this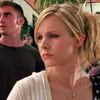
to this
1. First, duplicate your base and set it to screen. Sharpen if needed.
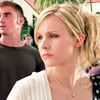
2. Image>Adjustments>Selective Colouring
Reds
Cyan: -100
Yellow: +100
Yellows
Cyan: -100
Yellow: -54
Neutrals
Cyan: +60
Magenta: +3
Yellow: -32
Black: -13
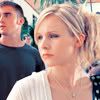
3. Create a new layer and floodfill it with #99C9ED. Set it to Colour Burn 100%.
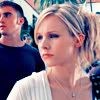
4. Image>Adjustments>Hue/Saturation. Set Saturation to +23. Leave Hue and Lightness alone.
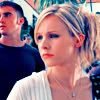
5. Image>Adjustments>Selective Colouring.
Reds
Cyan: -100
Yellow: -20
Yellows
Cyan: -100
Yellow: -100
Neutrals
Cyan: +100
Magenta: -4
Yellow: -1
Black: -29
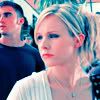
6. Add another Hue/Saturation and up the Saturation by 20 and the Lightness by 15.

7. Use the Elliptical Marquee Tool to copy a portion of the base and paste it over all the other layers. Place it whereever you want, and desaturate it.
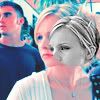
8. Place a rectangular layer of grey nder the layer with the circle image of the cropped base, and motion blur it. Then set the circle-ish image to Hard Light.
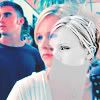
9. Now place any text/brushes/etc. that you want on it and voila! You're done!

I hope this was helpful! I'd love to see what you came up with! :)
this
to this
1. First, duplicate your base and set it to screen. Sharpen if needed.
2. Image>Adjustments>Selective Colouring
Reds
Cyan: -100
Yellow: +100
Yellows
Cyan: -100
Yellow: -54
Neutrals
Cyan: +60
Magenta: +3
Yellow: -32
Black: -13
3. Create a new layer and floodfill it with #99C9ED. Set it to Colour Burn 100%.
4. Image>Adjustments>Hue/Saturation. Set Saturation to +23. Leave Hue and Lightness alone.
5. Image>Adjustments>Selective Colouring.
Reds
Cyan: -100
Yellow: -20
Yellows
Cyan: -100
Yellow: -100
Neutrals
Cyan: +100
Magenta: -4
Yellow: -1
Black: -29
6. Add another Hue/Saturation and up the Saturation by 20 and the Lightness by 15.
7. Use the Elliptical Marquee Tool to copy a portion of the base and paste it over all the other layers. Place it whereever you want, and desaturate it.
8. Place a rectangular layer of grey nder the layer with the circle image of the cropped base, and motion blur it. Then set the circle-ish image to Hard Light.
9. Now place any text/brushes/etc. that you want on it and voila! You're done!
I hope this was helpful! I'd love to see what you came up with! :)