Tutorial #4 - Supernatural
>>>
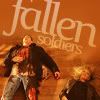
or
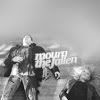
requested by julzdarling
These are recreated, so not exactly identical to the original icons.
I use Adobe Photoshop CS3.
01) I took this cap by oxoniensis and resized it to 700px width
02) Go to Adjustments > Variations, click on More Yellow, click on More Red and hit OK
03) Go to Layer > Duplicate Layer, then Filter > Sharpen > Sharpen; set this layer to soft light 100%
04) Resize the graphic to 500px width
05) Go to Layer > Duplicate Layer, then Filter > Sharpen > Sharpen, leave it at soft light 100%
06) Go to Layer > Duplicate Layer, set this layer to screen 100%
07) Go to Layer > Duplicate Layer and move this layer under the first soft light layer
So you have the following layers now: soft light 100%, screen 100% (the layer from step 06), soft light 100%, screen 100%
07) Merge all layers
08) Resize the image to 110px height
09) hit STRG+A in order to select the whole image, STRG+C in order to copy and on a new 100x100 canvas hit STRG+V in order to paste it as a new layer
10) Move the layer around in order to find an interesting crop. I wanted to avoid the CW logo, so I moved the layer around until I was satisfied
result:
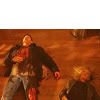
11) now I want to get rid of the white at the top of the image, select the Smudge Tool, I used the brush at 39px and smudged the layer at the top until the whole white space has disappeared
result:
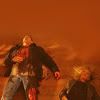
12) Go to Layer > New Adjustment Layer > Brightness/Contrast
set Brightness to +23
set Contrast to -16
13) Go to Layer > New Adjustment Layer > Black & White
use the following settings:
Reds 45%
Yellows 136%
Greens 40%
Cyans 60%
Blues 20%
Magentas 80%
set this layer to soft light 100%
14) after that use the text tool, the font I used was Constantia Italic
for "fallen" I used 48pt
for "soldiers" I used 18pt
15) on the text layer, go to Edit > Transform > Skew and move the text to your liking
set the text layer to soft light 52%
merge all layers and you're done!

BONUS*
01) for the black & white version of the icon, I just removed the text layer and duplicated the Black & White Layer from step 13 and set it to normal 100%
result:
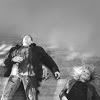
02) then hit STRG+SHIFT+N in order to create a new layer
03) on this layer select the Brush Tool with a dot of 19px master diameter in white draw two lines at the top of the image
something like this
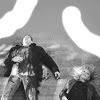
05) go to Filter > Blur > Gaussian Blur, use Radius 18,6px and hit OK
result
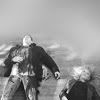
06) then add text (here "mourn the fallen"), font I used was Constantia Italic 12pt bold & italic
07) go to Edit > Transform > Skew and modify the font to your liking
08) still on the text layer, go to Layer > Layer Style > Gradient Overlay
I used a light gray to white gradient
09) then go to Layer > Layer Style > Stroke
I used a dark grey for the stroke at 100% opacity and size 1px
merge all layers and you're done!

Let me know if you have any questions. :)