New tutorial
Wow!, i´ve been gone for a long time!, i´m so sorry, danm real life got in the way, i´ve missed making tutorials and reading all of your comments :).
Anyway, finally i´m here again, i changed my layout, and i bring you two new Gimp tutorials, and i hope you´ll all enjoy :)
PS. hope you´ve all had great holidays :)
TUTORIAL (1)
Going from

to

Step 1: Open you picture, crop and resize, do not sharpen (at least ofcourse it´s 'totally' necesary)

Step 2: Duplicate the base twice. Set the first one to screen 50%, the top one to overlay 100%.

Step 3: New Layer. Fill it with #0e0347

and set it to Exclusion 50%.(Gimp: duplicate the dark blue layer and set to: lighten only and diference, both 50%)

Step 4: Again, New Layer. Fill it with #8aaade

and set it to Burn 80%

Step 5: New Layer. Fill it with #c6c6c6

and set it to Soft Light 100%

Step 6: Duplicate the base, drag it to the top and set it to softlight 100%

Step 7: new layer, Edit--> copy visible. Edit--> paste. leave that layer in Nornal.

Step 8: Go to Hue-Saturation = 0; -4; 19

Also go to Brightness-contrast = -2; -19

.If you want you can also use 'curves'(layer-->colors-->curves).

Step 9: merge layers, now duplicate that new base and go to filters--> blurr-->gaussian blurr, set the blurr at 4.0, Now select the eraser tool and erase the person or whatever you want so that only the background is blurred.

*Step 10: merge again and add some text or brush. I added text using the 'free type'. Finally merge again and that´s it.

TUTORIAL (2)
Going from
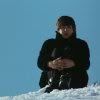
to
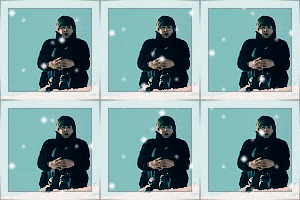
Step 1: Open the picture, crop, resize, and sharpen if you need to.
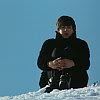
Step 2: Duplicate the base twice and set both to screen,first one: 100%, top one: 50%
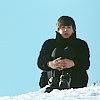
Step 3: Create a new layer and fill it with #92dcf8 set it to Burn 100%.

--->
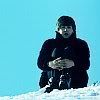
Step 4: New layer, fill it with #f4cec2 and set it to Multiply 100%

--->
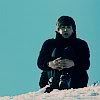
Step 5: Now open a new layer and use this:
brush (made by 77words), i lower the opacy of the layer to 70%, merge all layer; right, this is our new base.
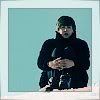
Step 6: Now we´re gona make the snow effect (it´s quite similar to the rain effect) we´re gonna use this
snow clip.
*On a new window, open the snow clip, it´s gonna open in 15 layers ´cause it´s animated. change the mode of the snow clip from Indexed to RGB in order for it to work properly.
*Now pick our new base(the one we got in step 5), and start pasting it in between the snow clip layers. (Make sure the snow clip layers are on top of the base layers)
*Set each snow clip layer to screen (You can use overlay, it just doesn´t lighten it up that much).
*Now merge down each snow layer to it´s base layer, there´s two way to do it: Layers-->merge down, or, on the layers window, right click on each snow clip and click: merge down)
*On the layers window change the time of the layers,mine: (100ms)
*Now, Files-->open as a layer.(open the new base, the one we got after step 5)
*Erase the part where you want the snow to show.Duplicate it 14 times and place each of them on top on the snowing bases you already had.now again layers-->merge down.
Step 7: FINALLY Save it as .gif

That´s it, hope you liked both tutorials, i think they´re pretty simple, if you have any question feel free to ask :)
PS. the person who made the snow clip is credited in my Resource Page.
:)