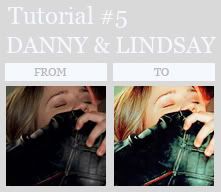
Tutorial #5 Danny & Lindsay

Made with Photoshop CS2
This is a selective colouring tutorial
Requested by
ashley_messer
It took a while but it's here
Don't claim this tut/colouring as your own please
1. Duplicate base, set to Screen 100%, duplicate again and set to 70% screen
2. Copy merge all layers, paste
3. Layer - New adjustment layer - Selective coloring
REDS
Cyan: -100
Magenta: +20
Yellow: +40
Black: -5
YELLOWS
Cyan: +20
Magenta: 0
Yellow: +30
GREENS
Cyan: +100
Magenta: +100
Yellow: -48
CYANS
Cyan: +73
BLUES
Cyan: +81
MAGENTAS
Cyan: +100
Magenta: -39
Yellow: -33
Black: -16
WHITES
Cyan: +80
Magenta: -20
Yellow: -10
Black: +15
NEUTRALS
Cyan: +20
Magenta: -10
Yellow: -10
Black: 0
3. Add a new selective color layer
REDS
Cyan: -100
Magenta: 0
Yellow: +30
YELLOWS
Cyan: -30
Magenta: +10
Yellow: +50
Black: -10
GREENS
Cyan: +78
Magenta: -91
Yellow: +100
Black: 100
CYANS
Cyan: +100
Magenta: -62
Yellow: +30
Black: +50
NEUTRALS
Cyan: -10
Magenta:
Yellow: +2
Black: -15
4. Duplicate the base (the merged one) set it to top, Soft light 30%
5. Take the rectangular marquee tool and drag it over a part of your icon, new layer, fill the selection with a light brown color and change the opacity to 70%
6. Add text and you’re done!
Original:

Remake:

If you have questions, do ask.