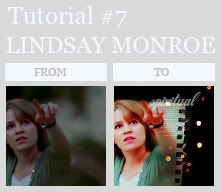
Tutorial #7 Lindsay Monroe

- Made with photoshop CS2
- Optional selective colouring
- Don't claim it as your own
1. Duplicate screen filter > sharpen > Smart sharpen > amout 70
2. Duplicate the screen layer
3. Copy merge base (shft+ctrl+C) make sure the icon is selected
4. #fde8ec soft light 100%
5. #c4df9b color burn 70%
6. #c2edf5 color burn 30%
7. #fde8ec color burn 100%
8. Layer > New adjustment layer > Hue/saturation > saturation +30
9. Layer > New adjustment layer > Color balance
midtones: +20 -10 +20
shadows: -10 +10 +10
highlights: +60 -8 -6
Change opacity to 70%
10. Duplicate the new base from step 3, set it to top on soft light 100%
11. Filter > Blur > Gaussian blur > 2,1 radius (you can take the blur tool to blur certain parts)
12. Layer > New adjustment layer > Selective colouring
reds:
-20
+20
-20
0
Neutrals:
+20
+5
+5
-5
13. selective colouring 2
reds:
-20
-20
+20
+10
Yellows
+50
+50
-50
-10
Greens:
+100
-33
-89
+51
Whites:
+100
-15
+5
+22
Neutrals
0
+10
+10
-10
14. I took
this texture by
xswaniconsx and blurred out the stripes,
Go to Edit > Transform > Flip horizontal.
Move the texture around to were you want it and set it to multiply 100%.
Fill everything around the texture black
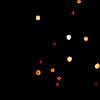
15. Take

this texture by ???, set it to screen and move it around to where you want.
Add text in white softlight or in low opacity, and your done.

without selective colouring

with selective colouring
Any questions? let me know... I'd like to know what you think :)