Full Icon Tutorial
Tutorial requested by timegoesbyx
How to go from
to
and
PHASE ONE
01. Start with your base. Mine is from Lost. 2x09 "What Kate did"

02. As you can see, this cap is very dark so we´ll need a lot of Screen Layers.
I duplicated my base 5 times.

I know, it´s too yellow, but we can fix it, be patient ^^
03. Take the last Screen layer and desature it. Set it to Soft Light (50%)

04. Now make a new layer and fill it with #07122D. Se to Exclusion (100%) and duplicate it twice.

At this step, our layers should look like this
05. Now merge all the layers
06. Press:
Ctrl+A ; Ctrl+c; Ctrl+alt+z (twice) and Ctrl + V
What´s what we did? We merge all the layers, selected the new base, we copied it and we go back two steps, just at the top of the second exclusion layer, and we past the new base there.
Now set the top layer to Soft Light.
If your head is a mess, maybe this pic could help you (help)
07. Ok, now duplicate the top Soft Light Layer.

08. Make a new Levels Layer and set the settings:
RGB; 30 / 1,00 / 255

09.New Layer. Fill it with #9CC1DB and set it to Soft Light (100%)

10. Now it´s time to fix that color soo yellow. Make a new Color Balance layer and adjust the settings;
Midtones;
Cyan-Red: -55
Magenta-Green: -32
Yellow-Blue: +62
Set this new layer to Color.

Well, it´s a big diference isn´t it?
11. And we have done our new and final base!
If it likes you, the icon is done, you just have to cropp it as you want and add to it brushes, text or whatever you want.
Phase One is completed.
PHASE TWO
01.Create a new file that is 200px by 200px. When we finish the work, we resize it to lj standard size (100 px by 100px)
Now is cropping time. Use the cropping tool with a fixed aspect ratio of 200px by 200px.
When you're satisfied with your cropping, move it to the new file.

02. Create a new file that is 200px by 200px (Yes, once again..). Meanwhile, we´ll work in our cropped base.
03. Grab your Elipitcal Marquee Tool. Put in the following settings:
-Style; Fixed Size
-Width; 190 px
-Height: 190 px
04. Now make a click in the middle of the icon on your base. If you don't like it, just press Ctrl+Z to go back, and keep going until you get it where you want it.
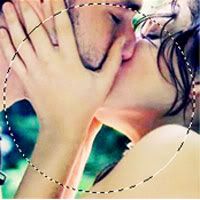
05. Press Ctrl+C and past your circle in that new file that is 200 px by 200 px
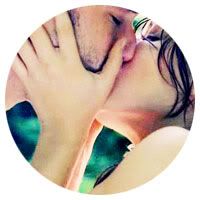
06. Now open your stock image. I think mine is from lovelamp. The original image is here
Duplicate this stock image and set the duplicate layer to Soft Light.

With the top layer selected, go to Filter>Blur>Gaussian Blur and adjust the settings;
Radius; 12,2 pixels

07. Merge all the layers, copy this new base and past it between your circle and the background of that new file (step 05)

08. Select the Jack/Kate picture and go to Edit>Free Transform. Now you can resize the picture as you want.
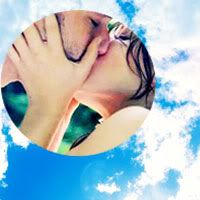
09.Duplicate that same layer and desature it. Move the duplicated layer a little to see what are you doing.

10. With your desaturated layer seleted, go to Edit>Free Transform and resize it as you want. You know, be creative ;)

11. I don´t like the layers just black and white…I think they have to be bouncy and bright so, with my desaturated layer selected, I went to Image>Adjust>Brightness/Contrast and set the settings;
Brightness; +5
Contrast; +26

12. Make a new layer and fill it with #000000 (Black). Set it to Multiply. You´ll need to low the oppacity to see where you want the circle to be.
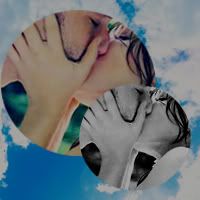
13. Now, there´s a lot of ways to make these famous transparent circles in the middle of your icon, but I decided to explain you the easier way because my English words are limited…
Grab your Eraser Tool and put it in the folowing settings;
-Shape: Circle
-Size: 178
-Hardness: 100
-Opacity: 100
Make a click wherever you want to be the circle in your icon, on the Multiply Layer. In this case, I wanted it in the middle.
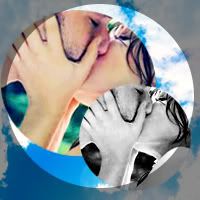
Now you can up the oppacity of the Multiply layer ;)

If you want more blurred edges, you can low the Hardness from 100 to 90 or even lower.
There´s another way to make it. Select your Multiply Layer and go to Filter>Blur>Gaussian Blur and adjust the settings as you want.
In my icon, I put this settings;
Radius; 2,0 pixels
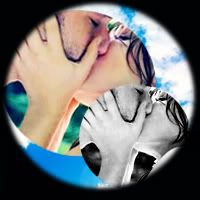
14. Now, we are going to add a little bit of color to our icon.
Make a new layer under the Multiply Layer. Fill it with #E1005F and low the oppacity to see where you want the circle to be.
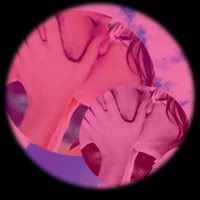
15.Repeat step 13. Put it in the folowing settings;
Shape: Circle
Size: 192
Hardness: 90
Opacity: 100
Make a click wherever you want to be the colored circle. In this case, I made the click in the right side of the icon.
Then you can up the oppacity again.
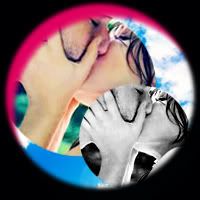
16. Ok, our icon is almost done. Now set that layer to Color Burn.
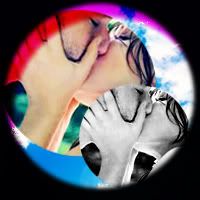
17. Merge all the layers and go to Image>Image Size and resize the image to 100 px by 100 px.

And we´re done, guys!
Well, this is the first complex tutorial that I made so…I´m sorry if it´s confused but you know English is not my first language …Anyway, if you have any question, I´ll made my best to answer you ^^
---------
-Feel free to friend this journal
-Do you want to be an affiliate? Click here
How to go from
to
and
PHASE ONE
01. Start with your base. Mine is from Lost. 2x09 "What Kate did"
02. As you can see, this cap is very dark so we´ll need a lot of Screen Layers.
I duplicated my base 5 times.
I know, it´s too yellow, but we can fix it, be patient ^^
03. Take the last Screen layer and desature it. Set it to Soft Light (50%)
04. Now make a new layer and fill it with #07122D. Se to Exclusion (100%) and duplicate it twice.
At this step, our layers should look like this
05. Now merge all the layers
06. Press:
Ctrl+A ; Ctrl+c; Ctrl+alt+z (twice) and Ctrl + V
What´s what we did? We merge all the layers, selected the new base, we copied it and we go back two steps, just at the top of the second exclusion layer, and we past the new base there.
Now set the top layer to Soft Light.
If your head is a mess, maybe this pic could help you (help)
07. Ok, now duplicate the top Soft Light Layer.
08. Make a new Levels Layer and set the settings:
RGB; 30 / 1,00 / 255
09.New Layer. Fill it with #9CC1DB and set it to Soft Light (100%)
10. Now it´s time to fix that color soo yellow. Make a new Color Balance layer and adjust the settings;
Midtones;
Cyan-Red: -55
Magenta-Green: -32
Yellow-Blue: +62
Set this new layer to Color.
Well, it´s a big diference isn´t it?
11. And we have done our new and final base!
If it likes you, the icon is done, you just have to cropp it as you want and add to it brushes, text or whatever you want.
Phase One is completed.
PHASE TWO
01.Create a new file that is 200px by 200px. When we finish the work, we resize it to lj standard size (100 px by 100px)
Now is cropping time. Use the cropping tool with a fixed aspect ratio of 200px by 200px.
When you're satisfied with your cropping, move it to the new file.
02. Create a new file that is 200px by 200px (Yes, once again..). Meanwhile, we´ll work in our cropped base.
03. Grab your Elipitcal Marquee Tool. Put in the following settings:
-Style; Fixed Size
-Width; 190 px
-Height: 190 px
04. Now make a click in the middle of the icon on your base. If you don't like it, just press Ctrl+Z to go back, and keep going until you get it where you want it.
05. Press Ctrl+C and past your circle in that new file that is 200 px by 200 px
06. Now open your stock image. I think mine is from lovelamp. The original image is here
Duplicate this stock image and set the duplicate layer to Soft Light.
With the top layer selected, go to Filter>Blur>Gaussian Blur and adjust the settings;
Radius; 12,2 pixels
07. Merge all the layers, copy this new base and past it between your circle and the background of that new file (step 05)
08. Select the Jack/Kate picture and go to Edit>Free Transform. Now you can resize the picture as you want.
09.Duplicate that same layer and desature it. Move the duplicated layer a little to see what are you doing.
10. With your desaturated layer seleted, go to Edit>Free Transform and resize it as you want. You know, be creative ;)
11. I don´t like the layers just black and white…I think they have to be bouncy and bright so, with my desaturated layer selected, I went to Image>Adjust>Brightness/Contrast and set the settings;
Brightness; +5
Contrast; +26
12. Make a new layer and fill it with #000000 (Black). Set it to Multiply. You´ll need to low the oppacity to see where you want the circle to be.
13. Now, there´s a lot of ways to make these famous transparent circles in the middle of your icon, but I decided to explain you the easier way because my English words are limited…
Grab your Eraser Tool and put it in the folowing settings;
-Shape: Circle
-Size: 178
-Hardness: 100
-Opacity: 100
Make a click wherever you want to be the circle in your icon, on the Multiply Layer. In this case, I wanted it in the middle.
Now you can up the oppacity of the Multiply layer ;)
If you want more blurred edges, you can low the Hardness from 100 to 90 or even lower.
There´s another way to make it. Select your Multiply Layer and go to Filter>Blur>Gaussian Blur and adjust the settings as you want.
In my icon, I put this settings;
Radius; 2,0 pixels
14. Now, we are going to add a little bit of color to our icon.
Make a new layer under the Multiply Layer. Fill it with #E1005F and low the oppacity to see where you want the circle to be.
15.Repeat step 13. Put it in the folowing settings;
Shape: Circle
Size: 192
Hardness: 90
Opacity: 100
Make a click wherever you want to be the colored circle. In this case, I made the click in the right side of the icon.
Then you can up the oppacity again.
16. Ok, our icon is almost done. Now set that layer to Color Burn.
17. Merge all the layers and go to Image>Image Size and resize the image to 100 px by 100 px.
And we´re done, guys!
Well, this is the first complex tutorial that I made so…I´m sorry if it´s confused but you know English is not my first language …Anyway, if you have any question, I´ll made my best to answer you ^^
---------
-Feel free to friend this journal
-Do you want to be an affiliate? Click here