TEXTURE TUTORIAL
How to make the following texture using default brushes, filters, gradients, and text in PS7:
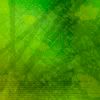
Okay you guys, I can’t help but see a huge burst of using textures, and at first I was a little wary of them. I really didn’t want to use other people’s textures because when I have the chance, I rather use my own stuff. But when I looked at the texture tutorials, most of them still used gradients and brushes by others (or I just didn’t like the outcome). I was looking at Vered’s tutorial for Real Fake Texture, and yet again it used brushes that required credit. But as I was doing it, I thought, “Wait, a minute. Photoshop 7.0 (that’s right, that’s the program this was written; please don’t ask me about PSP or lower versions of PS because I’m clueless) has built in brushes that could definitely achieve the same effect.” So this tutorial was born, using only gradients, brushes, filters, and text already included in Photoshop.
First off we’re going to create a gradient. Of course, you could always use one someone already made, but I never understood that; gradients aren’t that hard people. [/end two cents]
In my opinion, to get really get good gradients, you want to choose one color to be light and the other to be dark. For my light color, I’m choosing a green-tinted yellow (#CCD311), and for my dark color, a lime green (#54AF23)
Now let’s make our gradient shall we? The default should be a Linear Gradient, however, by playing with the different gradient types can give you different results.
Linear Gradient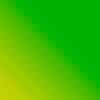
Radial Gradient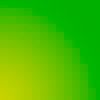
Diamond Gradient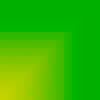
You can play around with them to get different results. For this tutorial, we’ll be working with the linear gradient.
We can already add texture by using the Add Noise filter; go to Filter>Noise>Add Noise. When the dialog box comes up, use the settings I have below (though you can play with the amount)
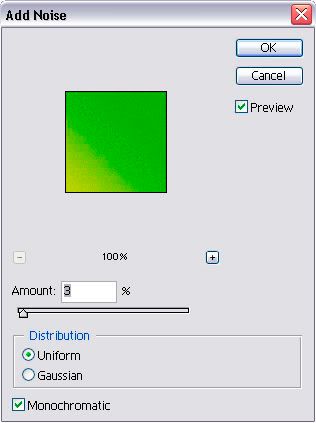
You should get the following result:
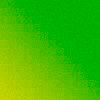
Make a new layer folks, because it’s time to bring out the brushes! Select the Brush Tool, and open up your current brush menu. Click on the arrow button that brings up the list of brushes. There are so many brushes we can work with, but I highlight a few that I think will be perfect for texture making:
Assorted Brushes
+ Crosshatch 1
+ Crosshatch 4
+ Ornament 5
+ Texture 1
+ Texture 2
+ Texture 3
Dry Media Brushes
+ Pastel on Charcoal Paper
+ Soft Oil Pastel
+ Wax Pencil
+ Heavy Smear Wax Crayon
+ Small Pastel on Charcoal Paper
+ Pastel Medium Tip
Faux Finish Brushes
+ Plastic Wrap - Dark 40 pixels
+ Plastic Wrap - Dark 90 pixels
+ Plastic Wrap - Light 40 pixels
+ Plastic Wrap - Light 90 pixels
+ Rolled Rag - Cotton 20 pixels
+ Rolled Rag - Cotton 60 pixels
+ Rolled Rag - Cotton 120 pixels
+ Rolled Rag - Terry 20 pixels
+ Rolled Rag - Terry 60 pixels
+ Rolled Rag - Terry 120 pixels
+ Sea Sponge 1
+ Sea Sponge 2
+ Stencil Sponge - Dry
+ Stencil Sponge - Wet
Natural Brushes 2
+ Charcoal - Dark
+ Charcoal - Light
+ Pastel Dark 118 pixels
+ Pastel Light 118 pixels
+ Watercolor 1
+ Watercolor 2
+ Watercolor 3
+ Watercolor 4
Thick Heavy Brushes
+ Round Bristle
+ Rough Round Bristle
Wet Media Brushes
+ Drippy Water
+ Dry Brush on a Towel
+ Paint on Rough Texture
+ Rough Dry Brush
+ Rough Ink
+ Large Texture Stroke
+ Brush Light Texture Medium Tip
Of course, there are many more brushes that would be great in textures, but truthfully, I’m too lazy to list them all. :P
Okay, first off, we’re going to create different color shadings. Take a small brush (like 4px or smaller), and scribble in colors that are in the same color scheme to the colors you use for the gradient but not too similar. I chose #B6D955 and #274108.
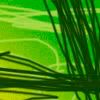
Go to Filter>Blur>Gaussian Blur and set the Radius to 10. You can play with this number, but I generally find 10 works the best.
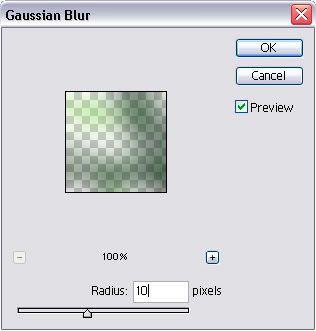
You should be left for the following:
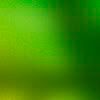
New layer, and new color choice. I used #D1ED8A and the Rolled Rag - Terry 120 pixels brush under the Faux Finish Brushes.
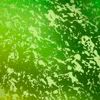
That’s a little too obvious for my tastes, so I’ll blend the layer to Soft Layer and make the Opacity 50%
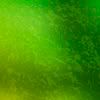
Another new layer (trust me, you’ll be making a lot), and we’re going to use Crosshatch 1 brush under Assorted Brushes. HOWEVER, before you do anything, look to the top right of the Photoshop screen: you should see two tabs labeled File Browser and Brushes. Of course, we went brushes: click that and then click the check box next to Scattering and use the following settings:
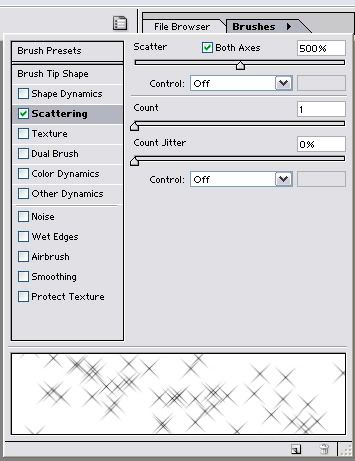
Now you may use the brush; you might notice that now more than one appears when you just click once. Cover the workspace carefully; you don’t want them all to clump together.
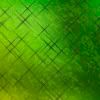
Set this layer to Overlay and Opacity again to 50%
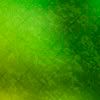
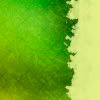
Wow, what a surprise, it’s new layer and color time: Using #E4EE8B and the Rough Round Bristle under Thick Heavy Brushes, we’re going to do something different. Press the Shift key and draw a straight line down the right side. Doesn’t that give a beautiful jagged edge? It’s a shame we’re going to blend the layer to Soft Light with a 50% Opacity. *sarcasm*
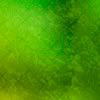
Only a few more brushes I swear (unless you want more). Use the Drippy Water under the Wet Media Brushes with the color of # F3ED4B randomly over the workspace. Again, blend it to Soft Light and Opacity to 50%.
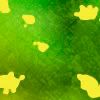
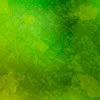
Last brush we’re going to use is Small Pastel on Charcoal Paper under the Dry Media Brushes with the color # 355711. We’re going to scribble real quick with it, and then blend the layer to Multiply and Opacity to 20%.
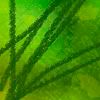
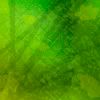
The final touch (though you don’t necessary have to do this) is to add text for decoration: Using the Horizontal Type Tool, make your type #000000, Times New Roman, 2pt, Crisp. It really doesn’t matter what you write, since no one will be able to read it, but make sure the lines are different in length for variety. And of course, blend the layer to Soft Light and Opacity to 50%
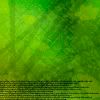

And we’re done with our texture! Practice playing with brushes and colors; you never know what you’ll make! :D

Okay you guys, I can’t help but see a huge burst of using textures, and at first I was a little wary of them. I really didn’t want to use other people’s textures because when I have the chance, I rather use my own stuff. But when I looked at the texture tutorials, most of them still used gradients and brushes by others (or I just didn’t like the outcome). I was looking at Vered’s tutorial for Real Fake Texture, and yet again it used brushes that required credit. But as I was doing it, I thought, “Wait, a minute. Photoshop 7.0 (that’s right, that’s the program this was written; please don’t ask me about PSP or lower versions of PS because I’m clueless) has built in brushes that could definitely achieve the same effect.” So this tutorial was born, using only gradients, brushes, filters, and text already included in Photoshop.
First off we’re going to create a gradient. Of course, you could always use one someone already made, but I never understood that; gradients aren’t that hard people. [/end two cents]
In my opinion, to get really get good gradients, you want to choose one color to be light and the other to be dark. For my light color, I’m choosing a green-tinted yellow (#CCD311), and for my dark color, a lime green (#54AF23)
Now let’s make our gradient shall we? The default should be a Linear Gradient, however, by playing with the different gradient types can give you different results.
Linear Gradient

Radial Gradient

Diamond Gradient

You can play around with them to get different results. For this tutorial, we’ll be working with the linear gradient.
We can already add texture by using the Add Noise filter; go to Filter>Noise>Add Noise. When the dialog box comes up, use the settings I have below (though you can play with the amount)

You should get the following result:

Make a new layer folks, because it’s time to bring out the brushes! Select the Brush Tool, and open up your current brush menu. Click on the arrow button that brings up the list of brushes. There are so many brushes we can work with, but I highlight a few that I think will be perfect for texture making:
Assorted Brushes
+ Crosshatch 1
+ Crosshatch 4
+ Ornament 5
+ Texture 1
+ Texture 2
+ Texture 3
Dry Media Brushes
+ Pastel on Charcoal Paper
+ Soft Oil Pastel
+ Wax Pencil
+ Heavy Smear Wax Crayon
+ Small Pastel on Charcoal Paper
+ Pastel Medium Tip
Faux Finish Brushes
+ Plastic Wrap - Dark 40 pixels
+ Plastic Wrap - Dark 90 pixels
+ Plastic Wrap - Light 40 pixels
+ Plastic Wrap - Light 90 pixels
+ Rolled Rag - Cotton 20 pixels
+ Rolled Rag - Cotton 60 pixels
+ Rolled Rag - Cotton 120 pixels
+ Rolled Rag - Terry 20 pixels
+ Rolled Rag - Terry 60 pixels
+ Rolled Rag - Terry 120 pixels
+ Sea Sponge 1
+ Sea Sponge 2
+ Stencil Sponge - Dry
+ Stencil Sponge - Wet
Natural Brushes 2
+ Charcoal - Dark
+ Charcoal - Light
+ Pastel Dark 118 pixels
+ Pastel Light 118 pixels
+ Watercolor 1
+ Watercolor 2
+ Watercolor 3
+ Watercolor 4
Thick Heavy Brushes
+ Round Bristle
+ Rough Round Bristle
Wet Media Brushes
+ Drippy Water
+ Dry Brush on a Towel
+ Paint on Rough Texture
+ Rough Dry Brush
+ Rough Ink
+ Large Texture Stroke
+ Brush Light Texture Medium Tip
Of course, there are many more brushes that would be great in textures, but truthfully, I’m too lazy to list them all. :P
Okay, first off, we’re going to create different color shadings. Take a small brush (like 4px or smaller), and scribble in colors that are in the same color scheme to the colors you use for the gradient but not too similar. I chose #B6D955 and #274108.

Go to Filter>Blur>Gaussian Blur and set the Radius to 10. You can play with this number, but I generally find 10 works the best.

You should be left for the following:

New layer, and new color choice. I used #D1ED8A and the Rolled Rag - Terry 120 pixels brush under the Faux Finish Brushes.

That’s a little too obvious for my tastes, so I’ll blend the layer to Soft Layer and make the Opacity 50%

Another new layer (trust me, you’ll be making a lot), and we’re going to use Crosshatch 1 brush under Assorted Brushes. HOWEVER, before you do anything, look to the top right of the Photoshop screen: you should see two tabs labeled File Browser and Brushes. Of course, we went brushes: click that and then click the check box next to Scattering and use the following settings:

Now you may use the brush; you might notice that now more than one appears when you just click once. Cover the workspace carefully; you don’t want them all to clump together.

Set this layer to Overlay and Opacity again to 50%

Wow, what a surprise, it’s new layer and color time: Using #E4EE8B and the Rough Round Bristle under Thick Heavy Brushes, we’re going to do something different. Press the Shift key and draw a straight line down the right side. Doesn’t that give a beautiful jagged edge? It’s a shame we’re going to blend the layer to Soft Light with a 50% Opacity. *sarcasm*


Only a few more brushes I swear (unless you want more). Use the Drippy Water under the Wet Media Brushes with the color of # F3ED4B randomly over the workspace. Again, blend it to Soft Light and Opacity to 50%.


Last brush we’re going to use is Small Pastel on Charcoal Paper under the Dry Media Brushes with the color # 355711. We’re going to scribble real quick with it, and then blend the layer to Multiply and Opacity to 20%.


The final touch (though you don’t necessary have to do this) is to add text for decoration: Using the Horizontal Type Tool, make your type #000000, Times New Roman, 2pt, Crisp. It really doesn’t matter what you write, since no one will be able to read it, but make sure the lines are different in length for variety. And of course, blend the layer to Soft Light and Opacity to 50%


And we’re done with our texture! Practice playing with brushes and colors; you never know what you’ll make! :D