(no subject)
Decided to finally get off my butt and post those tutorials I've been promising. I'm using PSP9.
This tutorial was requested by xtatiq
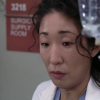
to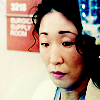
We start off with our base.


Soflight 100%

Screen 100%

Soflight 100%

Softlight 46%

Softlight 100%

Softlight 52%

Screen 100%

Burn 44%

Multiply 34%

Burn 56%

Soflight 100%
I used a bluish brush stroke. Something like this:
and set it to hardlight 100%

Softlight 100%

Exclusion 100%

Screen 56%

Softlight 100%

Burn 30%

Burn 66%

Softlight 66%

Burn 100%

Softlight 100%

Softlight 100%

Softlight 52%

Burn 80%
Burn 34%

Burn 66%
We now have this.
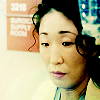
I don't like the puke greenish yellow color so I grab a blue color.

Burn 28%
I also duplicate the base layer and dragged it all the way to the top.
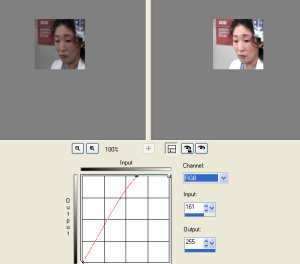
I went to Adjust>>Brightness and Contrast>>Curves to make the base a little brighter.
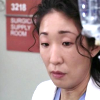
Softlight 100%
Merge all.

Done! :)
This tutorial was requested by sorairo_laina
to
Base.


Overlay 100%

Softlight 100%

Duplicate 7-8 times and set all of the layers to screen.
Of course, it depends on your base to determine how many times you duplicate the screened base. And just to let you know, when you get done duplicating your layers, your icon probably wont look good. Mine looks like this:
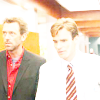
Later steps should fix the ugliness, but if it doesn't fix it that well, you can always delete some of the screen layers. :)
Moving along.

Exclusion 100%

Screen 100%

Burn 46%

Softlight 100%

Burn 42%

Burn 100%
Duplicate that last layer 3 times.
Again, it depends on your base to determine how many times the layer is duplicated.
Anyway, play around with this one. You can skip some of the colors, change the colors, use different opacities and get some really interesting results.
Some last minute rules. No need to credit me for the tutorial, but please do not copy the tutorial exactly with the same image and then post it for taking and claim the end product as your own. Thanks.
Enjoy!
This tutorial was requested by xtatiq

to

We start off with our base.


Soflight 100%

Screen 100%

Soflight 100%

Softlight 46%

Softlight 100%

Softlight 52%

Screen 100%

Burn 44%

Multiply 34%

Burn 56%

Soflight 100%
I used a bluish brush stroke. Something like this:

and set it to hardlight 100%

Softlight 100%

Exclusion 100%

Screen 56%

Softlight 100%

Burn 30%

Burn 66%

Softlight 66%

Burn 100%

Softlight 100%

Softlight 100%

Softlight 52%

Burn 80%

Burn 34%

Burn 66%
We now have this.

I don't like the puke greenish yellow color so I grab a blue color.

Burn 28%
I also duplicate the base layer and dragged it all the way to the top.
I went to Adjust>>Brightness and Contrast>>Curves to make the base a little brighter.


Softlight 100%
Merge all.

Done! :)
This tutorial was requested by sorairo_laina

to

Base.


Overlay 100%

Softlight 100%

Duplicate 7-8 times and set all of the layers to screen.
Of course, it depends on your base to determine how many times you duplicate the screened base. And just to let you know, when you get done duplicating your layers, your icon probably wont look good. Mine looks like this:

Later steps should fix the ugliness, but if it doesn't fix it that well, you can always delete some of the screen layers. :)
Moving along.

Exclusion 100%

Screen 100%

Burn 46%

Softlight 100%

Burn 42%

Burn 100%
Duplicate that last layer 3 times.
Again, it depends on your base to determine how many times the layer is duplicated.
Anyway, play around with this one. You can skip some of the colors, change the colors, use different opacities and get some really interesting results.
Some last minute rules. No need to credit me for the tutorial, but please do not copy the tutorial exactly with the same image and then post it for taking and claim the end product as your own. Thanks.
Enjoy!