(no subject)
Woo! I finally got around to doing some tutorials. Took me a while. Lol.
EDIT: Whoops! Forgot to add what program I use. I did these with PSP 9. Also, don't copy these exactly and then claim the end product as your own. Thanks! :)
#1

to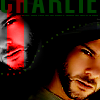
I made this icon a while ago so I'm not sure how I made the base. Sorry.
Start with your base.

Duplicate it and set it to Soft Light 100%
Choose black (#000000)
Burn 38%

I chose the paintbrush.
Size 40, Hardness 0
I used it to make the blue background behind Charlie black

I merged all, then I copied. I pasted as a new image and grayscaled. I also mirrored it.
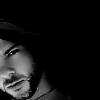
After adding some dotted lines.

(Not sure how to explain this part, but here goes.)
I pasted the grayscaled charlie and erased the black parts covering the colored charlie and I placed it in the upper left corner.
I added some text and this red line.

And set it to color 100%
And then we're done.
Not the best, I know. Comment if you have any questions.
Other icons I've made using similar steps:

#2

to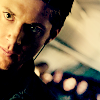

Duplicate twice and set both to screen

Multiply 100%
Desaturate your base
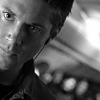
Soft Light 100%

Burn 100%

Color 20%

Multiply 100%
Merge all.
Go to Adjust-> Brightness and Contrast ->Curves
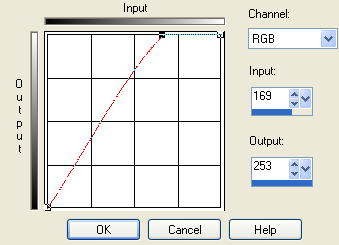
I use this to make the icon brighter. It depends on the picture to measure how bright you make it. Don't make it too bright.
Then I set this texture/gradient by, I think, detoxcocktails
Softlight 100%
I ended with this.

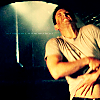
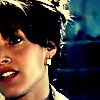
Other icons I have made using similar steps:

#3
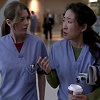
to
and/or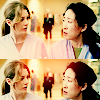
Started with my base.


Soft Light 100%

Exclusion 30%

Screen 100%

Soft Light 100%

Soft Light 46%

Soft Light 100%

Soft Light 52%

Screen 100%

Burn 44%
I added a light bluish brushstroke like this
and set it so screen 100%
(This step is not 100% needed)

Multiply 34%

Burn 56%

Soflight 100%

Soft Light 100%

Exclusion 100%

Screen 52%

Soft Light 100%

Burn 30%

Burn 42%

I added a brush stroke of this color, #f2a482, and set it to overlay 70 percent so the background looks more reddish.

This step is also not completely needed.
You can just stop there or you can merge all, copy, and paste as a new layer. Drag the new layer down.
I added a red brush stroke on top of the two layers
and set it to screen.

Weeee! All done. :)
Other icons I have made using similar steps:

BTW, thanks for all your kind words guys! :)
EDIT: Whoops! Forgot to add what program I use. I did these with PSP 9. Also, don't copy these exactly and then claim the end product as your own. Thanks! :)
#1

to

I made this icon a while ago so I'm not sure how I made the base. Sorry.
Start with your base.

Duplicate it and set it to Soft Light 100%
Choose black (#000000)
Burn 38%

I chose the paintbrush.
Size 40, Hardness 0
I used it to make the blue background behind Charlie black

I merged all, then I copied. I pasted as a new image and grayscaled. I also mirrored it.

After adding some dotted lines.

(Not sure how to explain this part, but here goes.)
I pasted the grayscaled charlie and erased the black parts covering the colored charlie and I placed it in the upper left corner.
I added some text and this red line.

And set it to color 100%
And then we're done.
Not the best, I know. Comment if you have any questions.
Other icons I've made using similar steps:

#2

to


Duplicate twice and set both to screen

Multiply 100%
Desaturate your base

Soft Light 100%

Burn 100%

Color 20%

Multiply 100%
Merge all.
Go to Adjust-> Brightness and Contrast ->Curves

I use this to make the icon brighter. It depends on the picture to measure how bright you make it. Don't make it too bright.
Then I set this texture/gradient by, I think, detoxcocktails

Softlight 100%
I ended with this.

Other icons I have made using similar steps:


#3

to

and/or

Started with my base.


Soft Light 100%

Exclusion 30%

Screen 100%

Soft Light 100%

Soft Light 46%

Soft Light 100%

Soft Light 52%

Screen 100%

Burn 44%
I added a light bluish brushstroke like this

and set it so screen 100%
(This step is not 100% needed)

Multiply 34%

Burn 56%

Soflight 100%

Soft Light 100%

Exclusion 100%

Screen 52%

Soft Light 100%

Burn 30%

Burn 42%

I added a brush stroke of this color, #f2a482, and set it to overlay 70 percent so the background looks more reddish.

This step is also not completely needed.
You can just stop there or you can merge all, copy, and paste as a new layer. Drag the new layer down.
I added a red brush stroke on top of the two layers

and set it to screen.

Weeee! All done. :)
Other icons I have made using similar steps:


BTW, thanks for all your kind words guys! :)